If you encounter any issues with the Ticket-Based IT Experience product during or after installation, please contact us at support@happysignals.com
Before you start:
There are a few key points to note before beginning the installation process.
- Make sure you have administrator access to the ServiceNow instance where you are installing the application
- Make sure you have access to the HappySignals cloud service
- Make sure you have received the following information from HappySignals:
- End-point URLs to your HappySignals cloud services.
Generally, the end-point URL looks something like: https://[your company name].happysignals.com - A shared secret, which is used to make sure generated feedbacks come from your environment
- API-key for two-way integration between the HappySignals cloud service and your ServiceNow Instance
- End-point URLs to your HappySignals cloud services.
- Make sure you have requested the Ticket-Based IT Experience application from the ServiceNow store. For details on how to do this, see our article on "How to proceed when you want to download our Application from the ServiceNow Store?"
Installing the application:
Installation of the application is very straightforward and requires only a few steps to complete:
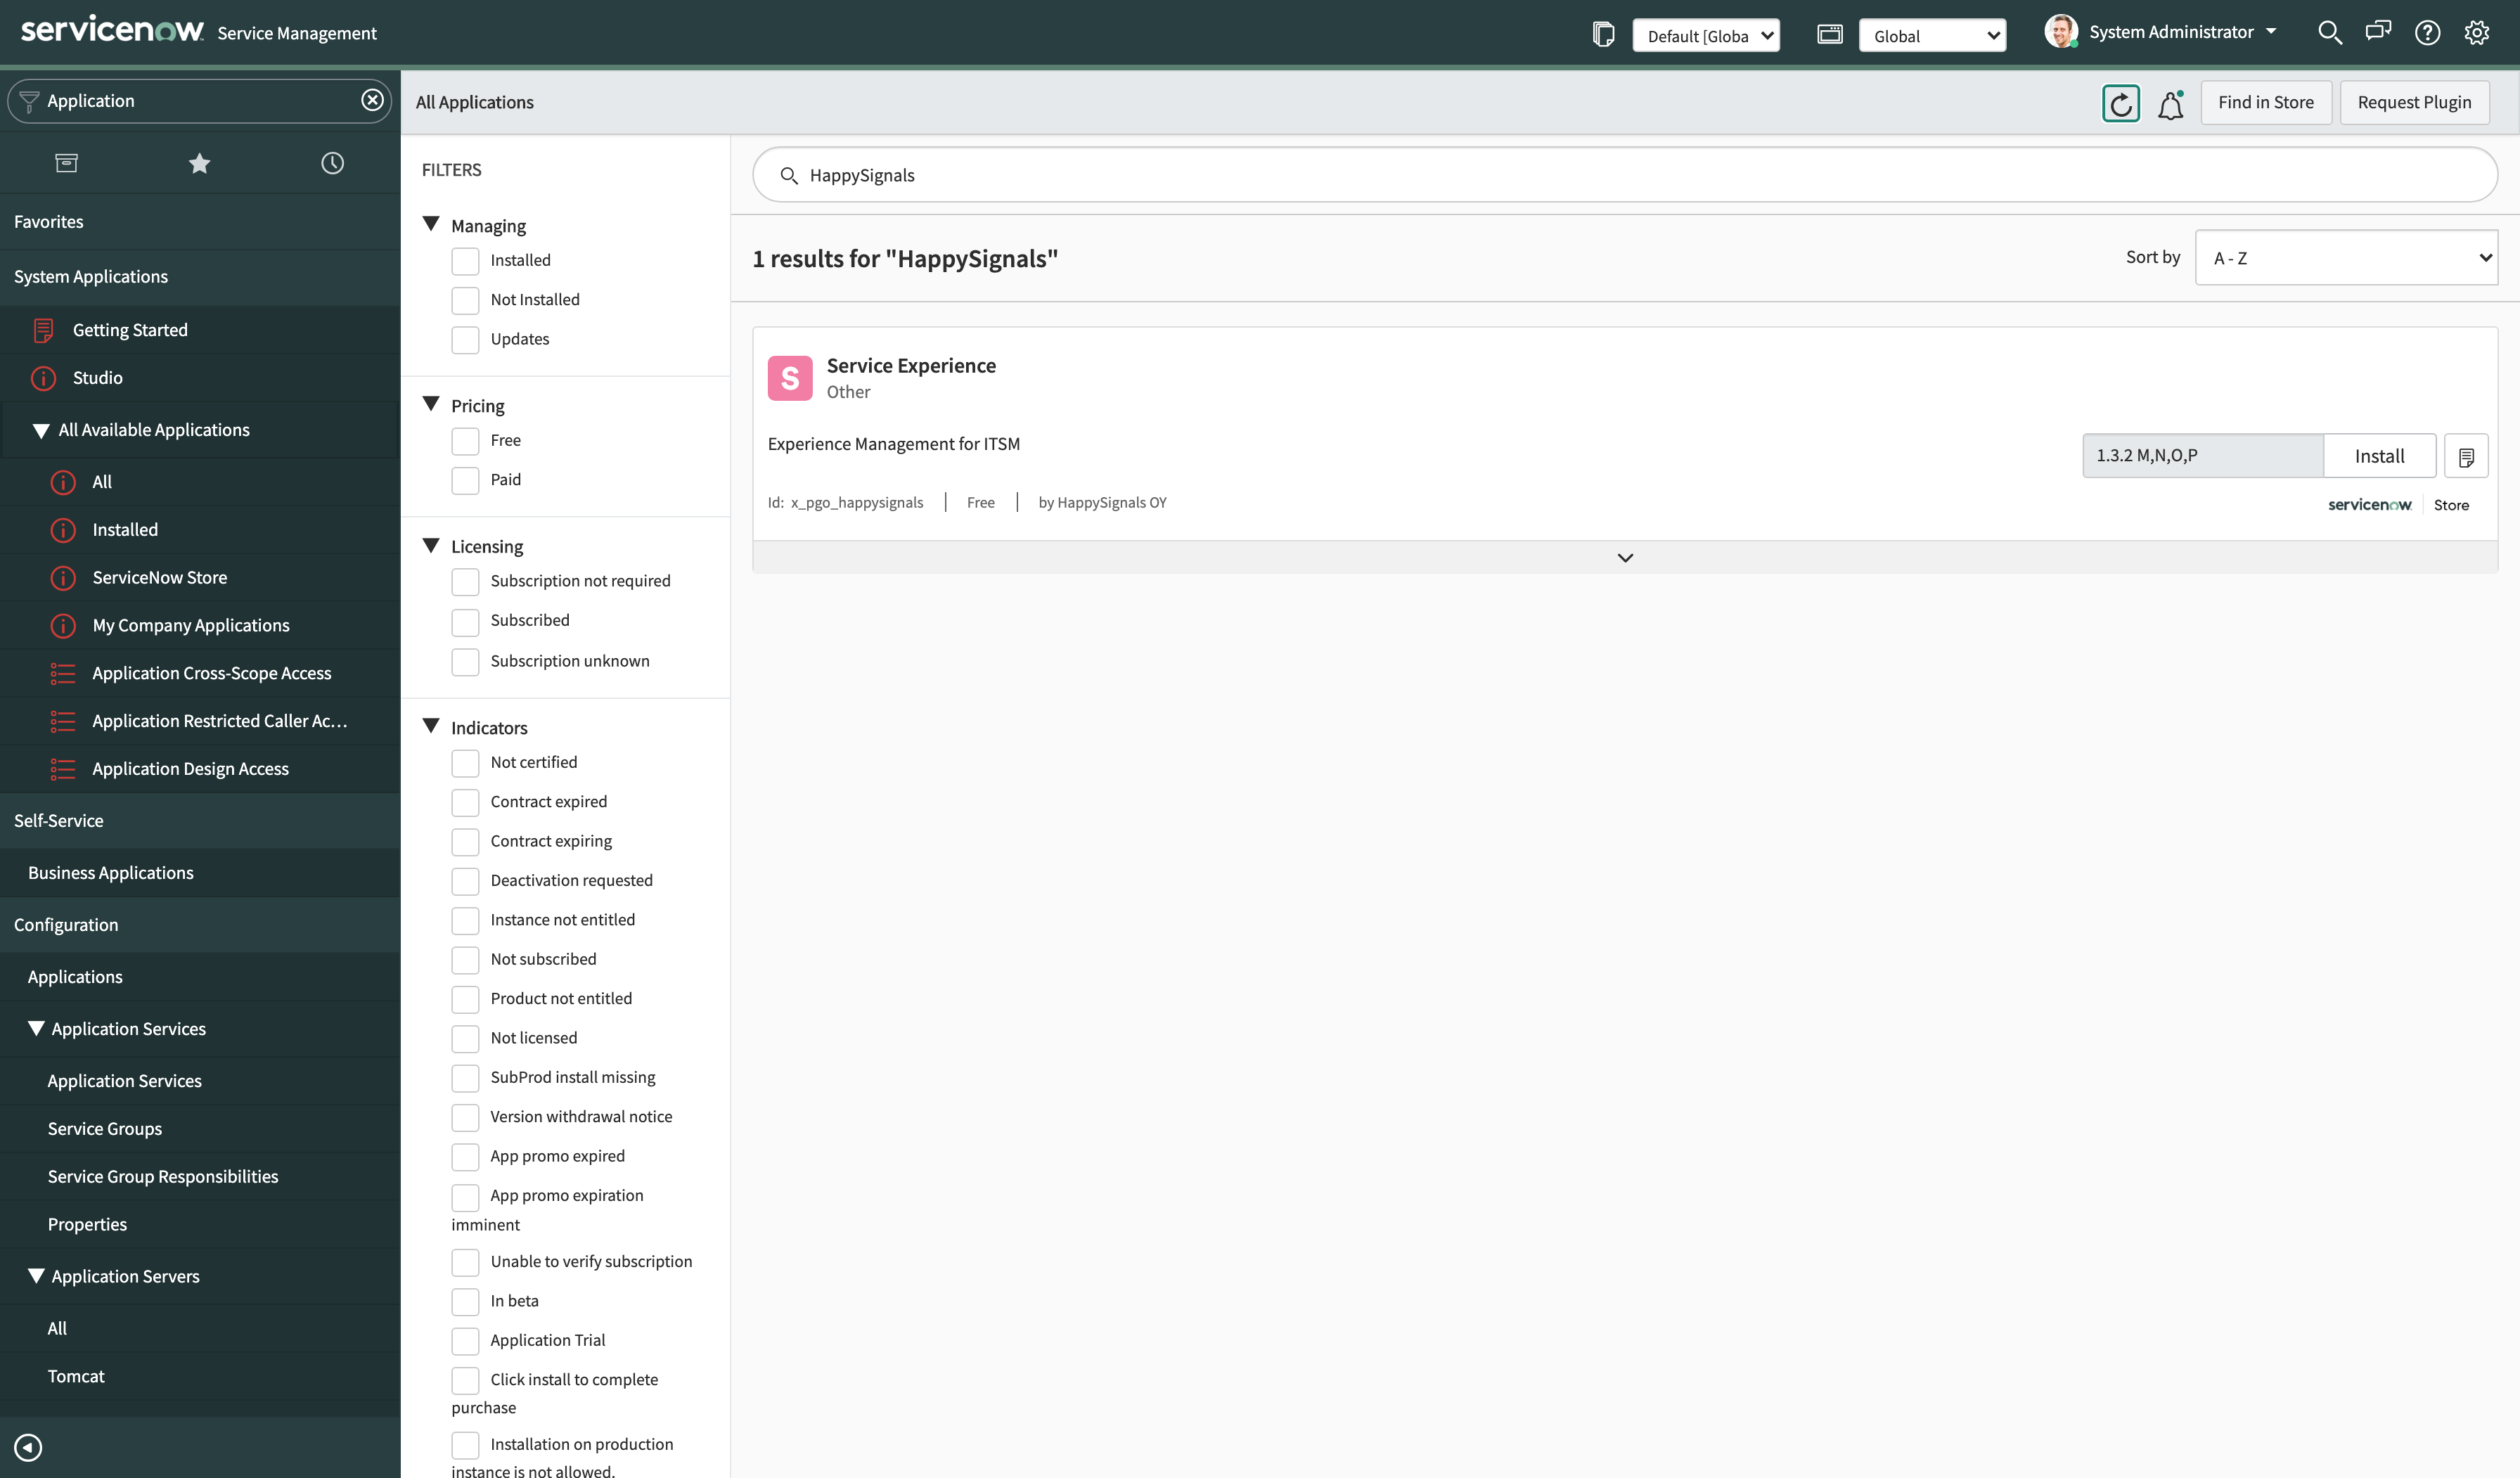
- In the ServiceNow application navigator, find the "System Applications" module. In the "System Applications" module, expand the "All Available Applications" section and click on the "All" menu item.
- In the "All applications" page, type "HappySignals" in the search bar. In the application list below find the Ticket-Based IT Experience application and click the "Install"-button. Confirm the installation in the modal that pops up.
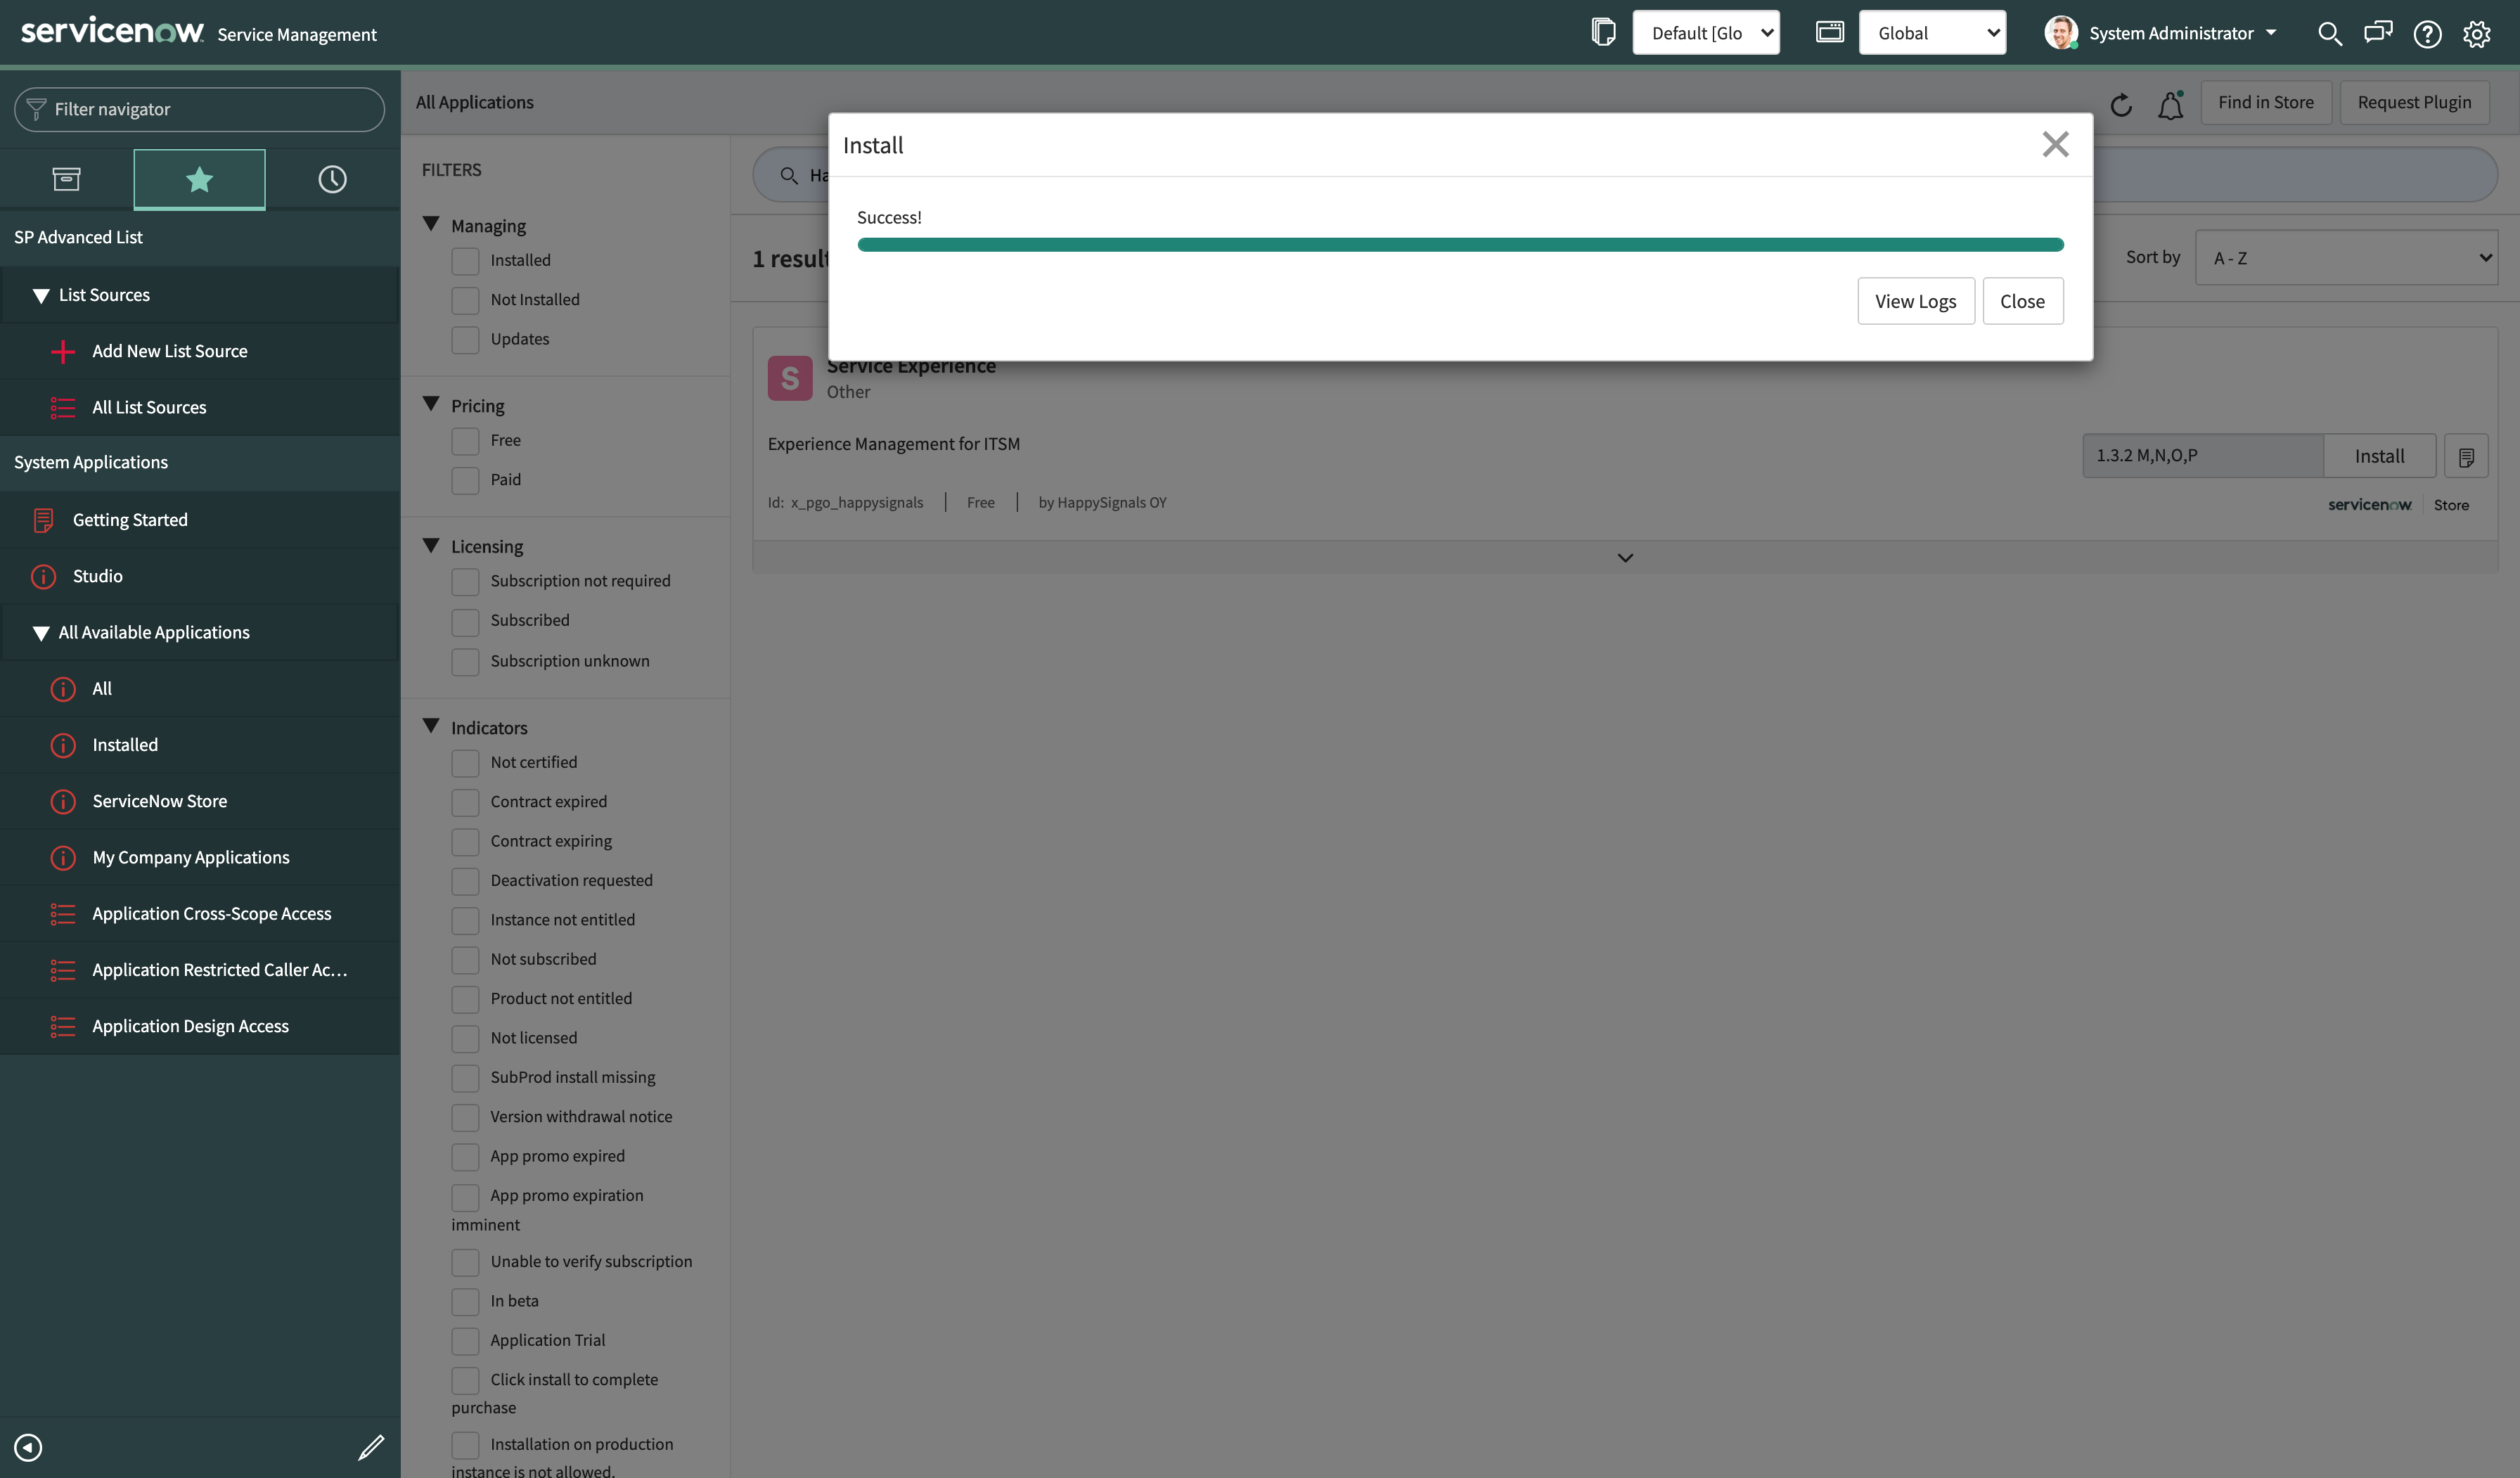
- Wait for the installation to complete, and you have successfully installed the HappySignals Ticket-Based IT Experience in your ServiceNow instance.
Configuring the application:
Once you have installed the HappySignals Ticket-Based IT Experience application to your instance, you can start the configuration process.
Before you begin the next steps:
- Switch your application scope to "Ticket-Based IT Experience."
Now, you are ready to set up the General Properties:
General properties of the application determine how the application connects to the HappySignals cloud service,
- In the ServiceNow application navigator, find the HappySignals Ticket-Based IT Experience application and click on the "General Properties" module.
- We have provided some defaults on the properties that work for most of our customers, but the exact configurations will depend on how you set up your organizational processes. We recommend starting with our default setup, testing, and learning how the Ticket-Based IT Experience works, and then modifying the properties as needed.
- The main properties you need in order to get the Ticket-Based IT Experience application working in your instance are described below.
Property Description Default value Happy Cloud Service end-point This is the endpoint URL to your HappySignals cloud service. Generally, this looks something like: https://[your company name].happysignals.com https://support.happysignals.com/need-subscription/wow? The word for proof of origin in email functionality. This is the shared secret that we provided to your company. [none] HappySignals vendor API key This is the API key that is required for two-way integration between the HappySignals cloud service and ServiceNow. ●●●●●●● - Once you have set up these three main properties, you can proceed to configure the email properties.
Data mapping
Creating data mapping for your application is an import part of the installation. Following article will give a better understanding of the mappings needed.
Key Fields in Data Mapping for Getting Value from HappySignals
Before you begin the next steps:
- Create a new update set for the "Ticket-Based IT Experience" application scope to capture and transfer configuration changes to test and production instances later.
Setting up tenant mapping (starting from application version 2.0.0):
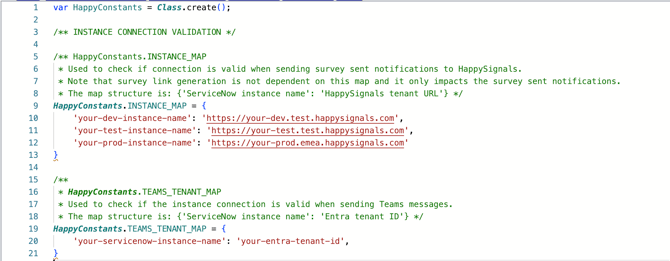
Map your ServiceNow instances to their expected HappySignals platform counterpoints. This is done in the script include HappyConstants, as shown below. This mapping is required for the response rate calculation to work and also for the Teams channel to work if in use.
- In the ServiceNow application navigator, find the HappySignals Ticket-Based IT Experience application and click on the "Script-based Settings" module.
- Find you ServiceNow instance name from "sys_properties.list", filtering the name with instance_name.
- Create the mapping with the ServiceNow instance_name on the left and the counterpart HappySignals platform URL on the right. You should map all the environment so the mapping is then copied correctly when cloning to lower environments.
- If you are using Teams as a channel also create the mapping for teams, with the same instance_name on the left and the tenant id shown in the HappySignals Teams installation on the right. The tenant ID is generated when you register HappySurveys via Teams in your Entra environment.
Setting up email properties:
Email properties determine what data is received and passed on to the HappySignals cloud service from a ticket in ServiceNow when feedback is requested. We have provided defaults for most properties, which work for many of our customers. However, the exact configuration will depend on your organizational processes and the data available in your ServiceNow instance.
- In the ServiceNow application navigator, find the HappySignals Ticket-Based IT Experience application and click on the "Data Properties" module.
- Email properties are divided into three sections:
- general email properties, which determine the format (HTML or VML) for our feedback buttons in emails and their background color.
- incident, which determines which fields in the incident records are used to pass data on to the HappySignals cloud service.
- requested item, which determines which fields in the requested item records are used to pass data on to the HappySignals cloud service.
- Incident and Requested Item sections should contain ServiceNow field names from incident or requested item tables that contain the data you want to pass on to the HappySignals cloud service. You can also use dot walking to access related data in the record - i.e., caller_id.location.country will return the country of the incident's caller. It is also possible to use literal values in the configurations by surrounding the configured value with quotation marks ("). For example, "Incident" will set the corresponding parameter's value to "Incident" without resolving it using the incident record.
Configure email notifications:
The final step in the configuration process is to add the HappySignals email script to the email notifications where you want the surveys to be sent out.
Before you begin:
- Switch your application scope to "Global"
- Create a new update set in the global application scope, so you can capture and transfer email configuration changes to test and production instances later.
Now, in the ServiceNow application navigator, find the email notifications under "System Notifications -> Email -> Notifications"
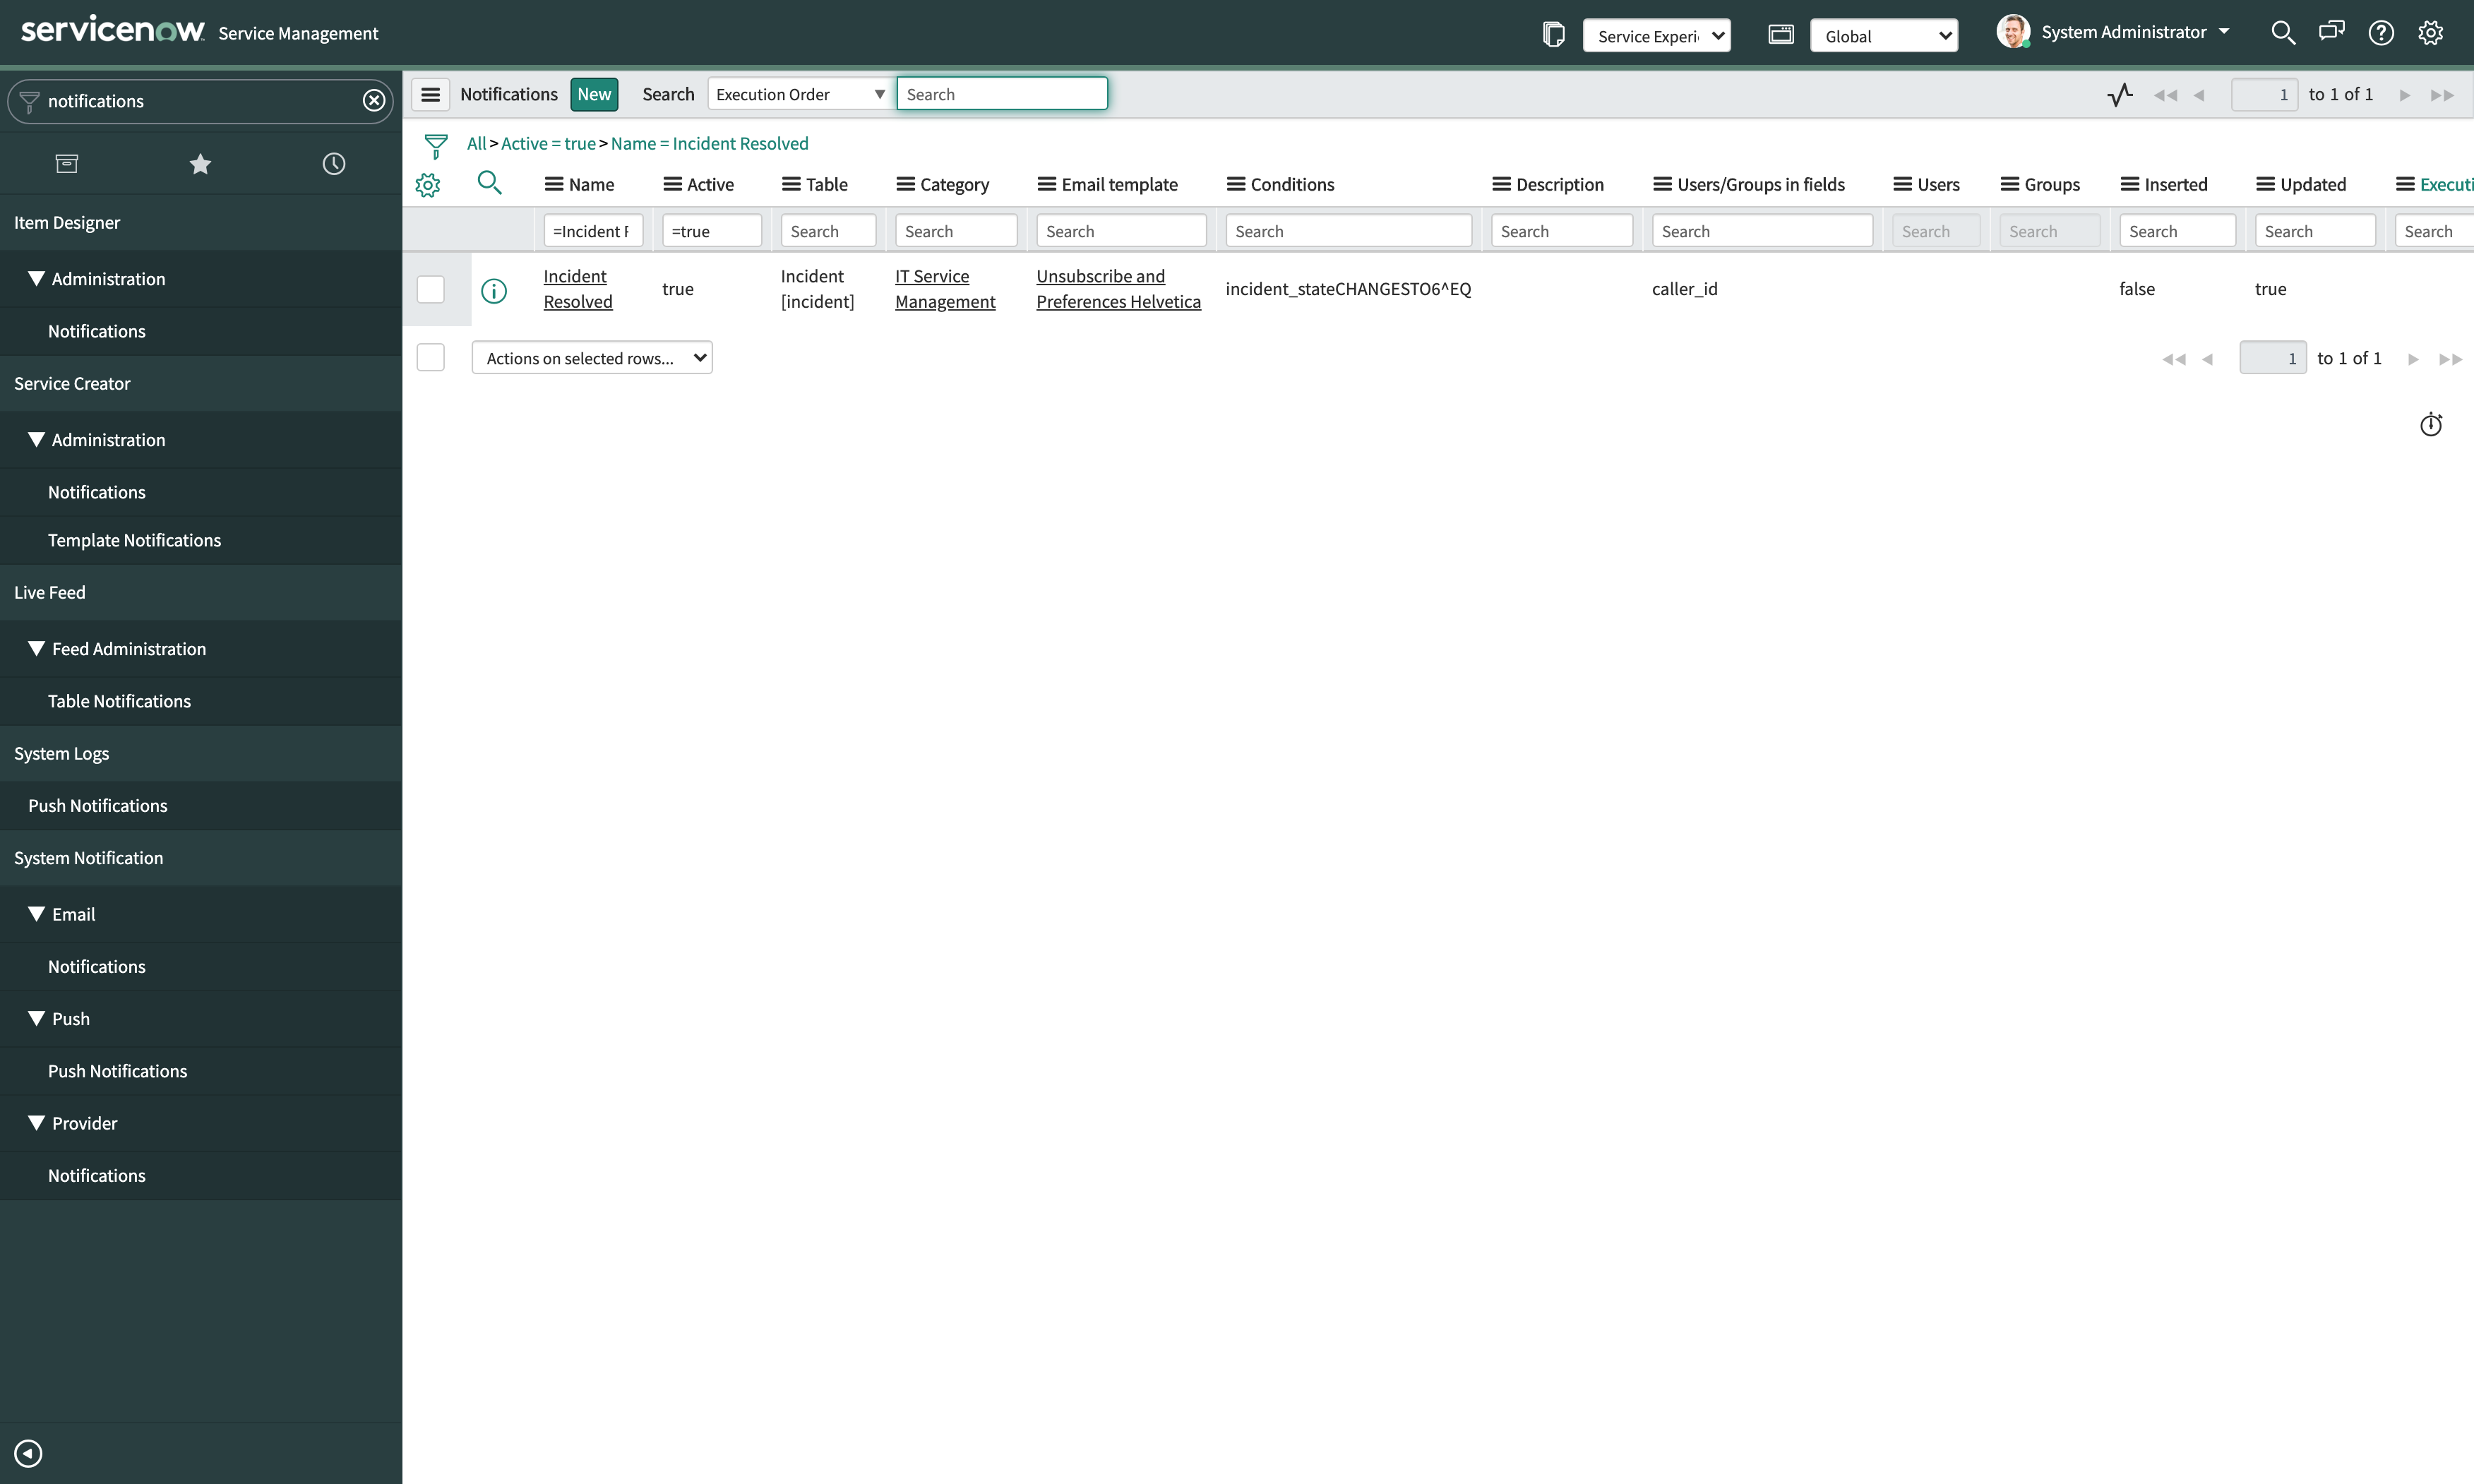
Find and open the incident notification where your organisation wants to measure service experience. Generally, service experience is measured when the incident is resolved by a service desk agent.
Once you have found and opened the correct notification:
- Navigate to the "What it will contain" -tab and look for the "Message HTML" field.
-
Add the following mail script to the "Message HTML" field. This script will add the service experience feedback buttons to the notification email.
${mail_script:happysignals_vote} - The contents of the notification and placement of the script are up to you, but we recommend reviewing our best practices for email notifications.
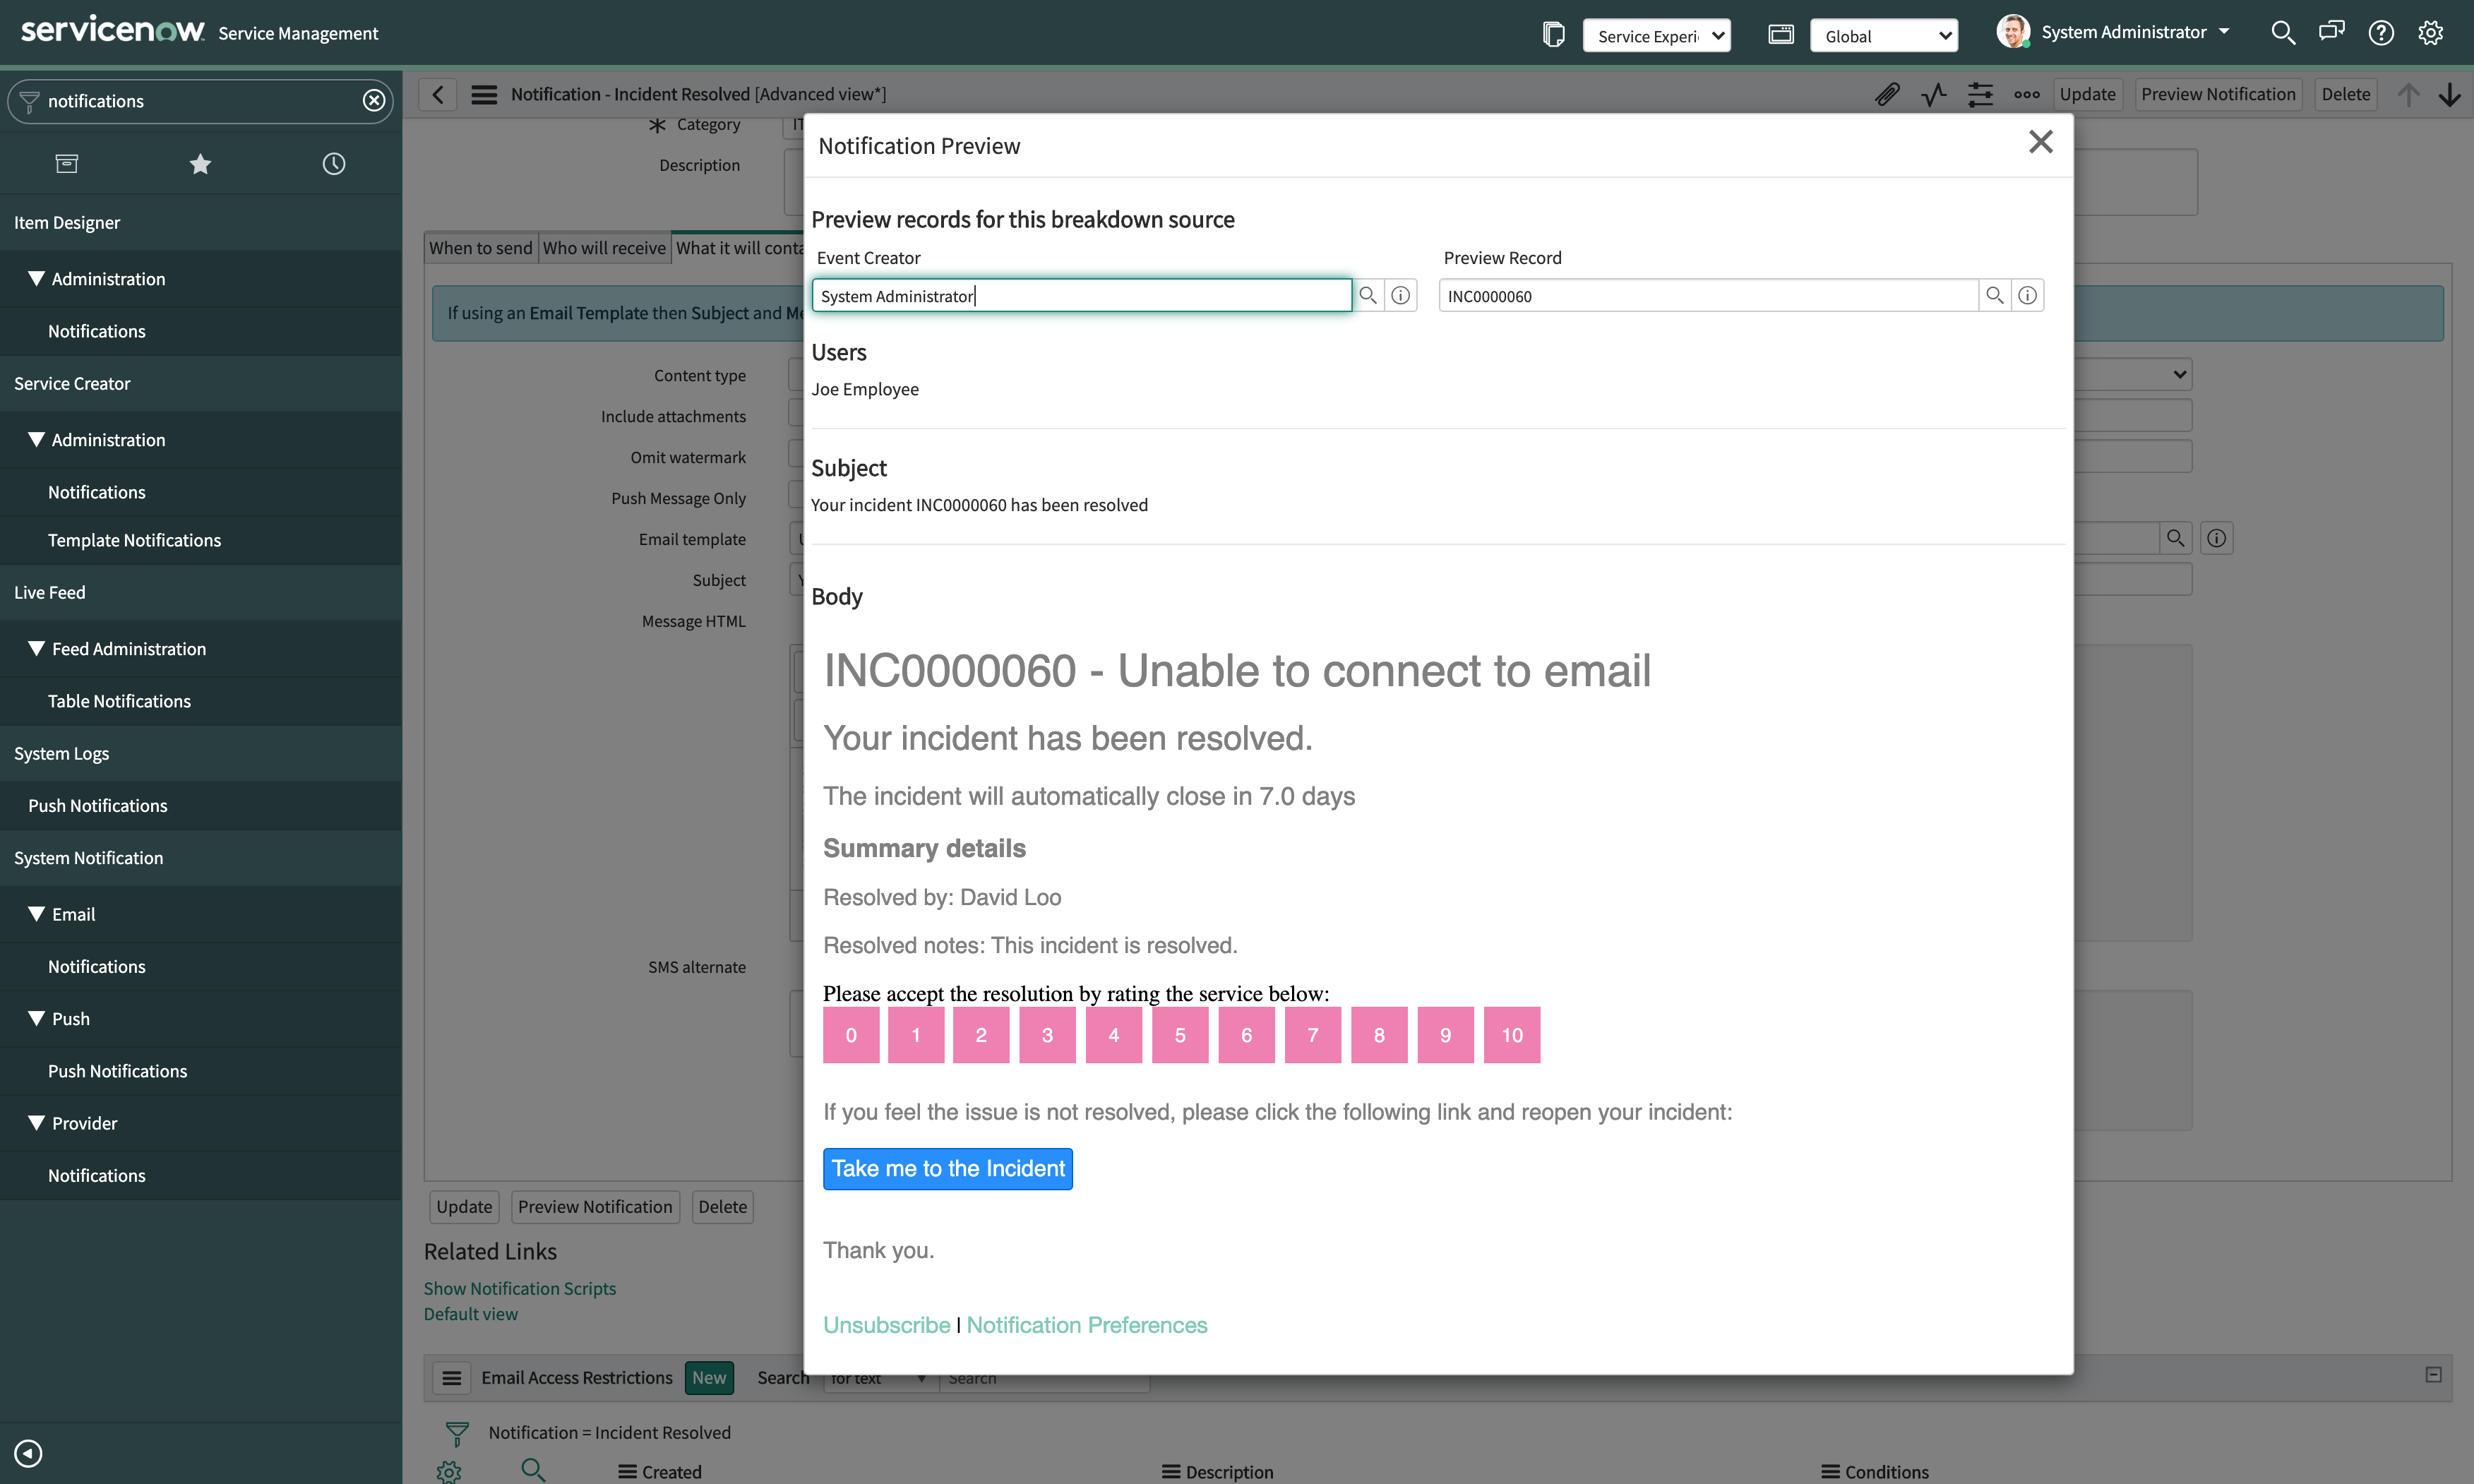
- Once you are happy with the notification content, click on the "Update" button (or "Save"). After the notification has been saved, you can verify that the feedback buttons are displayed in the notification by clicking the "Preview Notification" button.
Once you are finished with the incident notification, you can repeat the process for the requested item notification. Since usually, the requested items do not have a resolved state, the service experience is measured when the requested item is closed.
Other survey channels:
Following articles describe how you can install and use Teams and the Service Portal Widget as additional means of delivering the surveys.
Teams:
Setting up Teams Access for Entra and installing Teams application for Teams.
https://support.happysignals.com/install-the-happysignals-surveys-for-teams
Setting up Teams bot branding.
https://support.happysignals.com/branding-options-for-the-happysignals-surveys-via-teams-bot
Setting up Teams tenant mapping as described in the article earlier.
Configuring Teams settings on the HappySignals Ticket-based IT Experience.
- In the ServiceNow application navigator, find the HappySignals Ticket-Based IT Experience application, Surveys via Teams module click on the "Settings".
- Add the Pseudo Tenant ID shown when registering the Application to Entra to the corresponding field and set the "Send HappySignals Surveys via Teams" to "Yes"

- For testing you can use the "Test User ID" field by entering an email address to that field and then all the surveys via Teams will be sent to just that user.
Service Portal Widget:
Setting up the Service Portal Widget is described in the following article.
https://support.happysignals.com/ticket-rating-widget-for-servicenow-portal
Make sure everything works as intended:
Testing that the Ticket-Based IT Experience application works is fairly straightforward.
- Create a new Incident in your ServiceNow instance.
- Make sure the incident contains the data you want to send to the HappySignals cloud service.
- Resolve the incident you created.
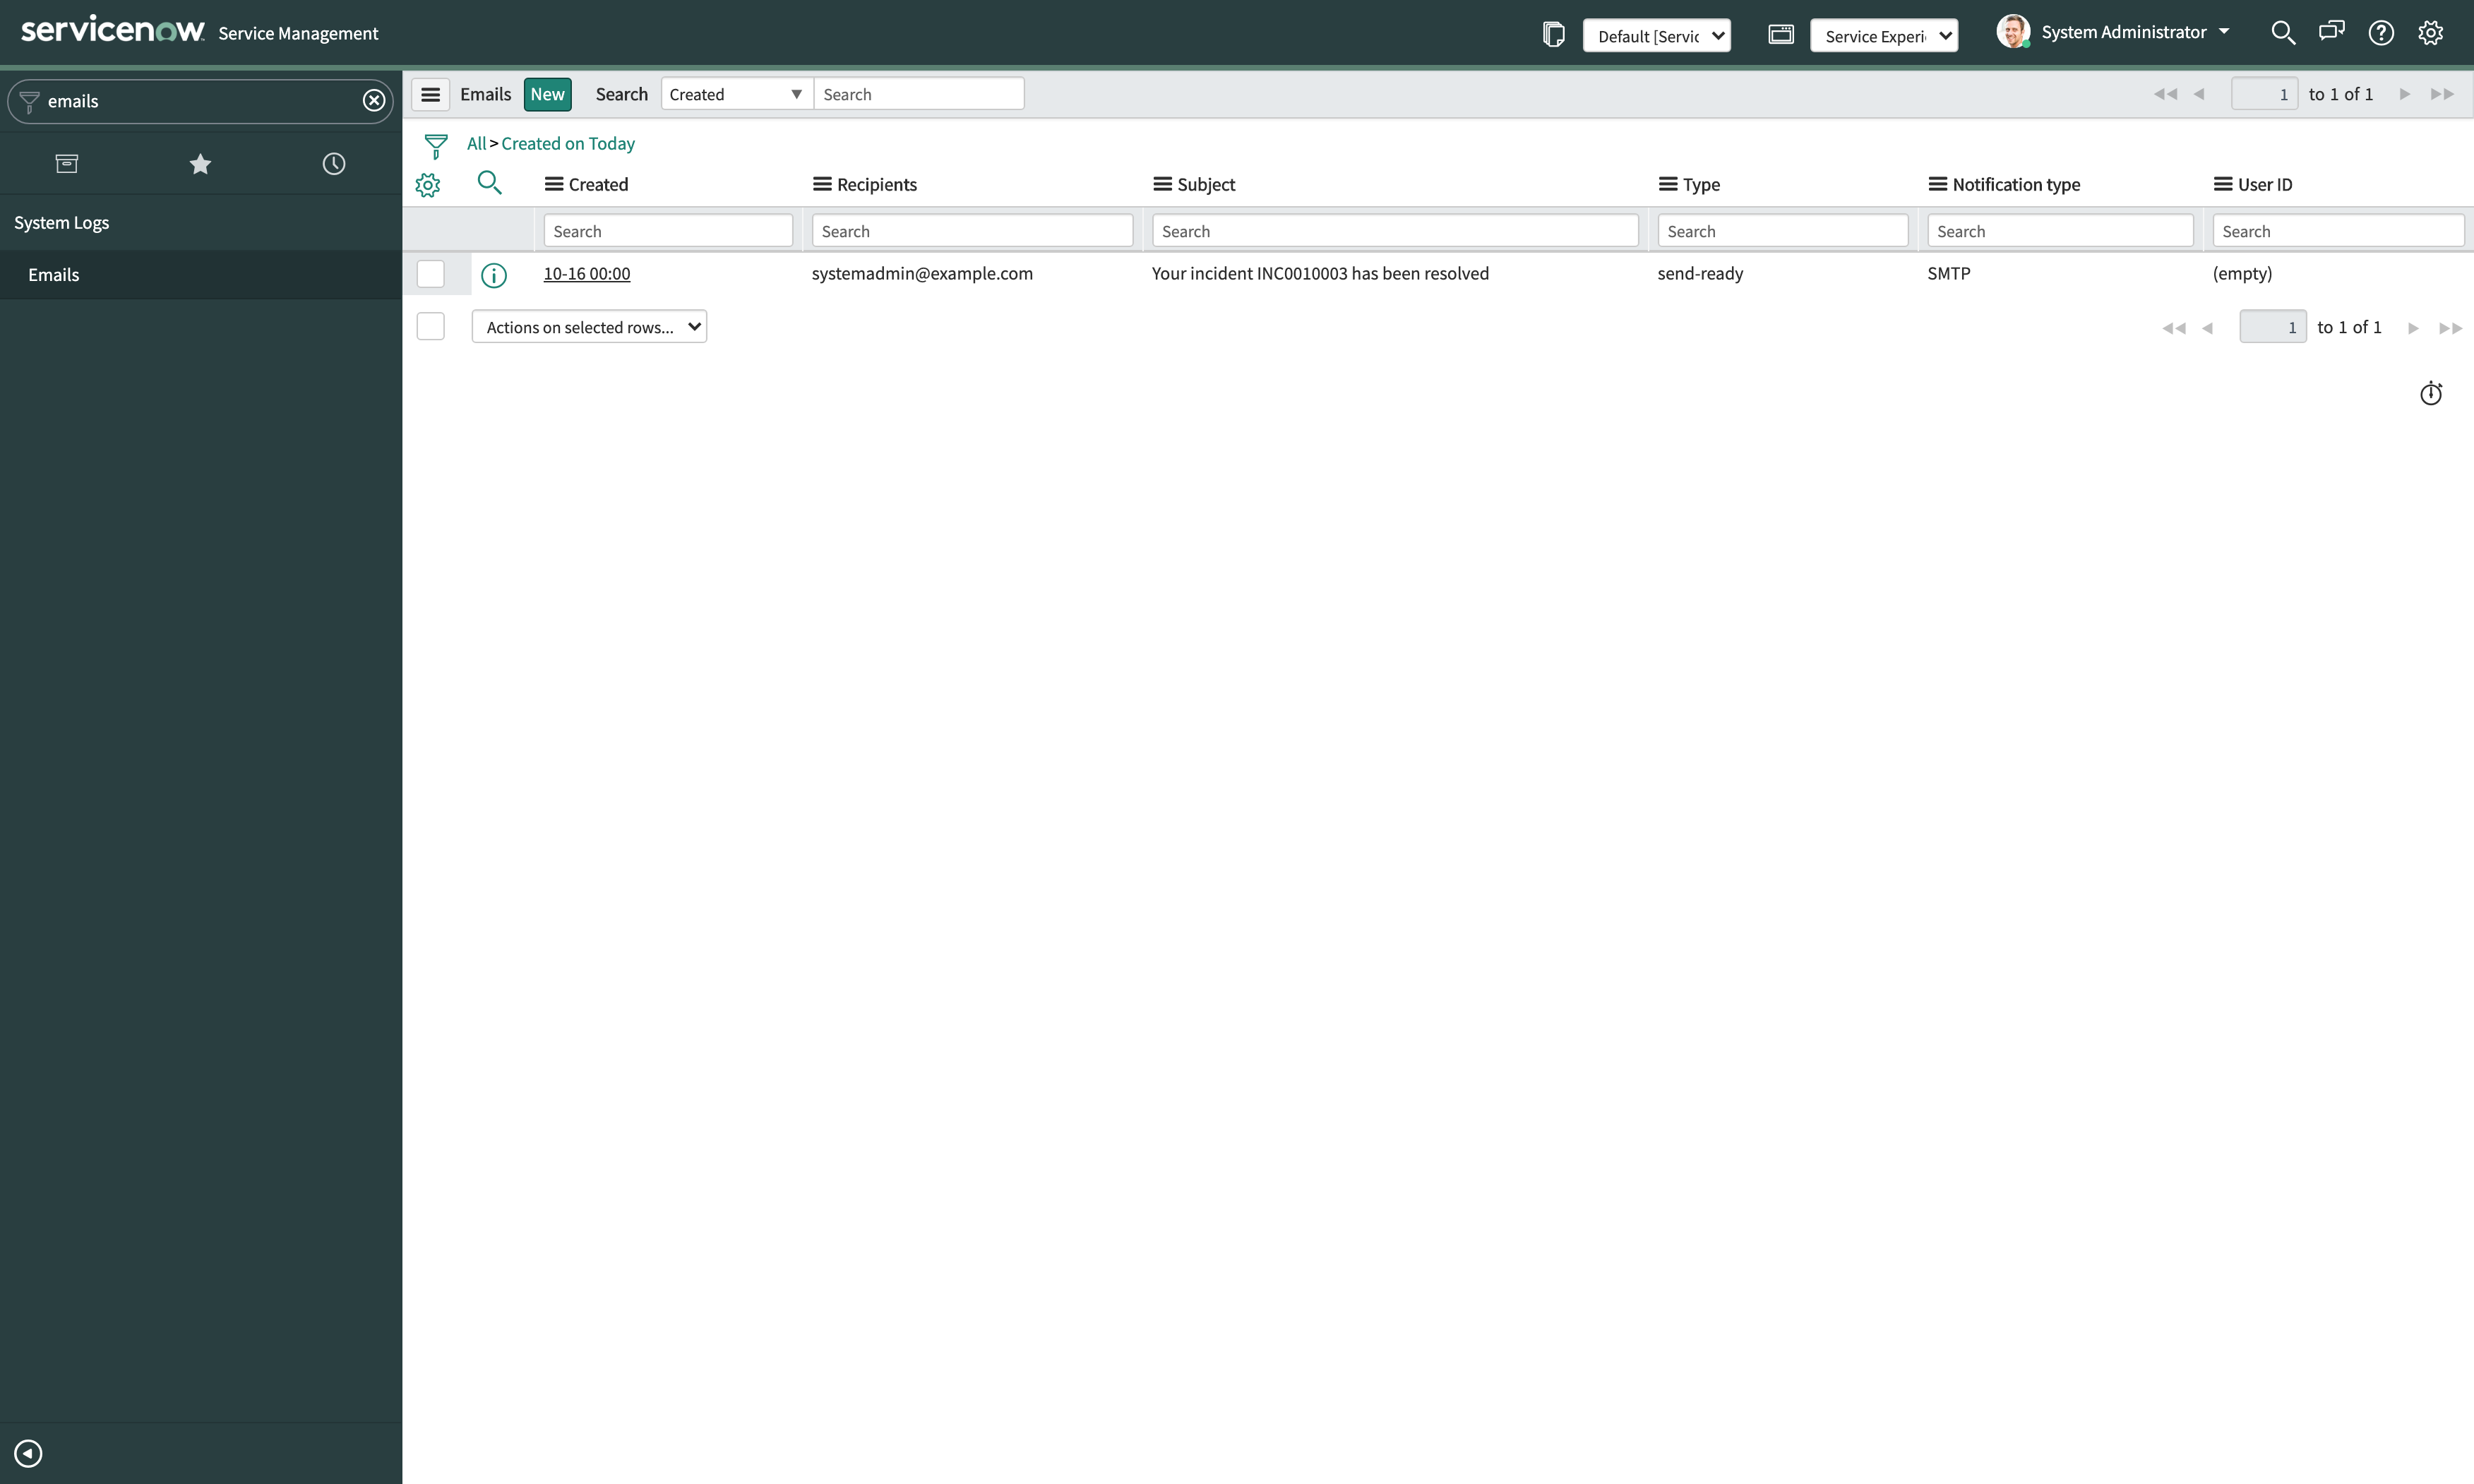
- In the ServiceNow application navigator, find the email log under "System Logs -> Emails" and check that an email has been created for the incident you resolved.
- Open the email and click on "Preview HTML Body". In the preview, click on one of the feedback buttons, and our feedback form should open in a new window or a tab. Fill out the feedback form and click "Submit" at the end of the survey.

- Now, in your ServiceNow application navigator, find the HappySignals integration job under "HappySignals Ticket-Based IT Experience -> Integration Job".
- Set the integration job to "Active", if not already. Then click on on the "Execute Now", button to fetch all new feedback from the HappySignals cloud service to your ServiceNow instance.

- Now, in the application navigator, find the HappySignals feedback list under "HappySignals Ticket-Based IT Experience -> HappySignals Feedbacks". Open the list and verify that your feedback is included.
You have now verified that the feedback buttons on the email notifications are being generated correctly, that the feedback is collected by the HappySignals cloud service, and that the integration between the cloud service and your ServiceNow instance is functioning properly. For additional test cases, see our examples before production use.
Remember, if you encounter any issues with the Ticket-Based IT Experience product during or after installation, please contact us at support@happysignals.com
That's it, you have now installed and configured the HappySignals Ticket-Based IT Experience application to your ServiceNow instance.
Note: This article is part of the HappySignals Self-Service Implementation Tour.
To proceed to the next step in the tour, click here.