The installation process in brief:
- Requesting the portal Experience application from ServiceNow Store
- Installing the application on the ServiceNow instance
- Configuring the application
- Activating two-way integration
- Adding the measurement widget(s) to the desired portal pages
- (Optional) Setting up translations for survey elements
- Testing the survey
- All done!
Before you start
There are a few key points to note before beginning the installation process.
- Make sure you have administrator access to the ServiceNow instance where you are installing the application
- Make sure you have access to the HappySignals cloud services
- Make sure you have received the following information from HappySignals:
- End-point URLs to your HappySignals cloud environments.
Generally, the end-point URL looks something like: https://[your company name].happysignals.com - Shared secrets for all your HappySignals cloud environments, which are used to make sure generated feedbacks come from your environments.
- API keys for all your HappySignals cloud environments, which are used to pull feedback data back to your ServiceNow.
- End-point URLs to your HappySignals cloud environments.
- Make sure you have requested the Portal Experience application from the ServiceNow store. For details on how to do this, see our article on "How to proceed when you want to download our Application from ServiceNow Store?"
Installing the application
Installation of the application is very straightforward and requires only a few steps to be complete:
- In the ServiceNow application navigator, find the "System Applications" module. In the "System Applications" module, expand the "All Available Applications" section and click on the "All" menu item.
- In the "All applications" page, type "HappySignals" in the search bar. In the application list below find the Service Portal IT Experience application and click the "Install"-button. Confirm the installation in the modal that pops up.
- Wait for the install to complete.
Once the installation is complete, reload the page and search "HappySignal Service Portal Experience" in the application navigator and confirm the application menu is there.
Configuring the application
After the application is installed and updated, you can proceed to the configurations. First, switch your application scope to the "HappySignals Service Portal Experience".
Open the "General Properties" module under the HappySignals Service Portal Experience application.

In general properties, first configure the three environment-specific details:
- "Endpoint", HappySignals cloud environment URL
- "Shared Secret", a shared secret to make sure the responses come from your environment
- "Vendor API key", the API that is used to access the HappySignals API.
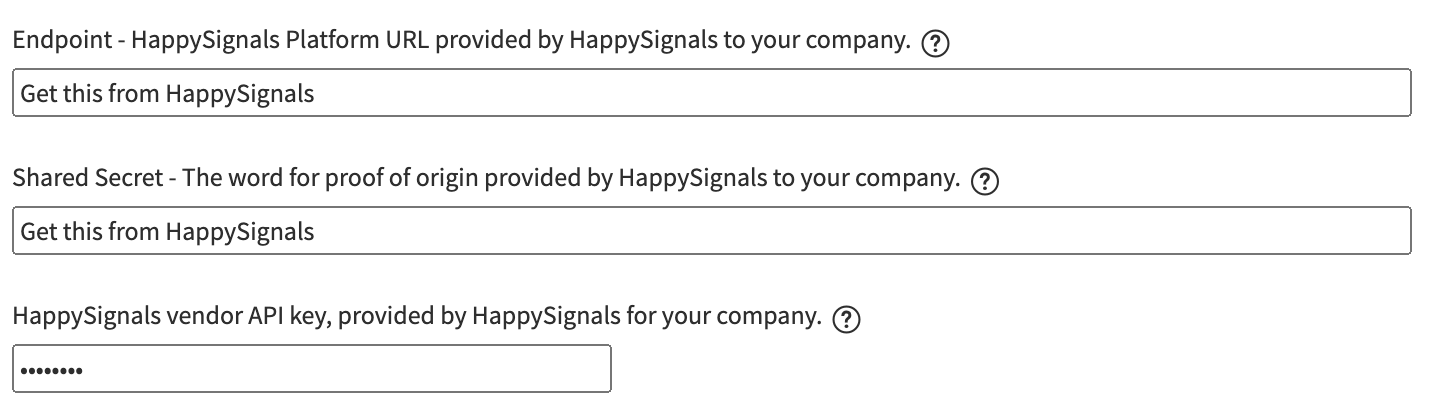
Note that all three configurations above are environment-specific, so make sure to update them when installing the application to a new ServiceNow environment. You should also make sure that you don't overwrite them when cloning data between environments.
Mapping Happysignals instance
The mapping is required for the response rate calculation to work and If this mapping is not done pre-responses are not created for response rate calculation.
Map your ServiceNow instances to their expected HappySignals platform counterpoints. This is done in the script include HappyPortalConstants, as shown below.

Portal response rates
You can now start tracking your service portal experience response rates directly in HappySignals platform.
Once you've set the environment-specific details, you are ready to continue with the other configurations.
See the full list of properties to check and their descriptions below.
First property section:
| Name | Description | Default value |
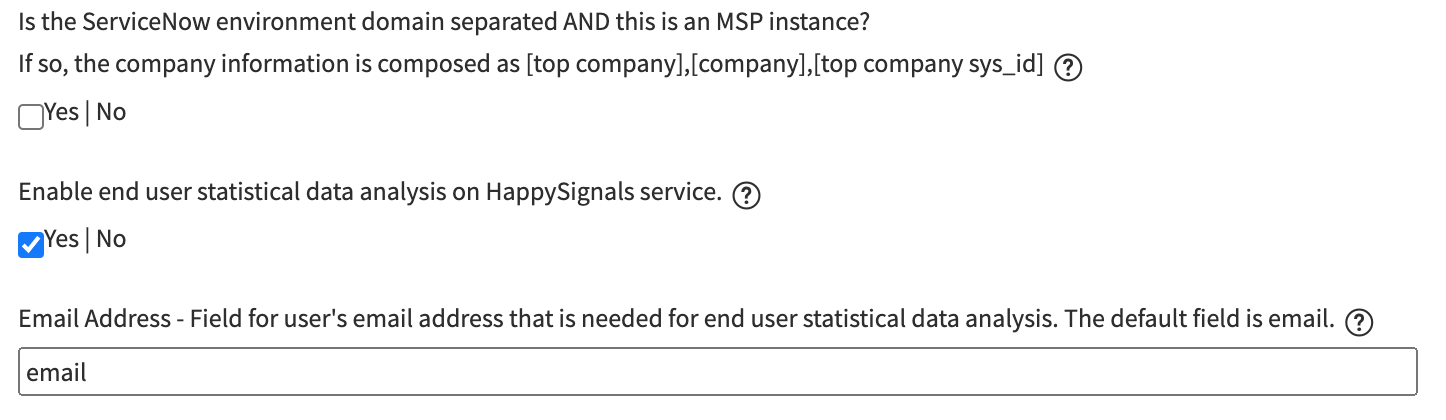
| Is the ServiceNow environment domain-separated, AND is this an MSP instance? | If enabled, changes how the end user company information is sent to HappySignals and enables the use of MSP functionalities in the HappySignals cloud environment. | false |
| Enable end-user statistical data analysis on the HappySignals service. | If enabled, a unique but anonymised detail about the end user is sent as part of the response context data. | false |
| Email Address | A field for the end user's email address or a similar non-ITSM tool-specific identifier of the end user. |
User data configuration:
Configurations in this section define what information about the person who provides the feedback is passed on to HappySignals.
You can use field names from the "Users" table in the configurations to map data dynamically. Or you can use static values that will be the same for all feedback by wrapping a configuration value with quotation marks (").

| Name | Description | Default value |
|
Employment started |
Information about the user's start date of employment. | sys_created_on |
|
Company |
Information about the user's company. | company |
|
Title |
Information about the user's job role or title. | title |
|
Location |
Information about the user's town, city, office building, or similar. | location |
|
Country |
Information about the user's country. The country information should be the full country name in English. | location.country |
| Region | Information about the user's region, department, or similar. | |
| Use user preferences for language selection | If enabled, it checks the user's language selection in their user preferences. | false |
|
Language |
A field containing information about the user's language. Used when user preference selection is not enabled or a static value has been defined. | preferred_language |
Widget Display Settings:
Settings in this section affect when the HappySignals widgets won't appear for the portal end users.
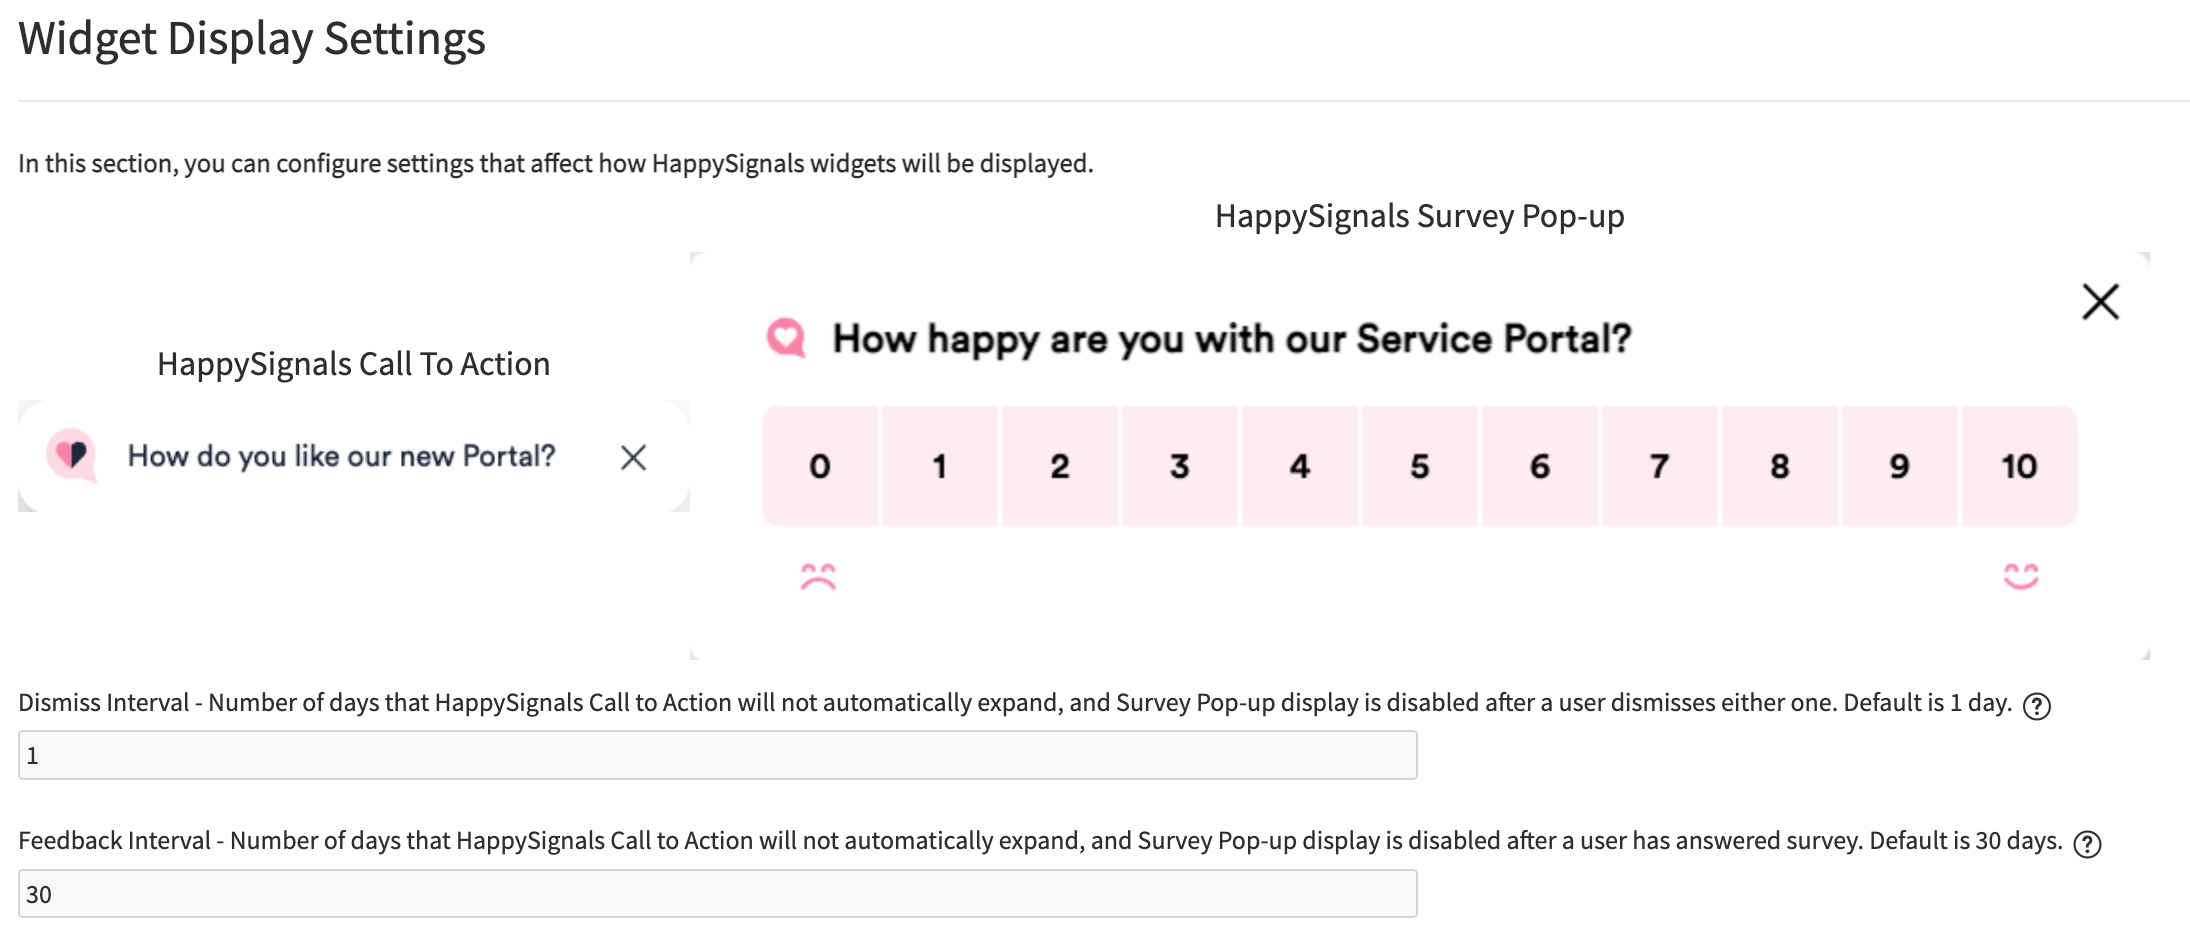
| Name | Description | Default Value |
| Dismiss Interval | How many days must pass until the widgets expand or display automatically to the user after they have dismissed either one. | 1 |
| Feedback Interval | How many days must pass until the widgets expand or display automatically to the user after they have given feedback. | 30 |
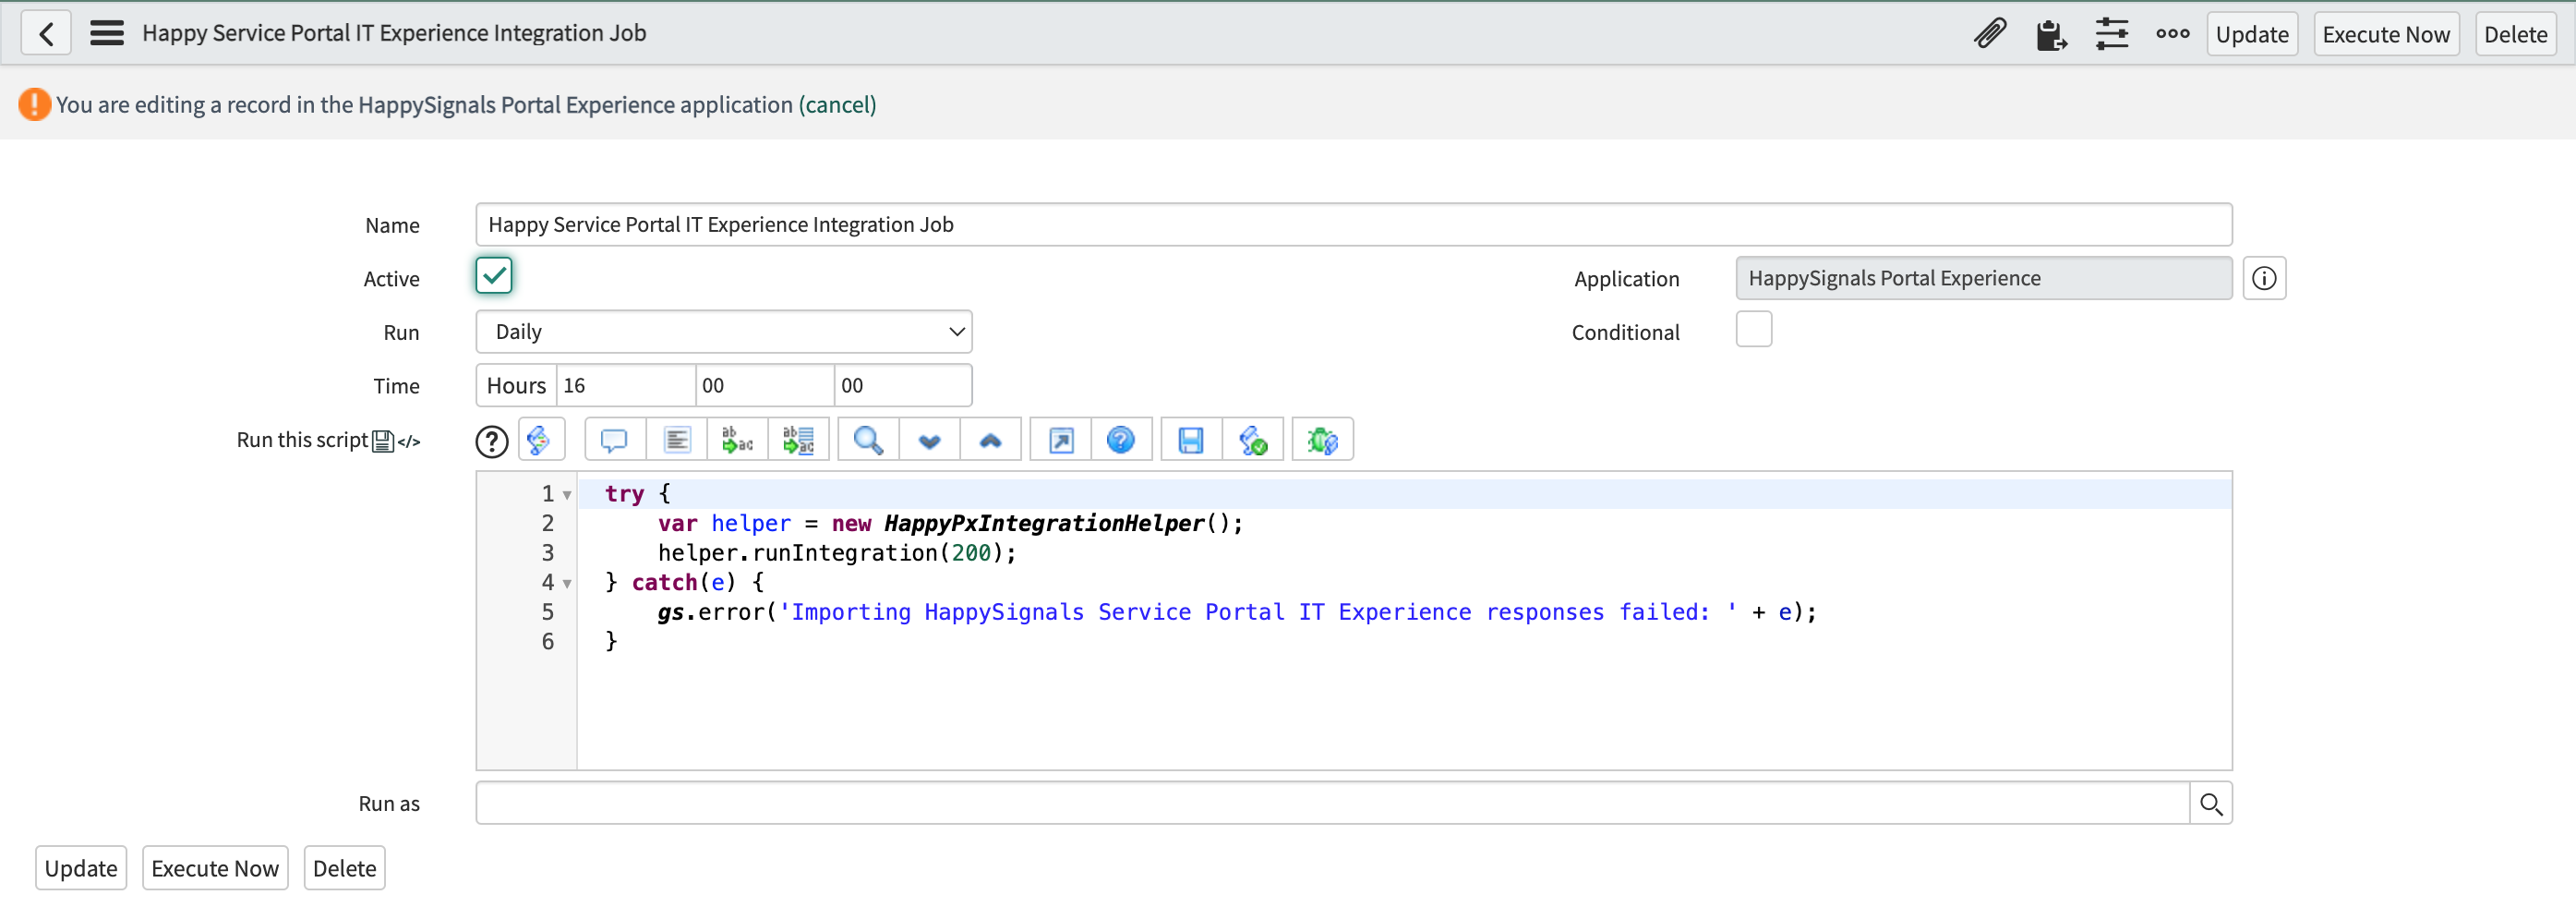
Activating the two-way integration
Now that all base configurations have been completed, it's time to activate the two-way integration to receive the feedback data back into ServiceNow.
To activate the integration, open the "Integration Job" under the HappySignals Service Portal Experience application and set the job as active.
By default, the job runs once a day, but if you need more real-time integration, you can change the run interval in the job settings.
Adding the widget(s) to the desired portal pages
To get started with gathering experience about the Service Portal, you need to add the HappySignals widget(s) to the desired portal pages.
Open your Service Portal and navigate to the page where you want to add the widget.
Move your cursor over a piece of content within the page and press CONTROL + RIGHT MOUSE CLICK to bring up the Service Portal context menu.
In the context menu, select the "Page in Designer" to open up the Service Portal page designer.
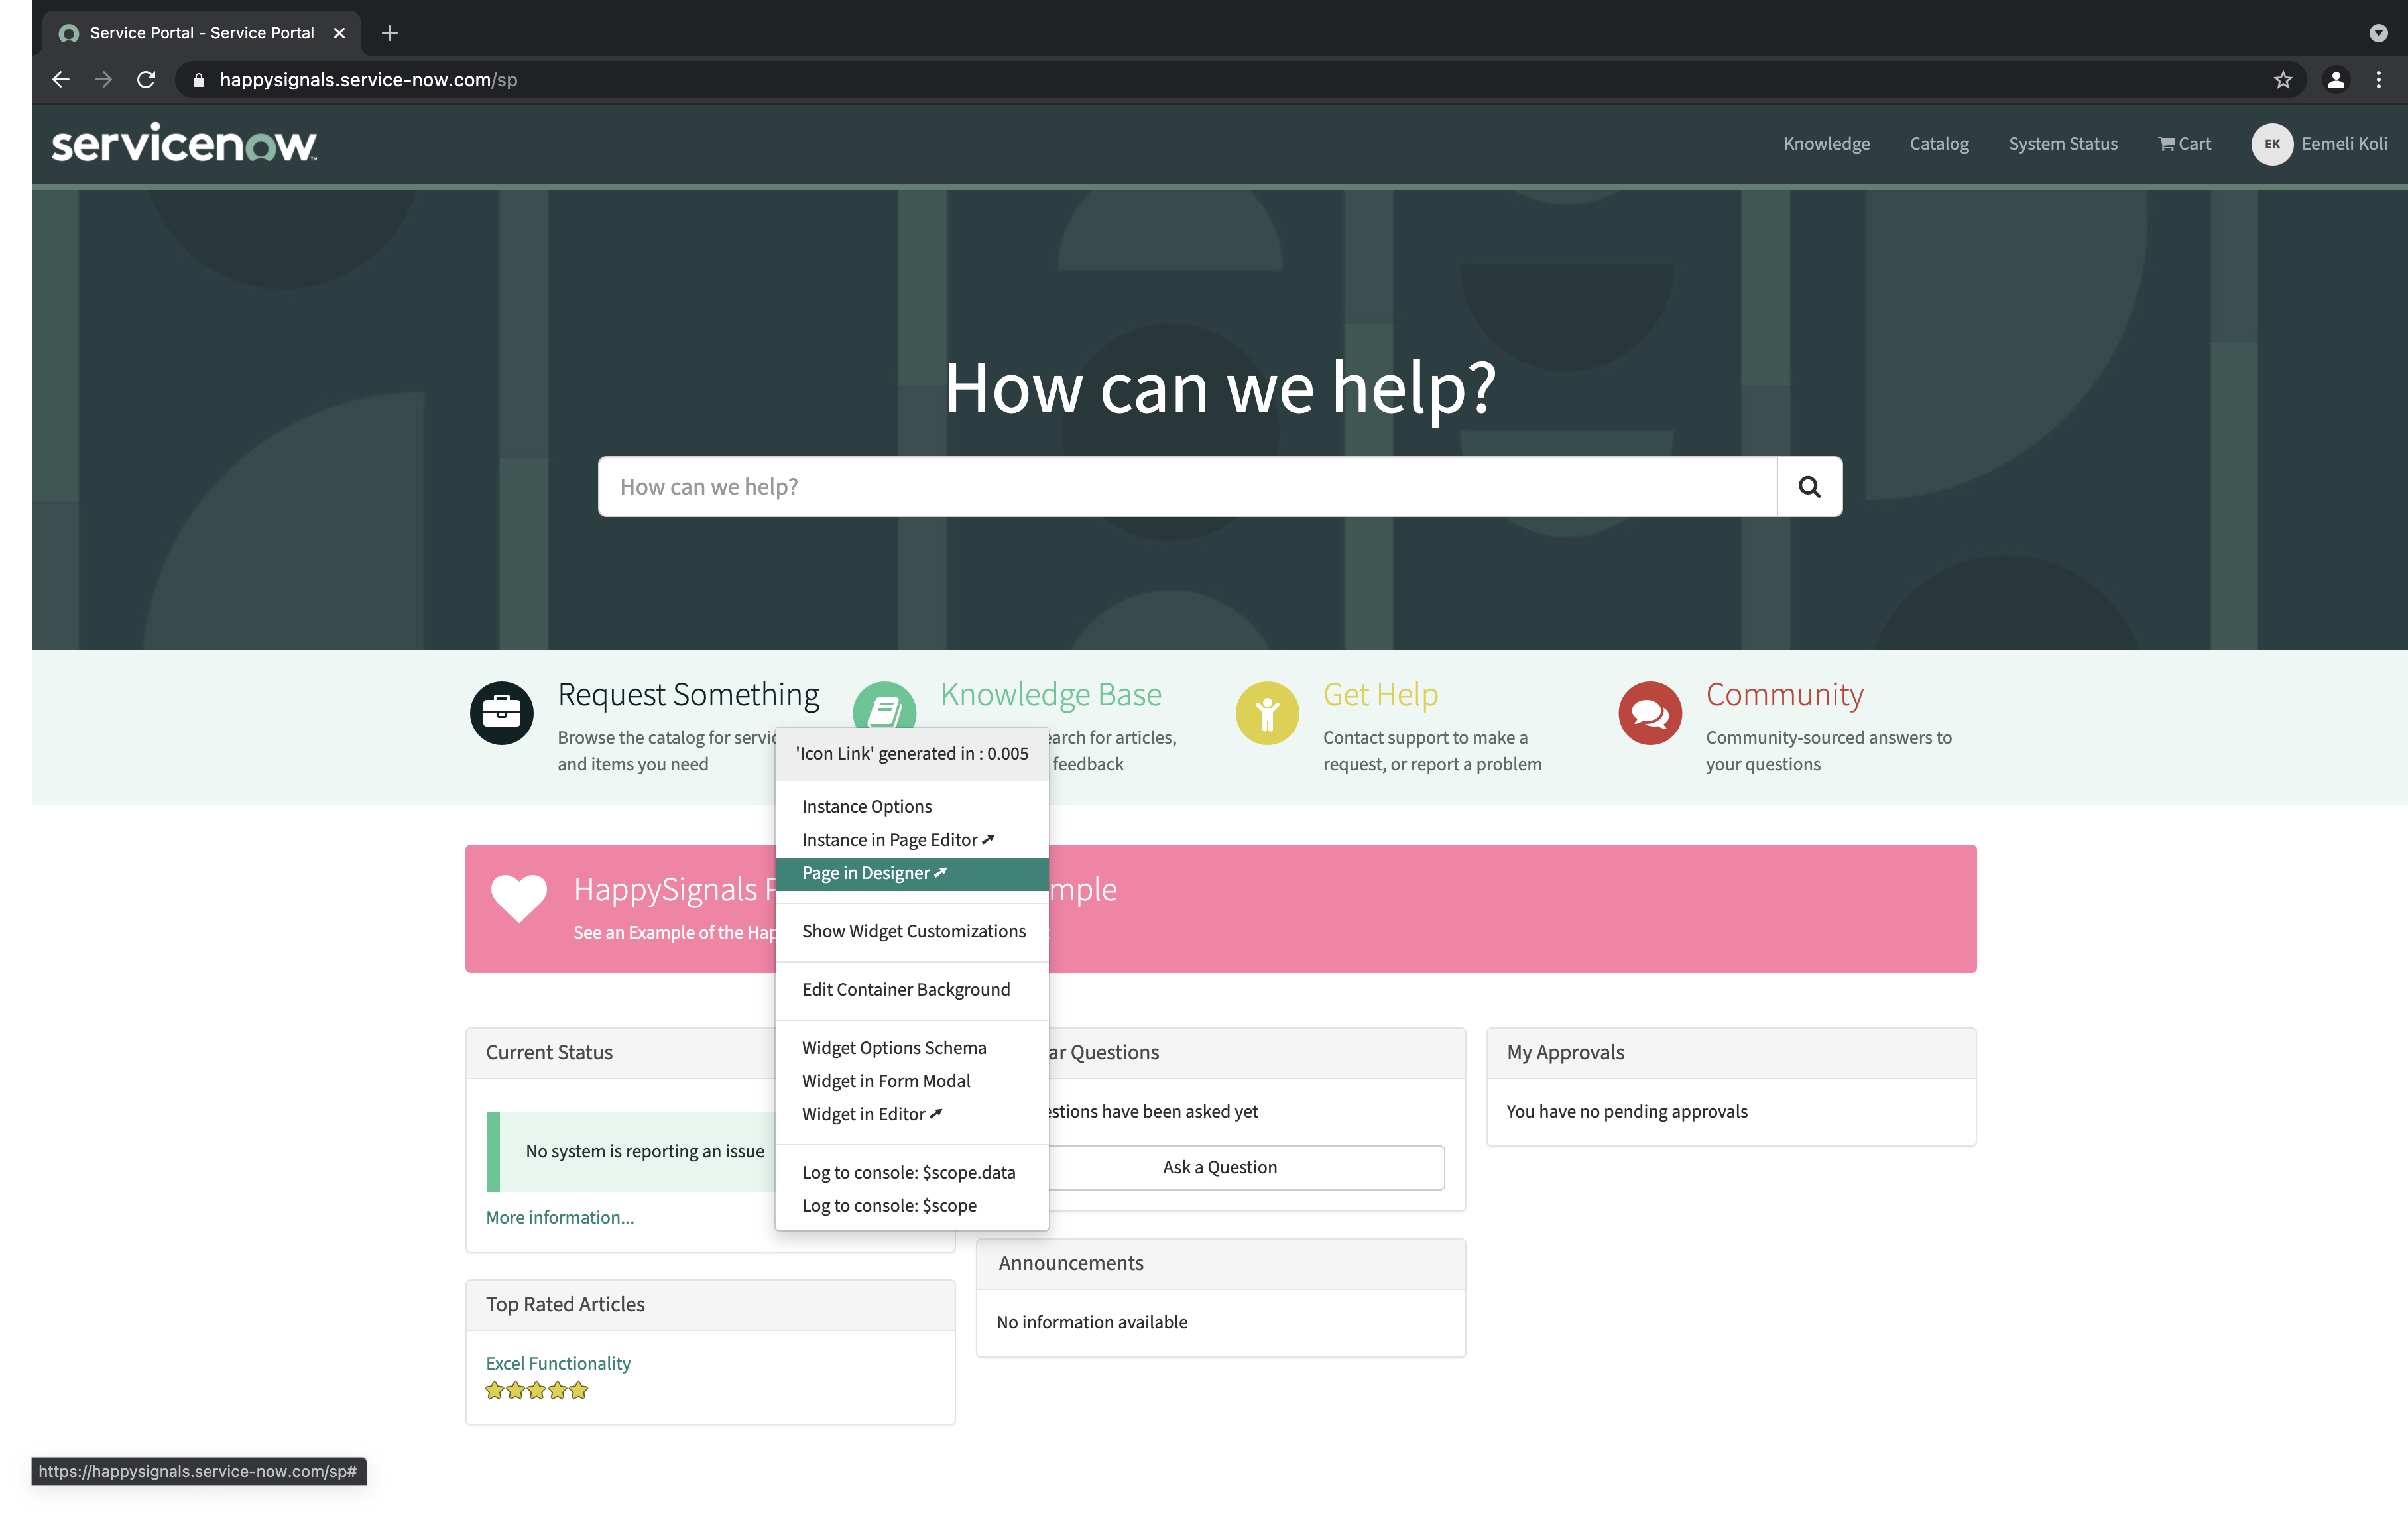
With the page designer, drag a new "Container" to the page content. 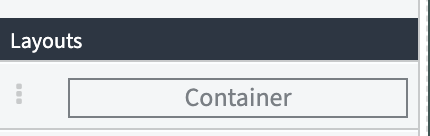
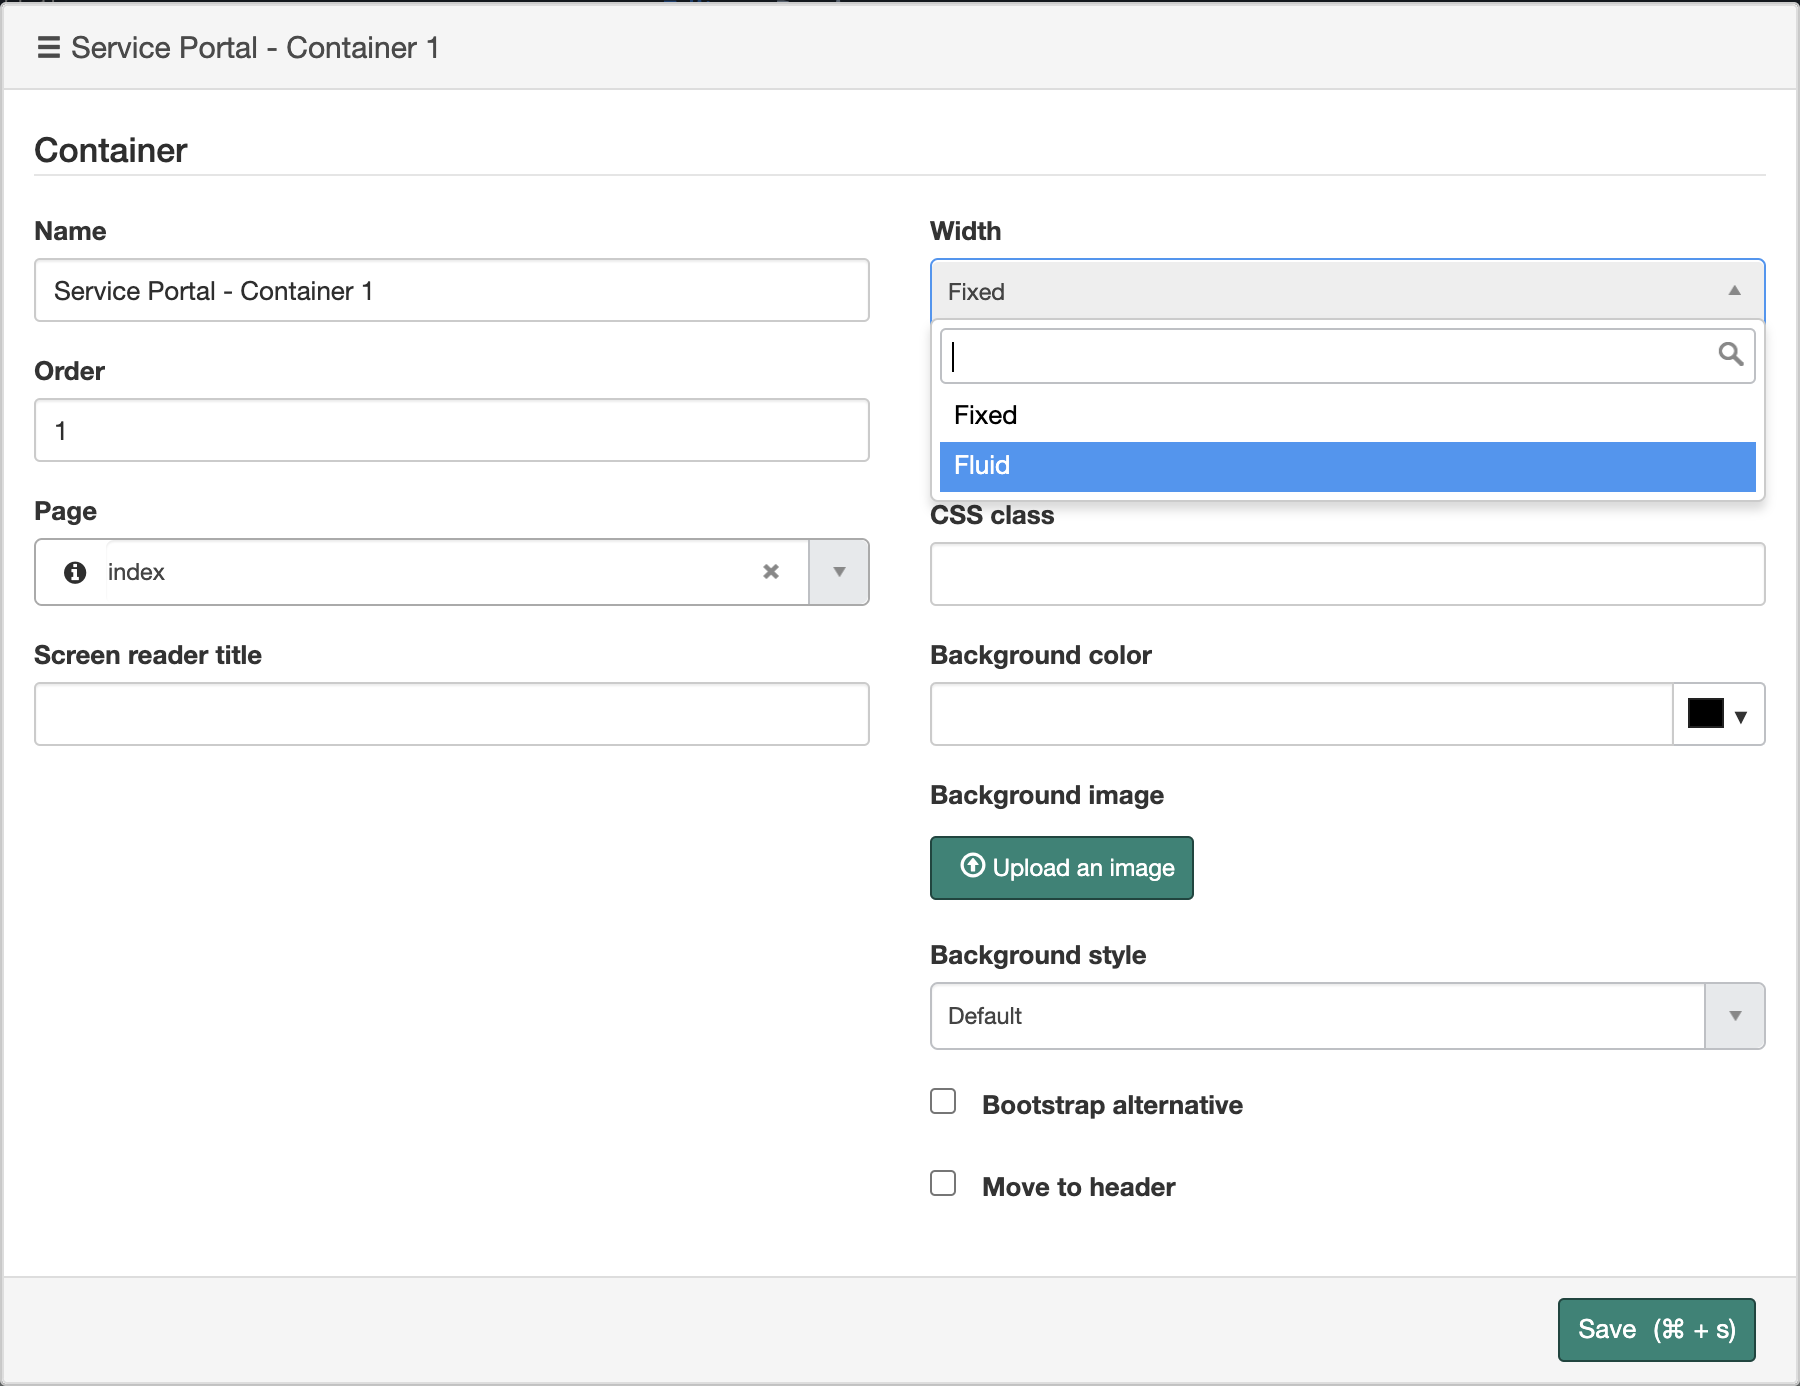
Then select the container in the page content and edit its settings by clicking the small pen icon ![]() in the top-right corner of the page.
in the top-right corner of the page.
In the container settings, change the width to "Fluid" and click "Save".
Drag a 12 column layout to the newly added container.

With the new container and layout setup in place, it's time to add the HappySignals widgets to it.
Search with the keyword "HappySignals," and two widgets will appear in the list.
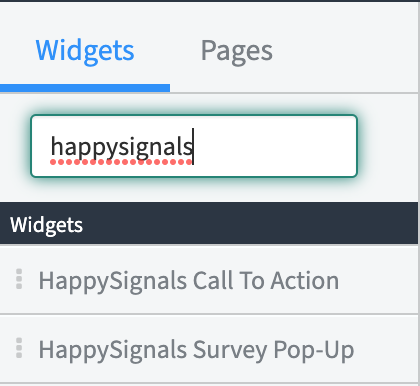
HappySignals Survey Pop-Up
First, drag the HappySignals Survey Pop-Up to the newly added 12-column layout. A blue placeholder image should show up in the page content.
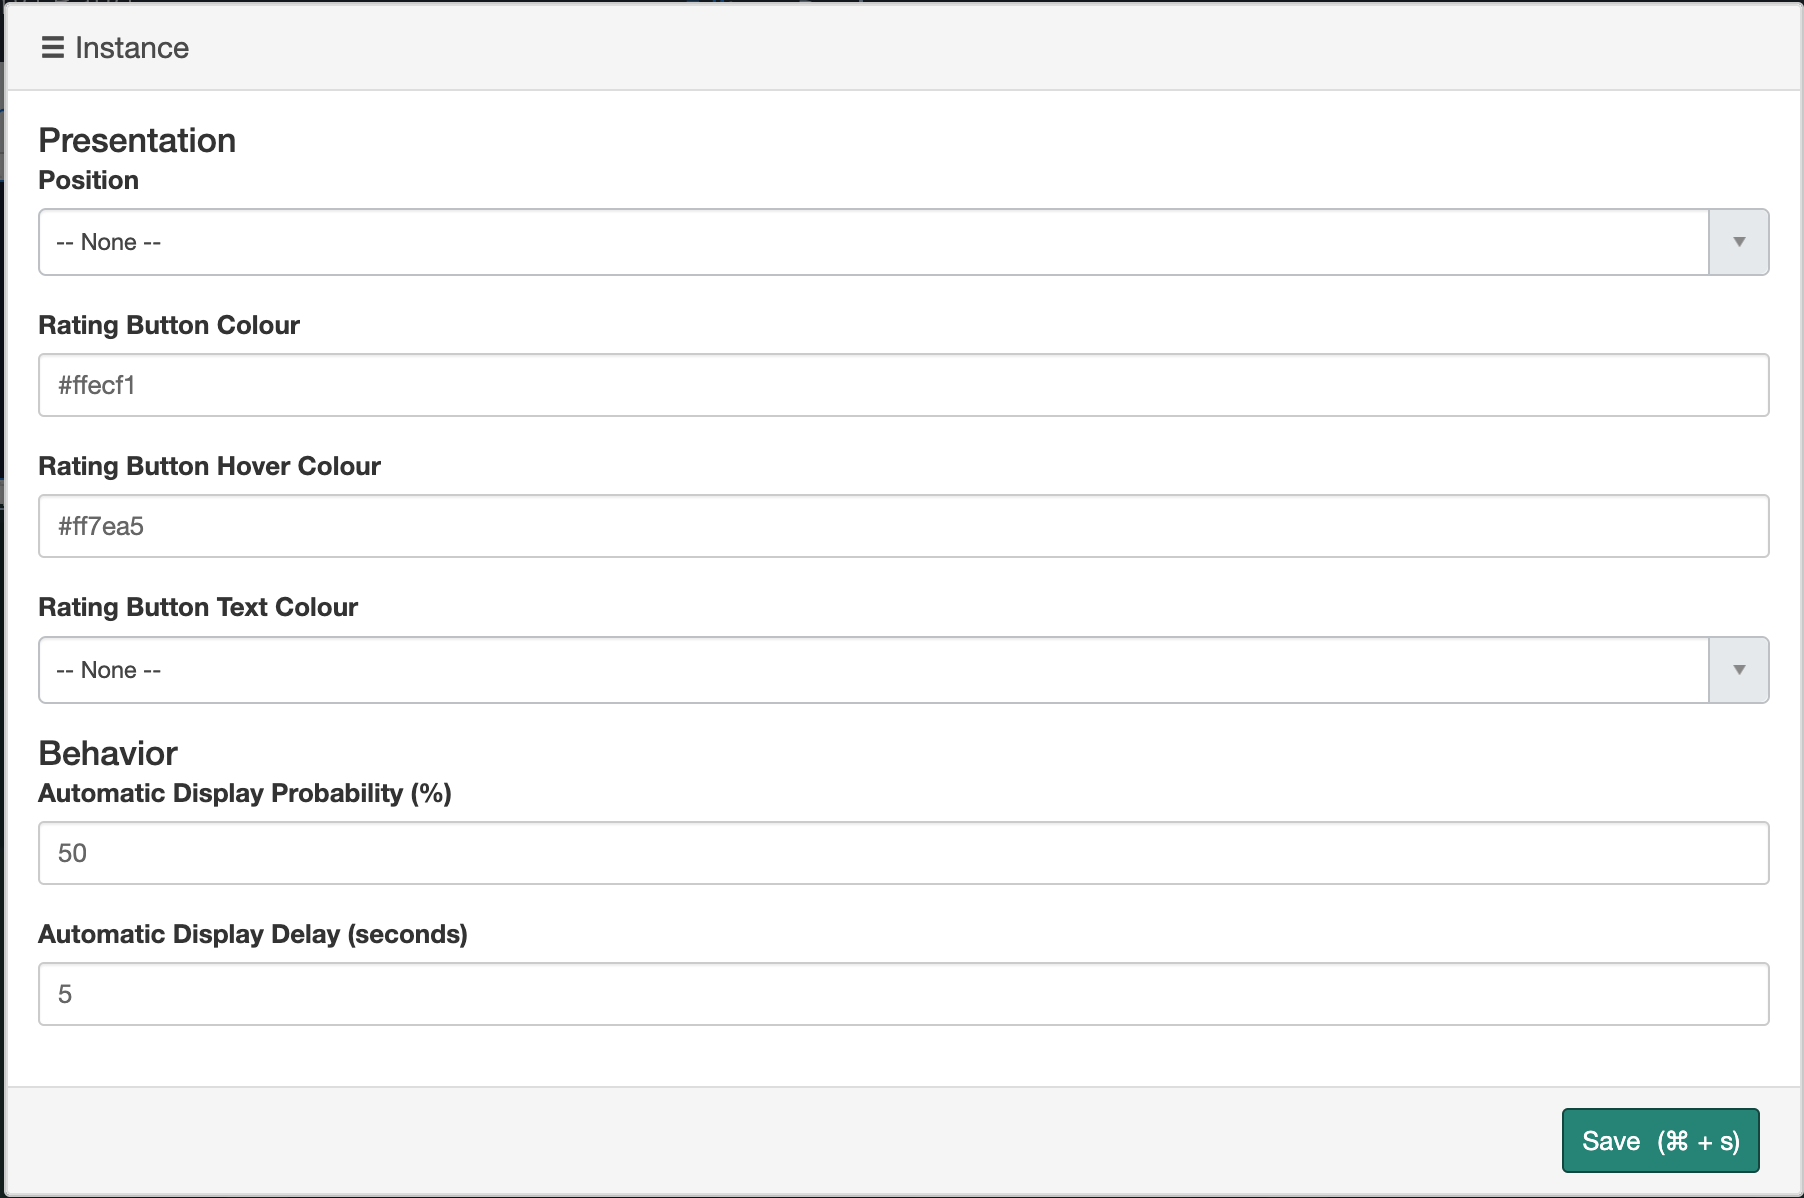
Select the newly added widget and click on the small pen icon to edit the widget instance options.
|
Option |
Description |
Default Value |
|
Position |
Select the position where the feedback pop-up is placed. |
center-top |
|
Rating Button Colour |
Background color of the rating buttons. |
#ffecf1 |
|
Rating Button Hover Colour |
Hover color of the rating buttons. |
#ff7ea5 |
|
Rating Button Text Colour |
Text color for the rating buttons. |
black |
|
Automatic Display Probability (%) |
The probability at which the survey pop-up will get displayed on any given page load. |
50 |
|
Automatic Display Delay (s) |
How long will the survey pop-up remain hidden before being displayed on the page. |
5 |
Once ready with the options, click "Save".
HappySignals Call To Action
The HappySignal Call-to-Action widget is a small, non-interruptive element placed on your portal page. The user can click the Call to Action to bring up the Survey Pop-Up at any time.
When using the Call To Action widget on a page, you must also add the Survey Pop-Up widget to the same page.
To add the Call to Action element to the page, drag it to the 12-column section with the Survey Pop-Up widget. A blue placeholder image should show up in the page content.
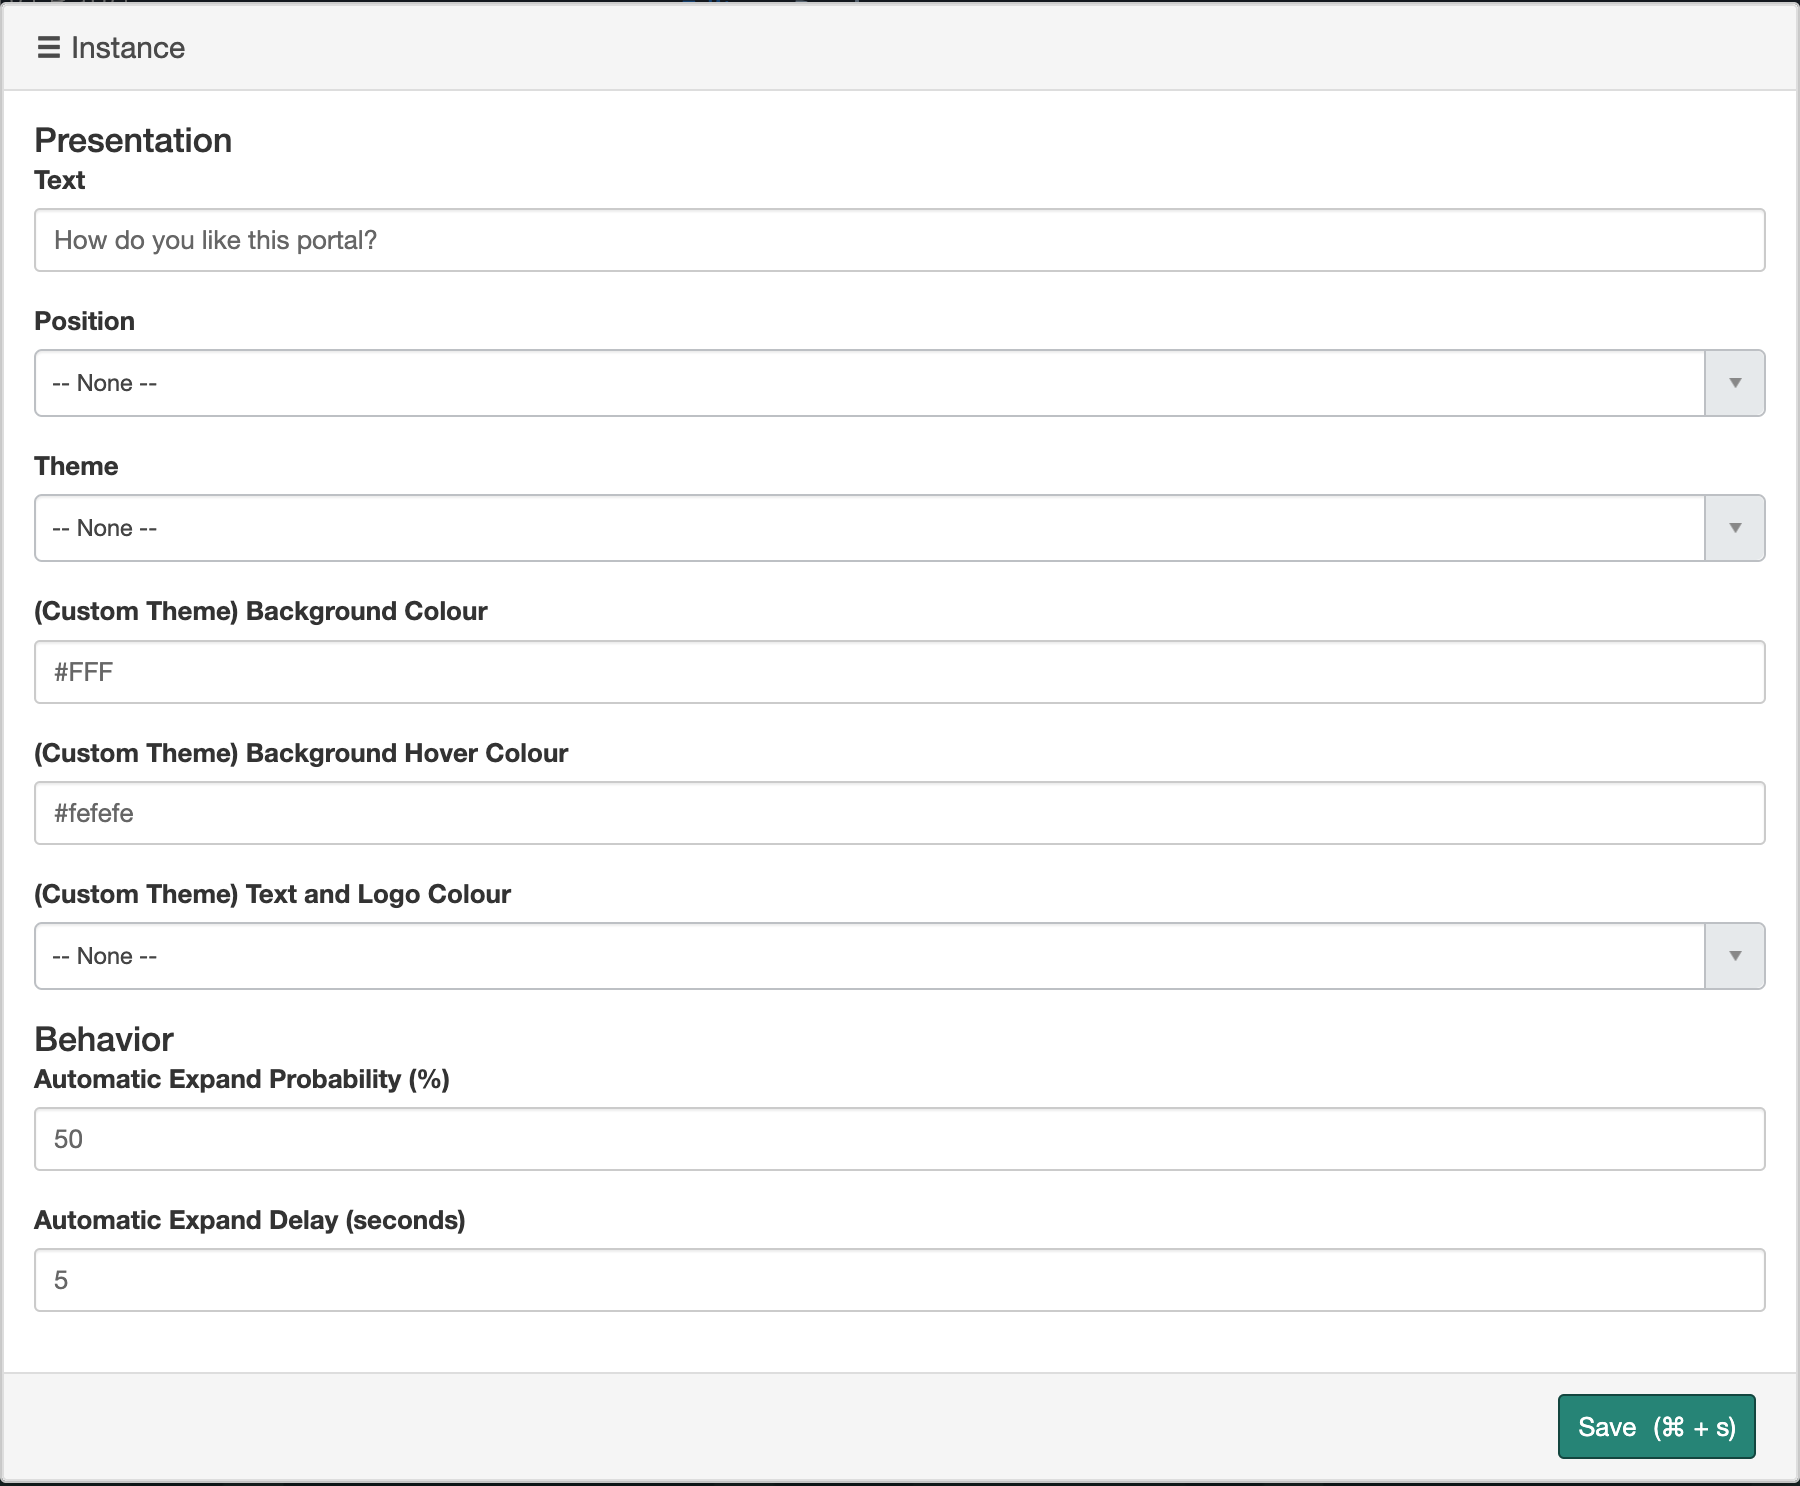
Select the newly added Call to Action widget and click on the small pen icon to edit the widget instance options.
|
Option |
Description |
Default Value |
|
Text |
Text that appears on the call-to-action once it expands. |
How do you like this portal? |
|
Position |
Select the position where the call to action appears on the page. |
bottom-left |
|
Theme |
Select a theme for the call to action. |
light |
|
(Custom theme) Background Colour |
Set the background color for the call-to-action. This option only applies if a custom theme is selected. |
#FFF |
|
(Custom theme) Background Hover Colour |
Set the background hover color for the call-to-action. This option only applies if a custom theme is selected. |
#fefefe |
|
(Custom theme) Text and Logo Colour |
Select the colour of the logo and text. This option only applies if a custom theme is selected. |
black |
|
Automatic Expand Probability (%) |
The percentage probability that the call to action will expand on any given page load. |
50 |
|
Automatic Expand Delay (s) |
How long will the call to action remain minimized before expanding. |
5 |
Once ready with the options, click "Save".
(Optional) Setting up translations for survey elements
If you offer your service portal in multiple languages, you can set up translations for the HappySignals portal elements. Translation for the elements can be set up using ServiceNow's built-in System UI Messages functionalities.
To set up your translation, navigate to "System UI -> Messages" and start by creating a new message record in the table.
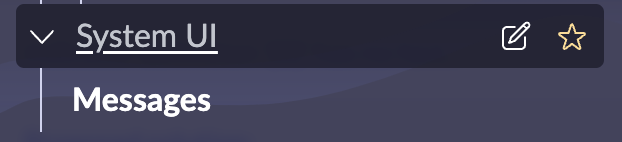
In message record form, you will need to fill in three fields described below:
| Field Name | Description | Example value when translating a survey pop-up question to Spanish |
| Key | Unique identifier for the message. This is the text that appears on the widgets in English. | How happy are you with our Service Portal? |
| Language | Language in which the message is translated. | Spanish |
| Message | Translated text that the user sees in the portal. | ¿Qué tan satisfecho está con nuestro Portal de servicios? |
![]()
If you want to translate the Call to Action widget text, the key for your translated messages is the text that you have added in the widget instance options. Note that different widget instances of the call to action can have different texts and thus use different translation keys.
To add multiple translations, simply create additional Message records with the same key and select a different value in the language field.
Testing the survey
With the configurations done, you are ready to test the survey.
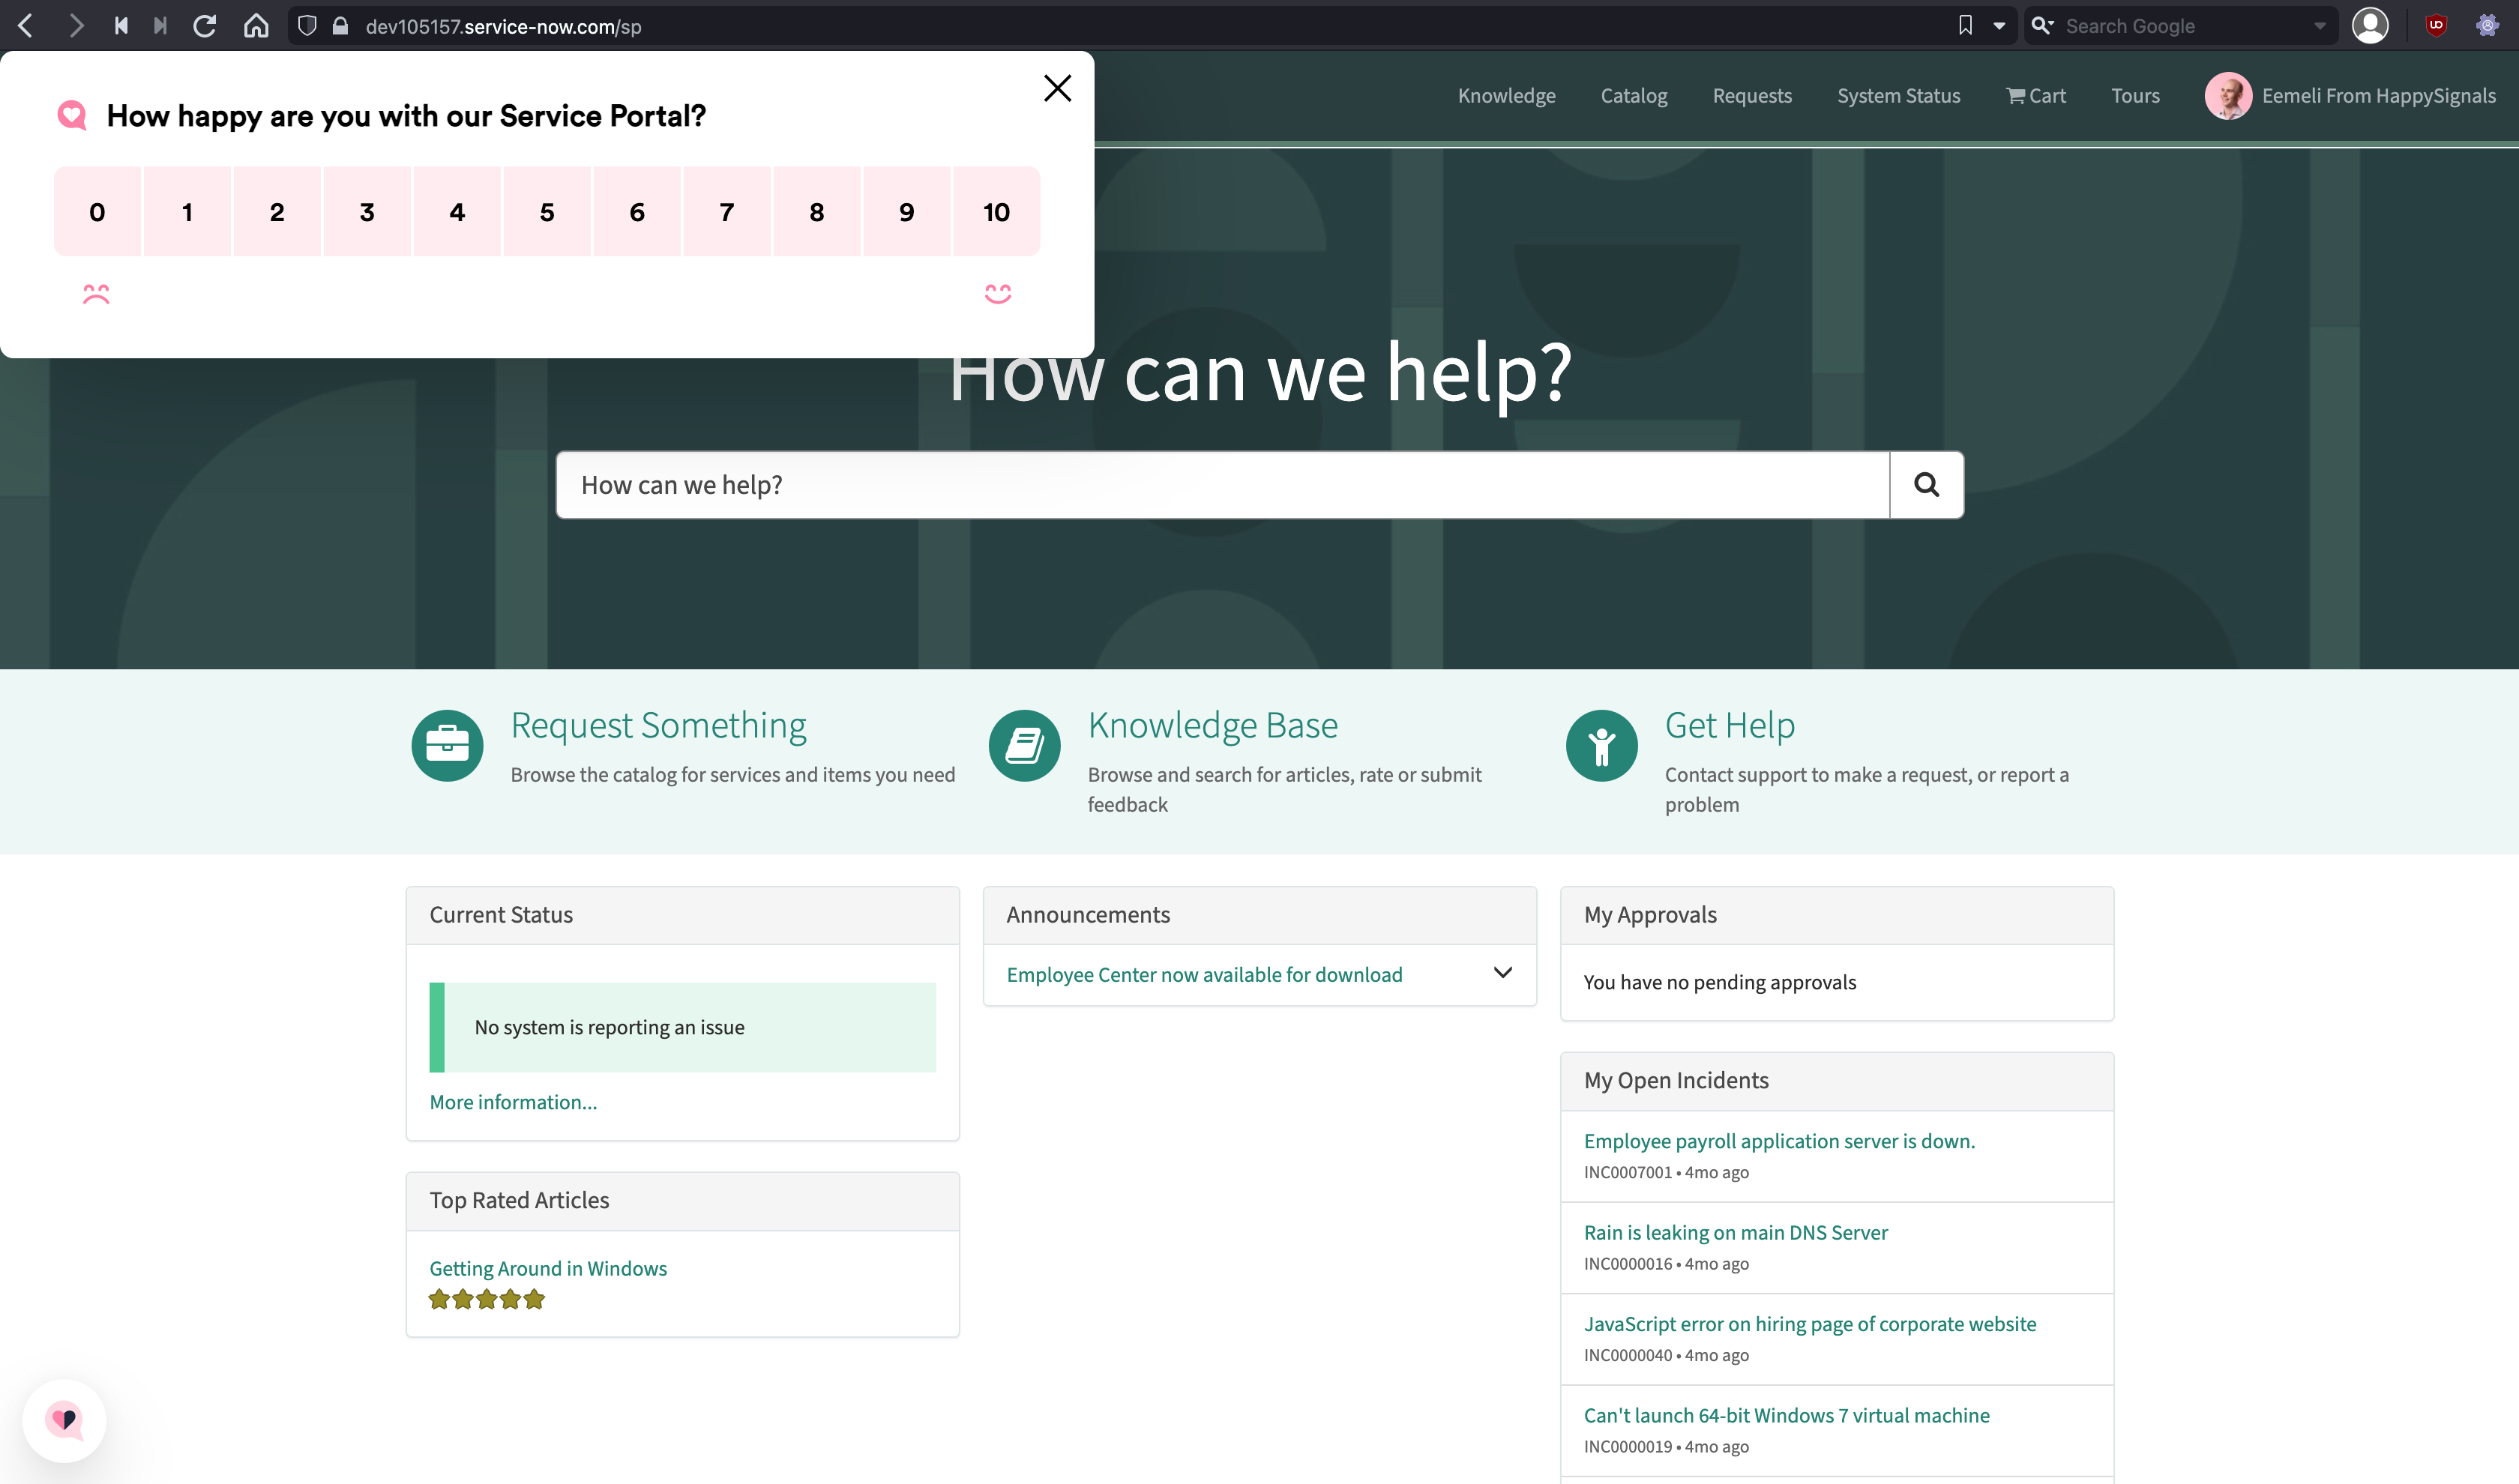
Open the page in Service Portal. Depending on your configuration, you can either use the call-to-action to bring up the feedback survey or reload the page until the survey appears on its own.
With the feedback survey visible, click on one of the rating buttons, which opens the HappySignals survey form on a new tab.
If no errors appear and you are able to submit feedback, then everything is working as it should to capture feedback.

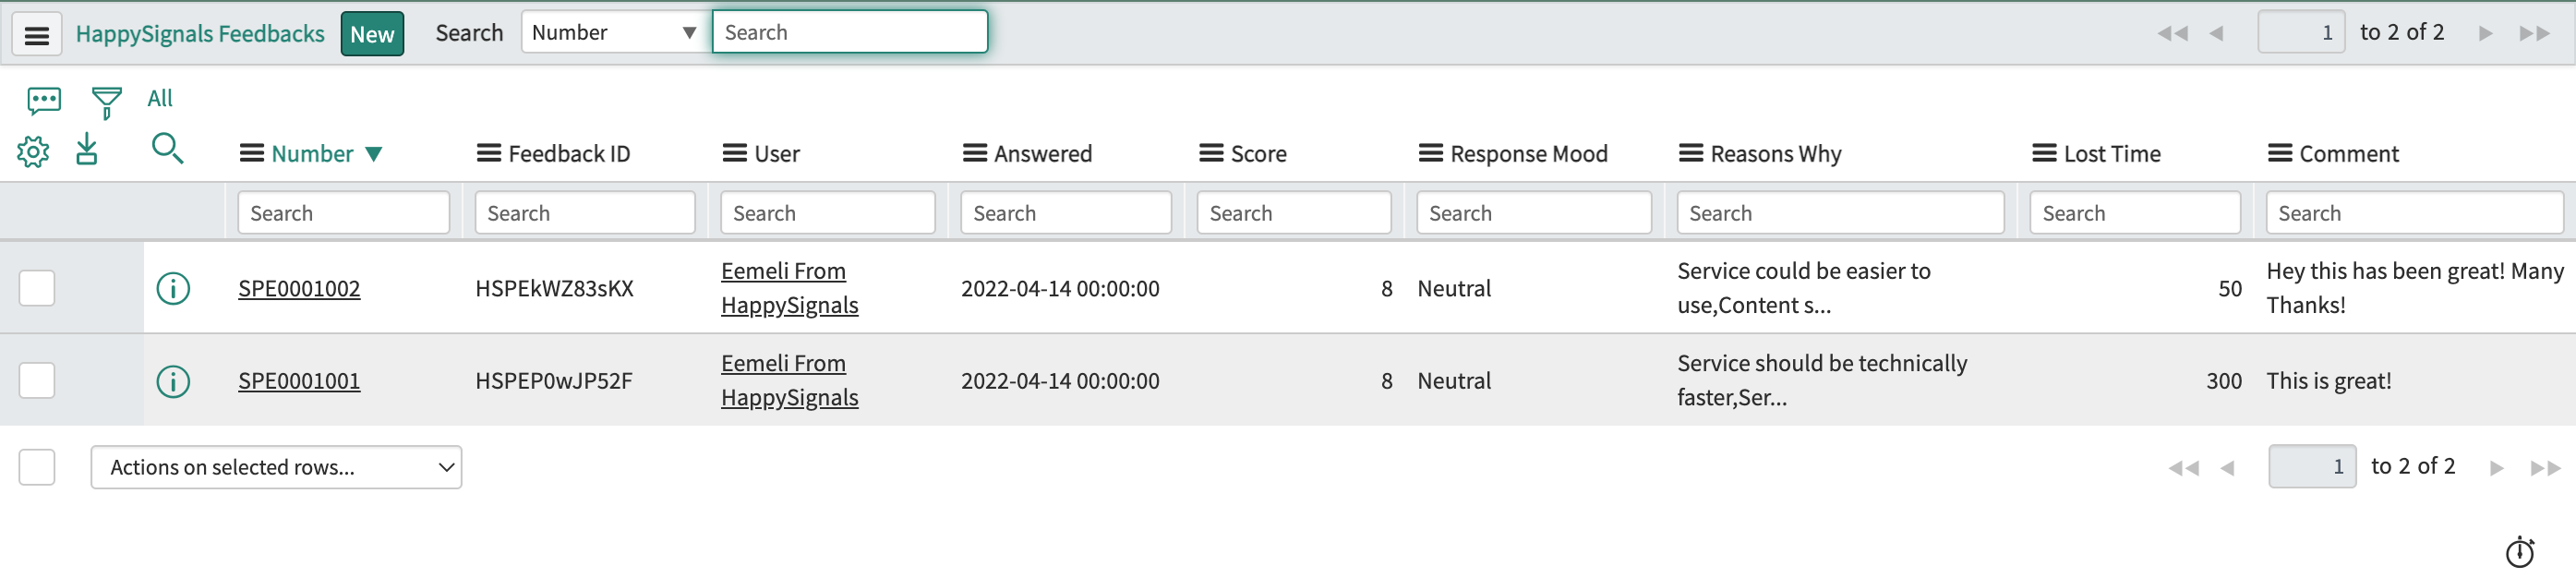
To test the two-way integration, open the "Integration Job" under the HappySignals Service Portal Experience application menu. Execute the job manually to fetch the latest feedback from the HappySignals cloud service. Once the job has run, navigate to "HappySignals Feedback" and verify that the feedback you just provided is displayed in the table.
Remember, if you encounter any issues with the Portal Experience product during or after installation, please contact us at support@happysignals.com
That's it; you have now installed and configured the HappySignals Portal Experience in your ServiceNow instance.
Note: This article is part of the HappySignals Self-Service Implementation Tour.
To proceed to the next step in the tour, click here.