HappySignals supports Single Sign-On (SSO) using the industry-standard Secure Assertion Markup Language (SAML 2.0). This allows organizations to manage HappySignals users via their existing identity infrastructure, such as Active Directory or providers like OneLogin or Okta. Other protocols (OIDC/OAuth) are not supported.
Data and privacy with SSO activated
When SSO is activated for your organization, HappySignals does not store user password information. Authentication happens via your Identity Provider (IdP).
HappySignals stores only the limited user information needed for the application:
-
First name
-
Last name
-
Email address
-
Data users create inside the platform (e.g., shortcuts, milestones)
Inactive accounts (no login in 6 months) are automatically removed, deleting all related data and private items.
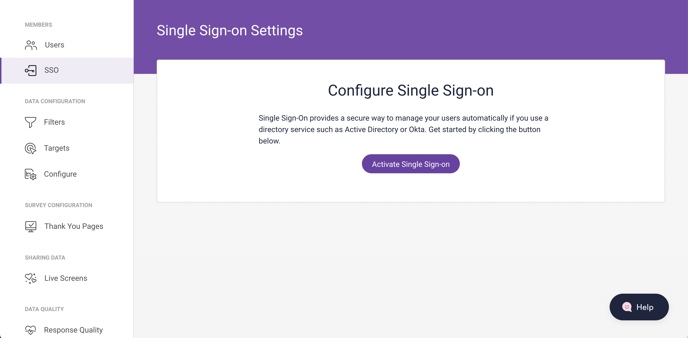
Setting up SAML-based SSO
Only users with a HappySignals Administrator role can set up SSO for the organization. If you are an admin, activate SSO by starting from Settings > SSO.
Information that your IT team needs to provide to HappySignals
To configure SSO for your organization, HappySignals needs to receive three pieces of information supplied by your IT team:
- Entity ID: Unique identifier of your IdP
- Single Sign-on Service URL: The IdP login URL (sometimes called SAML Single Sign-On URL)
- Certificate: Signing certificate in X.509 format
Alternatively, if you have a metadata XML file containing all the details above to set up SSO on the HappySignals side, upload the file using the button at the top right.
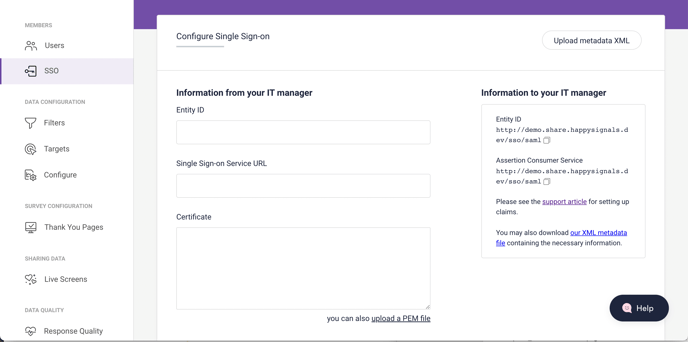
Information that your IT team needs from HappySignals
To set up SSO for HappySignals, your IT team will need the following details:
- Entity ID: the Audience URI, also known as SP Entity ID
- Assertion Consumer Service (ACS) URL for your instance
These are derived from your HappySignals instance by appending /sso/saml. For example, for:
https://acmecorp.emea.happysignals.com
Both the ACS and Audience URI will be
https://acmecorp.emea.happysignals.com/sso/saml
Additionally, the SAML server needs to be configured to provide the first and last name of the user, as well as their email address. Please ask your IT team to provide these details in the following fields (SAML Attribute Statements)
Attributes & Claims
Your IdP must provide the following attributes. Attribute names must match exactly.
| Claim name | Type | Value (example from Azure AD) |
|---|---|---|
| Unique User Identifier (NameID) | SAML | user.userprincipalname |
| SAML | user.mail | |
| SAML | user.givenname | |
| SAML | user.surname | |
| SAML | user.userprincipalname |
Notes:
-
The NameID can be any persistent identifier (UPN recommended). Since emails may change, a permanent ID is preferred.
-
If multiple values are sent, only the first value is used.
-
Unsupported attributes (e.g., roles, groups) can be sent but are ignored.
You can also download these settings in an XML file and send them to your IT team. Download our XML metadata file from the link on the right of the SSO setup page (marked below).
Alternatively, if your instance address is https://acmecorp.emea.happysignals.com, you can download the metadata by amending the address to https://acmecorp.emea.happysignals.com/sso/saml/metadata
.png?width=688&name=SSO%20setup-3%20(1).png)
Provisioning and account linking
-
SCIM provisioning: Not supported.
-
JIT (Just-in-Time) provisioning: Supported. Users are created at first login via SSO.
-
Default role: New users receive the Member role by default. This can be changed manually later.
-
Matching logic: Matching is done by email by default (case-insensitive). Other options are configurable. If no match is found, a new account is created.
-
Attribute updates: Updated information (e.g., changed email or name) is overwritten during the next login.
-
Deprovisioning: Users must be removed manually via the HappySignals UI or API. Existing sessions remain active until expiry.
Protocols, flows, and logout
-
Supported protocol: SAML 2.0 only
-
Flows: IdP-initiated and SP-initiated login supported
-
RelayState: If sent in IdP-initiated flow, it is ignored
-
Bindings: HTTP-POST binding supported for AuthnRequest/Response
-
Single Logout (SLO): Not supported (no logout endpoint)
Certificates and time settings
-
Signing: HappySignals verifies signatures if the IdP signs assertions or responses. Signing is recommended but not mandatory.
-
Encryption: Assertion encryption is not supported.
-
Certificate rollover: Only one certificate can be active at a time. Rollover requires a manual update.
-
Clock skew tolerance: ±300 seconds.
Sessions and user experience
-
Session timeout: Sessions follow HappySignals’ application session rules (see admin settings for details).
-
Errors: Failed logins return an error page with a correlation ID for troubleshooting. Support may request this ID.
Environments and multi-IdP
-
Multiple environments: Use separate apps for dev, test, and prod, each with its own EntityID/ACS URL.
-
Multiple IdPs: Not supported. Each HappySignals tenant connects to one IdP.
Logging and troubleshooting
-
Logging: Both successful and failed SSO logins are logged. Admins can see basic login events in the UI; detailed traces are available via Support.
-
Diagnostics: For debugging, use incognito mode, clear cookies, and capture a SAML trace with browser tools or IdP logs. Common issues:
-
Incorrect attribute names
-
Certificate mismatch
-
Clock skew beyond 5 minutes
-
Security and compliance
-
MFA: Must be enforced at the IdP. HappySignals passes through the authentication result.
-
Rate limiting / protection: Standard platform protections apply at SSO endpoints.
This completes the setup guide for configuring SAML-based SSO with HappySignals.