If you encounter any issues with the Service Experience product during or after installation, please contact us on support@happysignals.com
Before you start:
There are a couple of things to note before starting the installation process.
- make sure you have access to the HappySignals cloud service
- make sure you have received the following information from HappySignals:
- End-point URLs to your HappySignals cloud services.
Generally, the end-point URL looks something like: https://[your company name.environment].happysignals.com - A shared secret, which is used to make sure generated feedbacks come from your environment
- API-key for two way integration between HappySignals cloud service and your Freshservice Instance
- End-point URLs to your HappySignals cloud services.
- you have received the application package from HappySignals
- you have your FreshService API key (please see FreshService instructions for getting your API key)
Install the application as a custom app
Start the process by going to the Admin interface and navigating to the "Apps" section.
Click the "Go to Developer Portal" link on the top right sidebar of the Apps page.
In the "Developer Portal" open a dropdown (see image below) by clicking the down arrow next to your profile icon.
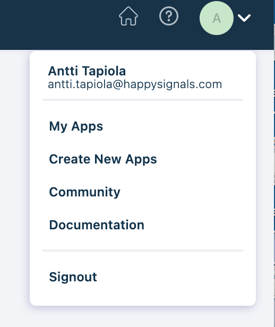
From there click "Create New Apps", and select "Custom App" in the pop-up window.
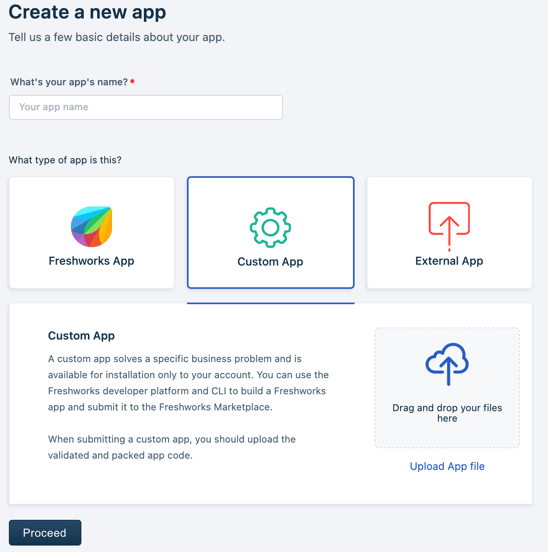
Drag and drop or select "Upload app file" and select the application package delivered by HappySignals.
Fill in the required application details, you can use the values in the image below. 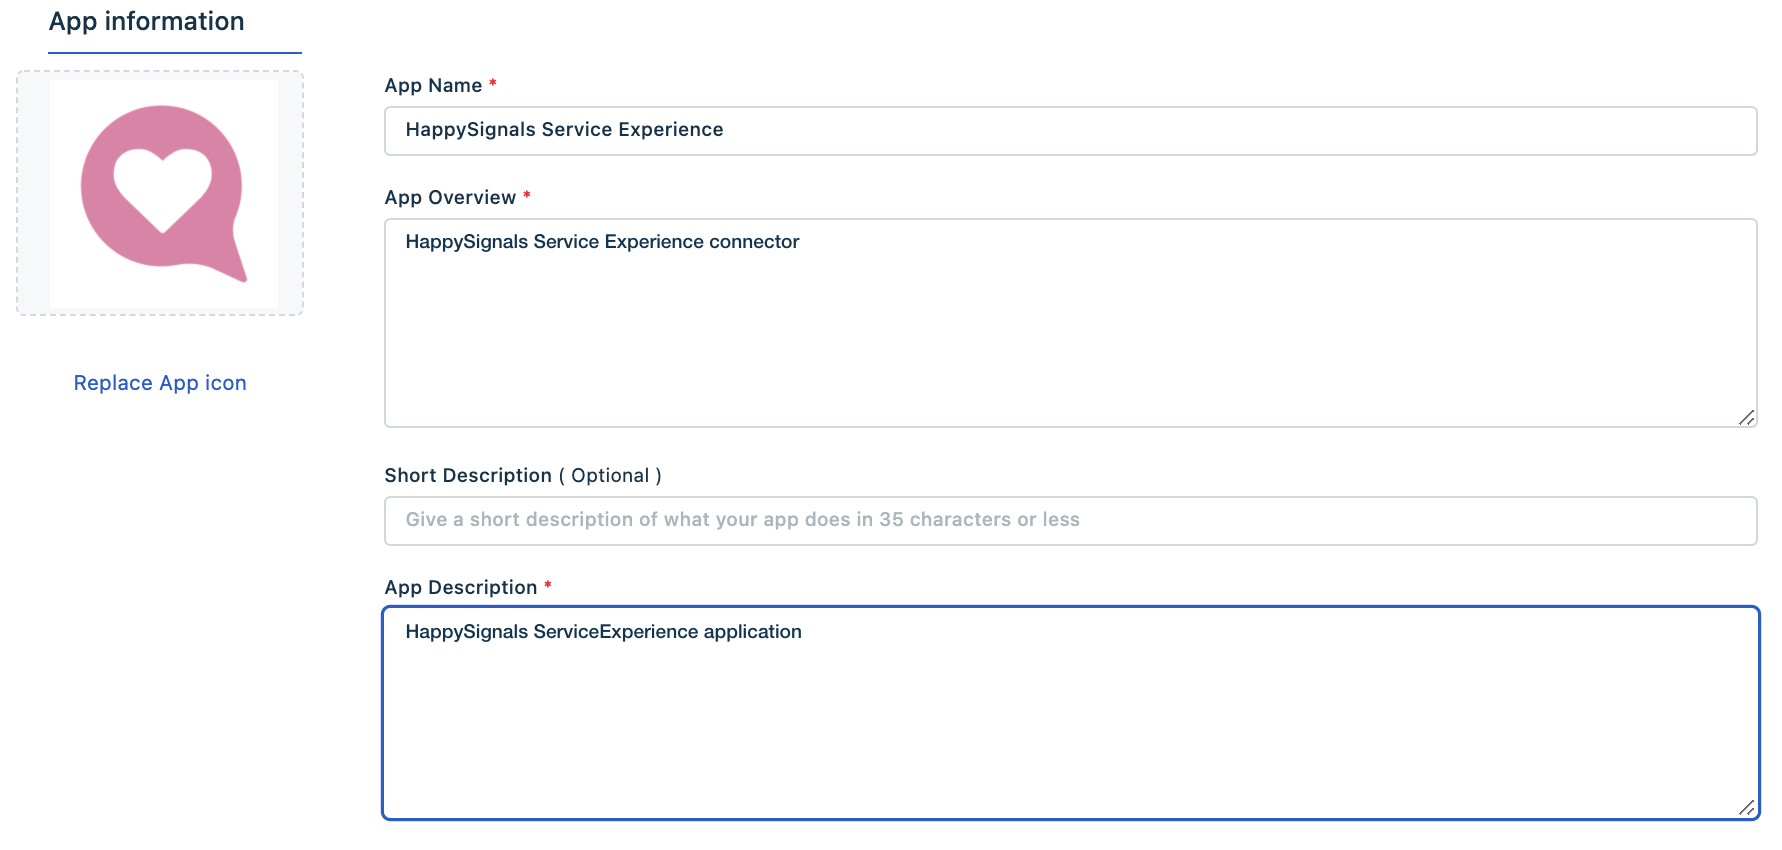

Click "Save and Publish" at the top of the page to publish it into your private custom application list. Publishing the app may take a couple of minutes.
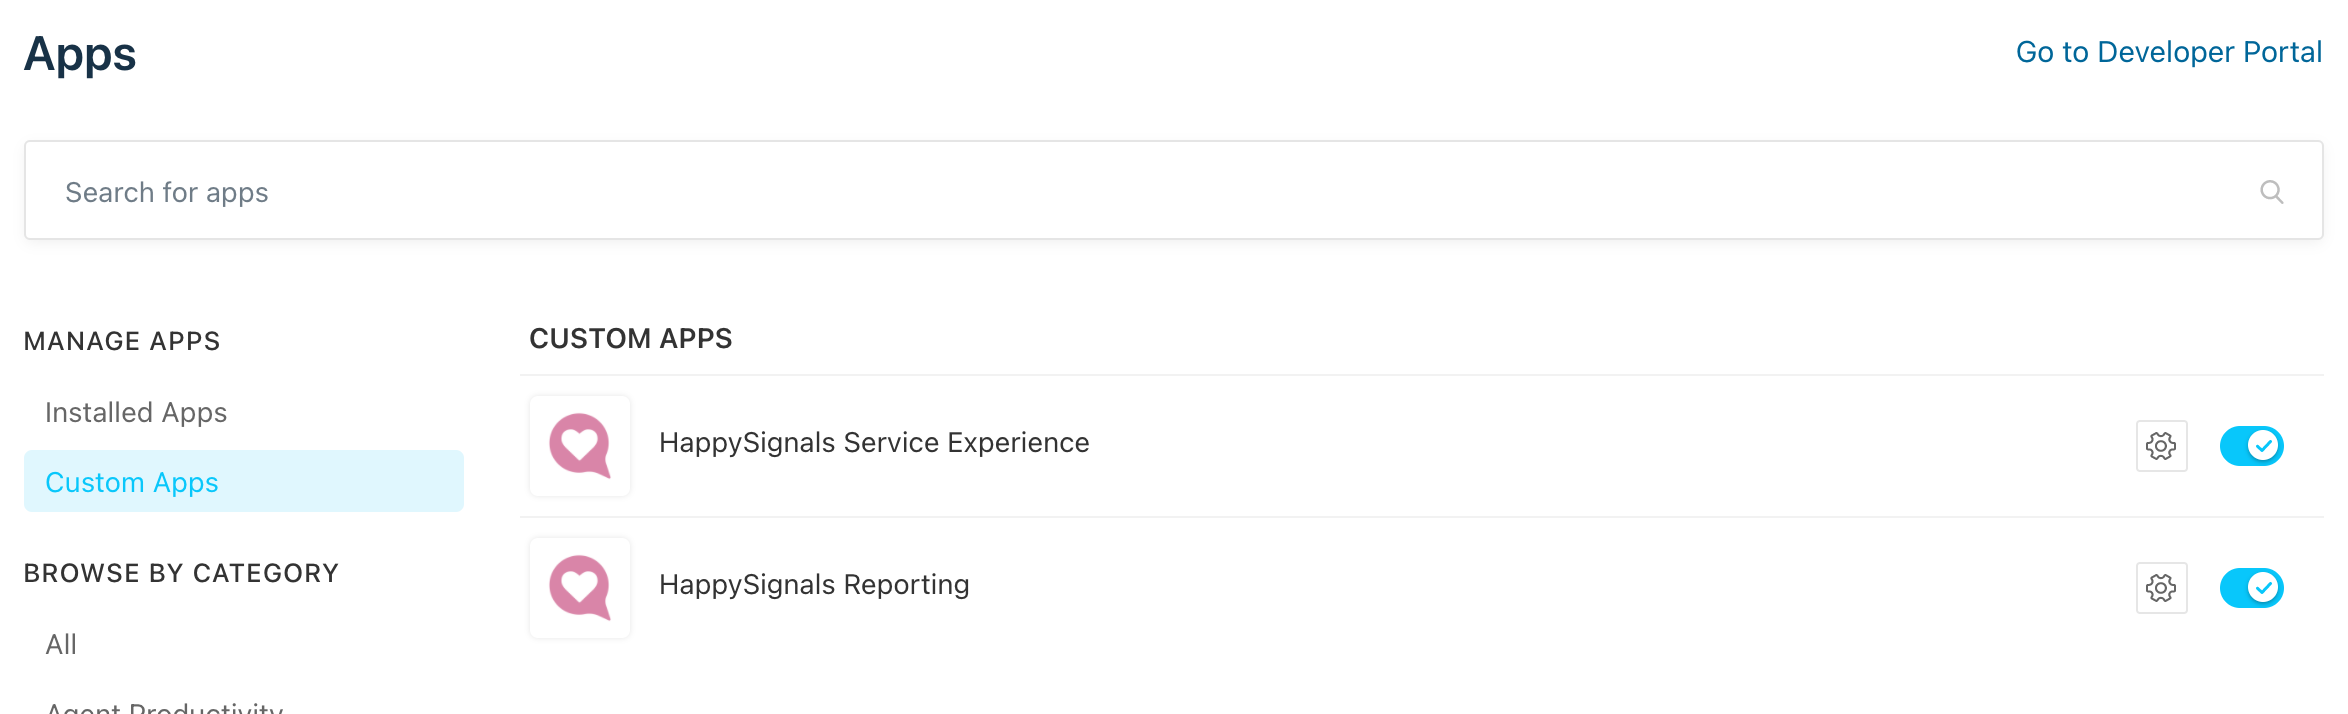
Navigate back to the "Apps" section, select Custom Apps and click "HappySignals Service Experience" application listed, select "Install" to install the application.
Fill in the application configurations in the form that opens:
| Field | Description |
| FreshService API key | API key that will be used by the application to interact with your FreshService helpdesk. |
| HappySignals URL | This is the end-point URL to your HappySignals cloud service. Generally, this looks something like: https://[your company name].happysignals.com |
| Shared secret | This is the shared secret provided to your company by us. |
| HappySignals API key | This is the API key that is required for two-way integration between HappySignals cloud service and FreshService. |
You may ignore the settings for "Custom mappings" for now, the application comes with a preconfigured set of field mappings to get you started.
If you wish to configure the colour of the voting buttons in the outgoing email, enter a HTML format colour code or colour name in the "Button colour" box, E.g. "red" or "#ef80b2". The default colour is our friendly pink.
Click "Install" to save the settings and install the application.
Configure your FreshService helpdesk for HappySignals
In order to send out voting buttons in the notification emails and to store the feedback details new fields need to be created to the FreshService ticket-object.
To do this, go to the Admin interface and navigate to the "Form fields" section and add new fields to the ticket with the following detail:
|
Field name |
Field Type |
Display for Requesters |
Note |
|
HappySignals Buttons |
Paragraph Text |
No |
Hide with business rule. |
|
HappySignals Lost Time |
Single Line Text |
No |
Disable with business rule. |
|
HappySignals Factors |
Paragraph Text |
No |
Disable with business rule. |
|
HappySignals Comment |
Paragraph Text |
No |
Disable with business rule. |
|
HappySignals Profile |
Single Line Text |
No |
Disable with business rule. |
|
HappySignals Score |
Dropdown |
No |
Add choices from 0 to 10 Disable with business rule. |
You can verify that the installation was successful so far by creating a test ticket for yourself, once the ticket is saved. The HappySignals buttons field should be updated with HTML markup automatically. Please note that you will need to reload the ticket page after saving in order to have the updated field value displayed.
Configure email notifications
The last step is to configure the email notification sent when your agents resolve tickets to include the voting buttons.
Again, under the "Admin" section navigate to "Email Notifications" and click "Agent solves the Ticket" to edit the template.
Add the voting buttons to a suitable place in the template by clicking "Insert Placeholders" to open a list of placeholders available. Find the "HappySignals Buttons" placeholder under the "Ticket Fields" section and insert the placeholder by clicking the button.
The placeholder inserts only a row of buttons, we recommend that a prompt similar to "Please rate your service experience by clicking one of the following numbers, where 0 is poor and 10 is awesome" is included to properly frame the question for the receiver.
Once the template is saved, any ticket that is resolved after that point will have the voting buttons added and the receiver can use those to rate their service experience via the HappySignals survey. The results are updated in near-realtime in the HappySignals Analytics portal