
A short guide how to install and configure HappySignals Service Experience integration for Jira Server using installation package from HappySignals.
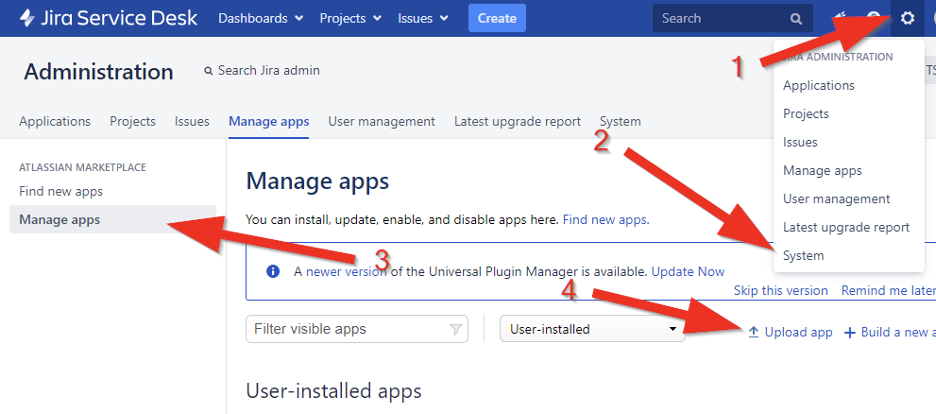
Upload plugin to Jira
Navigate to Manage app menu and click Upload app. It will open a dialog that you use to upload employeeExperience-1.3.2 package to Jira.
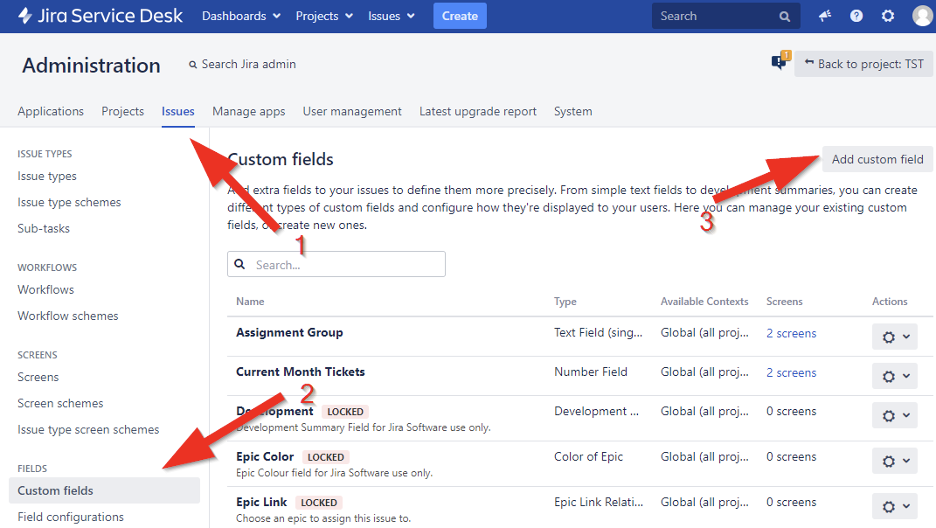
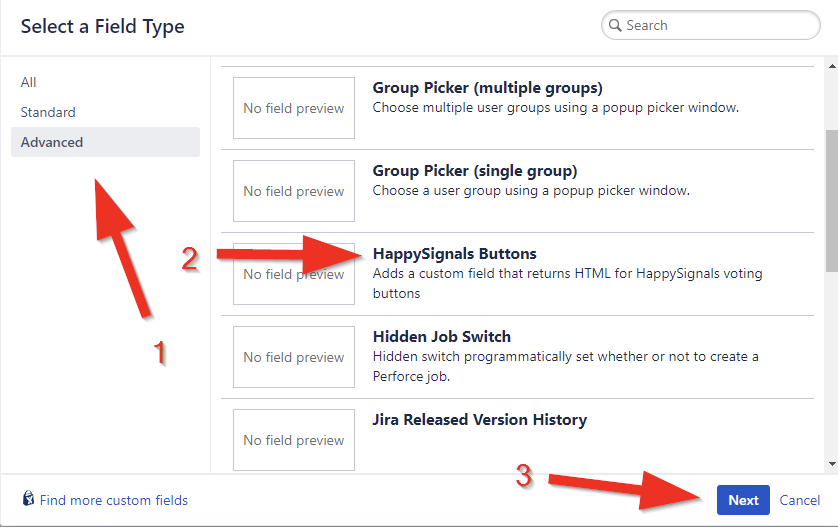
Add HappySignals custom field for Issue
HappySignals plugin adds two new custom field types for Issue: HappySignals Buttons and HappySignals Link. Both of those types are read only fields. Buttons prints HTML used to show voting buttons in email notifications. Link prints plain link to HappySignals survey without any value. It depends on customer needs and Jira configuration which of those types must be used.
To be able to those types in email templates a new custom field of that type must be added to Issue. In production, this field should not be added to any screens. See the two pictures below for the details how to add it.
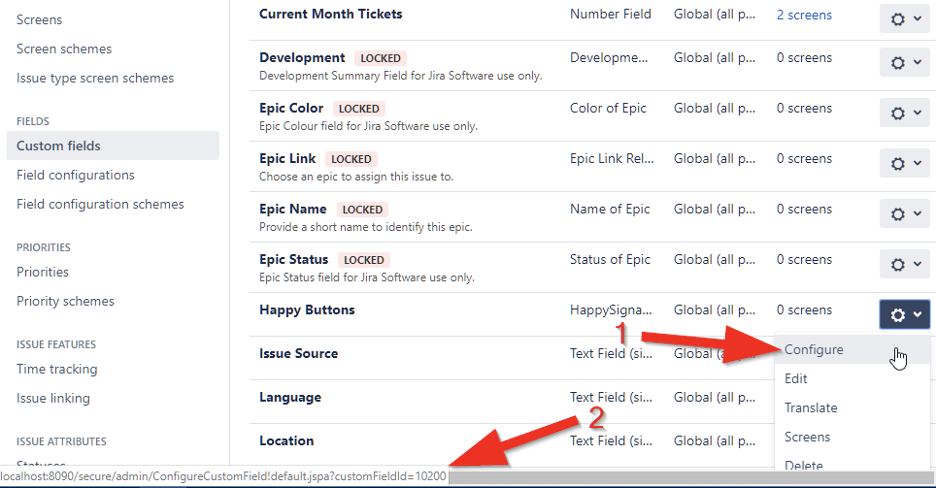
Later you will need the ID of newly added custom field. The following picture shows how you can find it. In this case the ID is 10200.
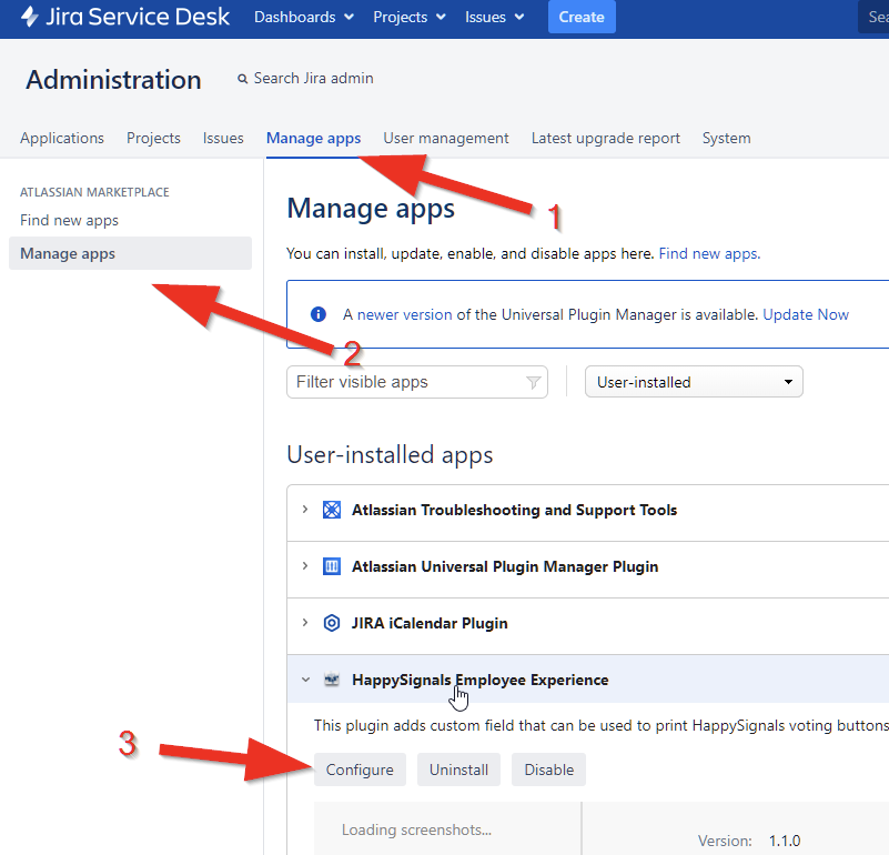
Configure HappySignals plugin
The following picture shows how you can open HappySignals config page.
Project configurations
In version 1.3.0 we added support project specific configurations. This means that you can add separate settings for each of your Jira projects. When feedback email is sent, project specific settings are used to resolve parameter values if issue’s project has settings configured. If there are no project specific settings, default settings are used. Default settings must always be configured first before project specific settings can be added.
Properties page shows configurations for a project selected from the Project dropdown menu. New project settings can be added by clicking Add project settings button seen in the following picture.
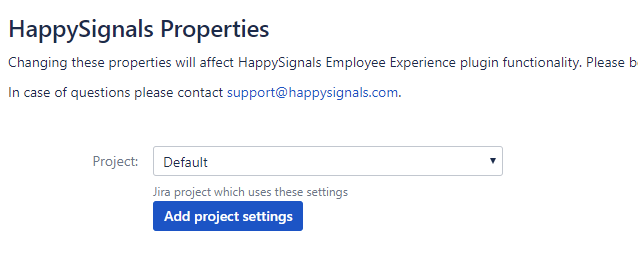
Button opens a blank settings page. You must select target project from Project dropdown menu. This menu lists all your Jira projects which doesn’t already have a configuration. You can copy settings from an existing project by selecting it from Copy settings from dropdown menu. After selection all settings are copied from that project and after that you can modify them as you need.

General settings
Config page contains three general settings. HappySignals should provide Endpoint and Proof of origin values. Buttons color is HTML color code for voting buttons shown in the email notification.
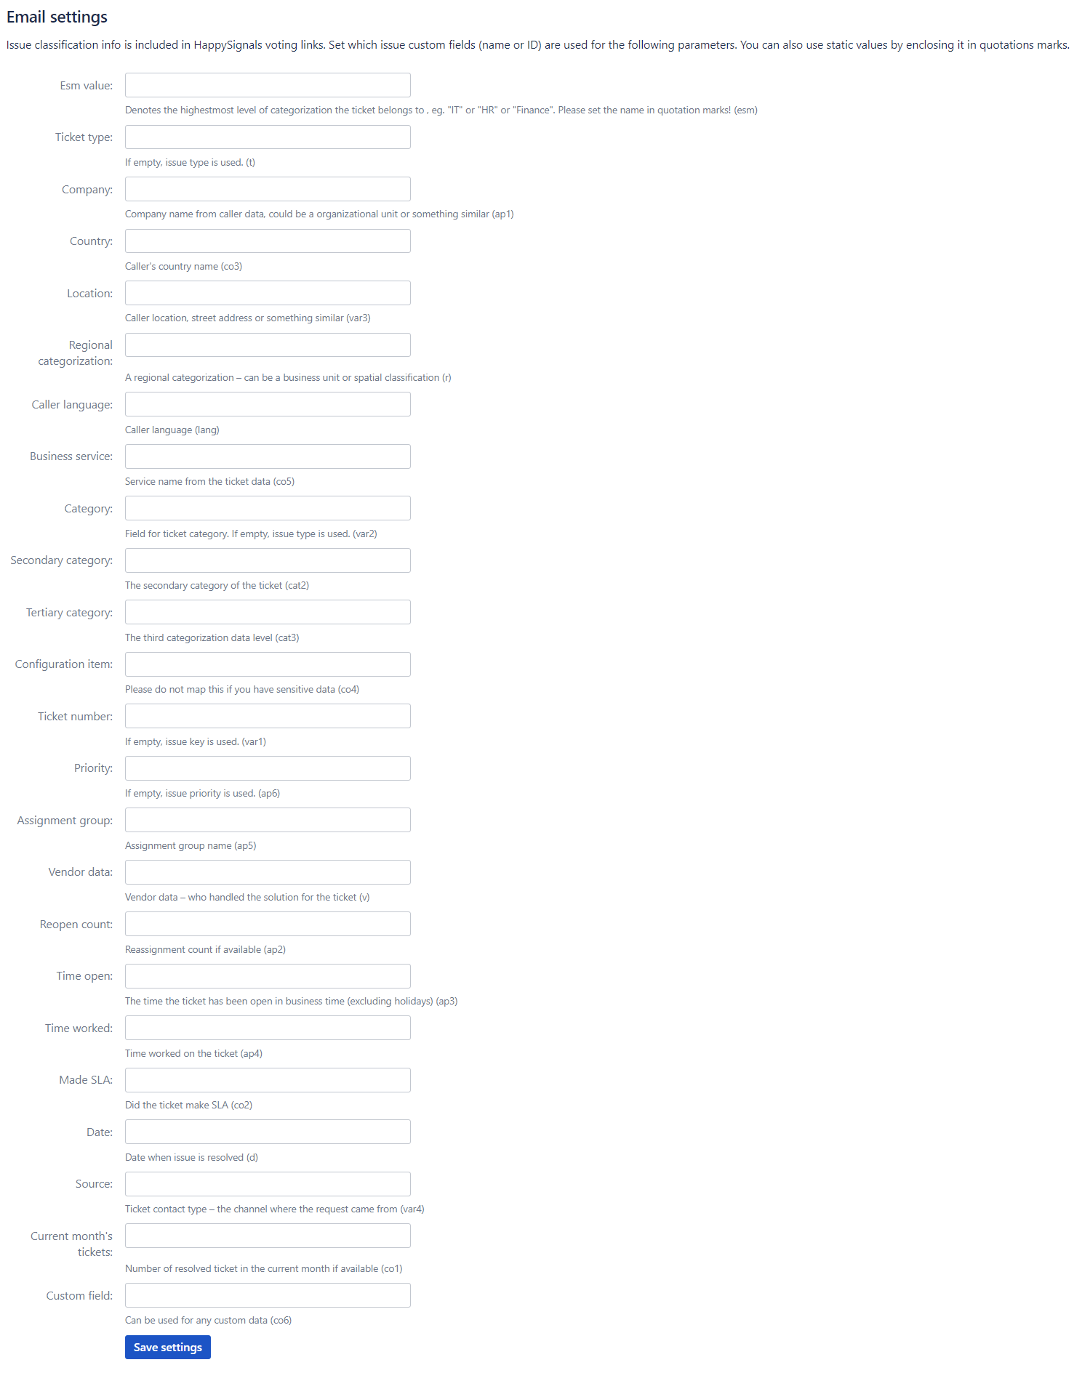
Email settings
In Email settings section you can configure which issue fields are sent to HappySignals as classification information. Currently, only issue’s custom fields can be used. Fields are configured by adding field name or ID to the setting text box. Instructions how to find custom field ID is presented in chapter Add HappySignals custom field for Issue.
You can also use static values by enclosing it in quotations marks. There is also #PROJECTKEY symbol that can be used for the any of settings to. If this is used issue’s project key is used as a value for the setting.
Some of the settings has default values if they are left empty. So, they can be configured manually but if they are left empty, following values are used:
| HappySignals parameter | Issue field |
| var1 | Key |
| var2 | Type |
| t | Type |
| ap6 | Priority |
| d | Current timestamp |
In the following picture you can see all configurable email settings.
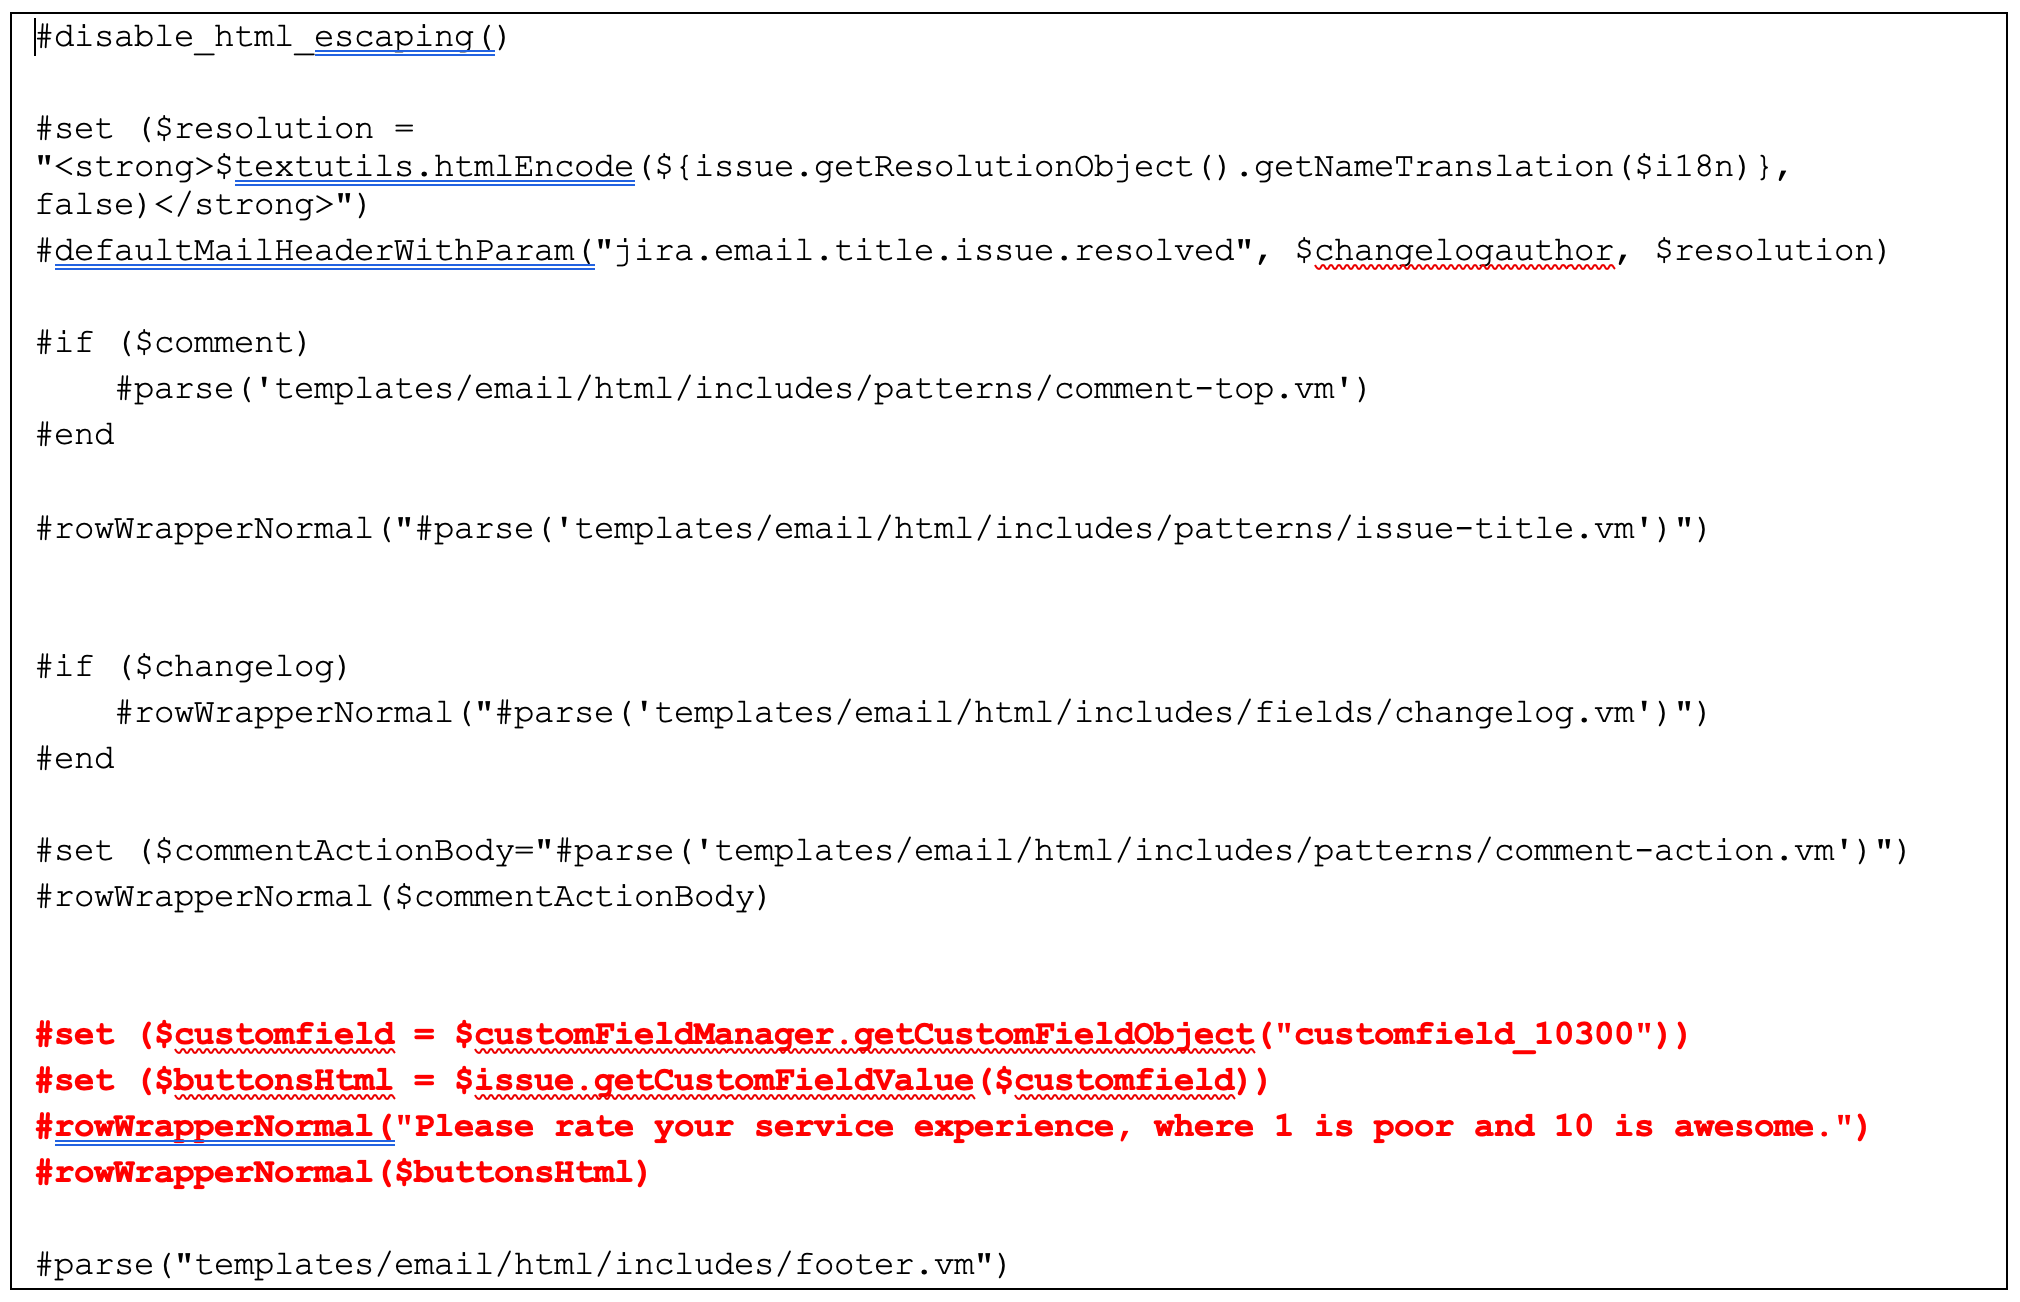
Modify email notification template
Email notification template(s) must be modified to include HappySignals voting buttons. It depends on customer in which notification they want to add the voting buttons. Typically, buttons are added to issue resolved HTML template (issueresolved.vm). HTML email notification templates can be found in this path jira\webapp\WEB-INF\classes\templates\email\html in Jira installation directory.
Below you can see an example of issueresolved.vm template file that contains script that prints HappySignals buttons. It’s based on default template and only four custom lines (red font) are added. Added script reads the value of HappySignals custom field and prints it to the email notification. Please note that custom field ID must be replaced with the value you read in chapter Add HappySignals custom field for Issue.
Test email notifications
After all steps above are done, email notification should be tested. Those are tested just by creating an issue, resolving it and checking that issue caller gets email notification that contains HappySignals buttons. This of course depends on Jira email notification configuration who should receive the emails.