Before you begin
Before you begin, please note that:
- you need to have IT Experience Administrator or Administrator role in ServiceNow
- you need to have access to the "Users" and "Groups" tables in ServiceNow
- the notification for your selected survey area must be activated in the ServiceNow instance
Set up a new survey
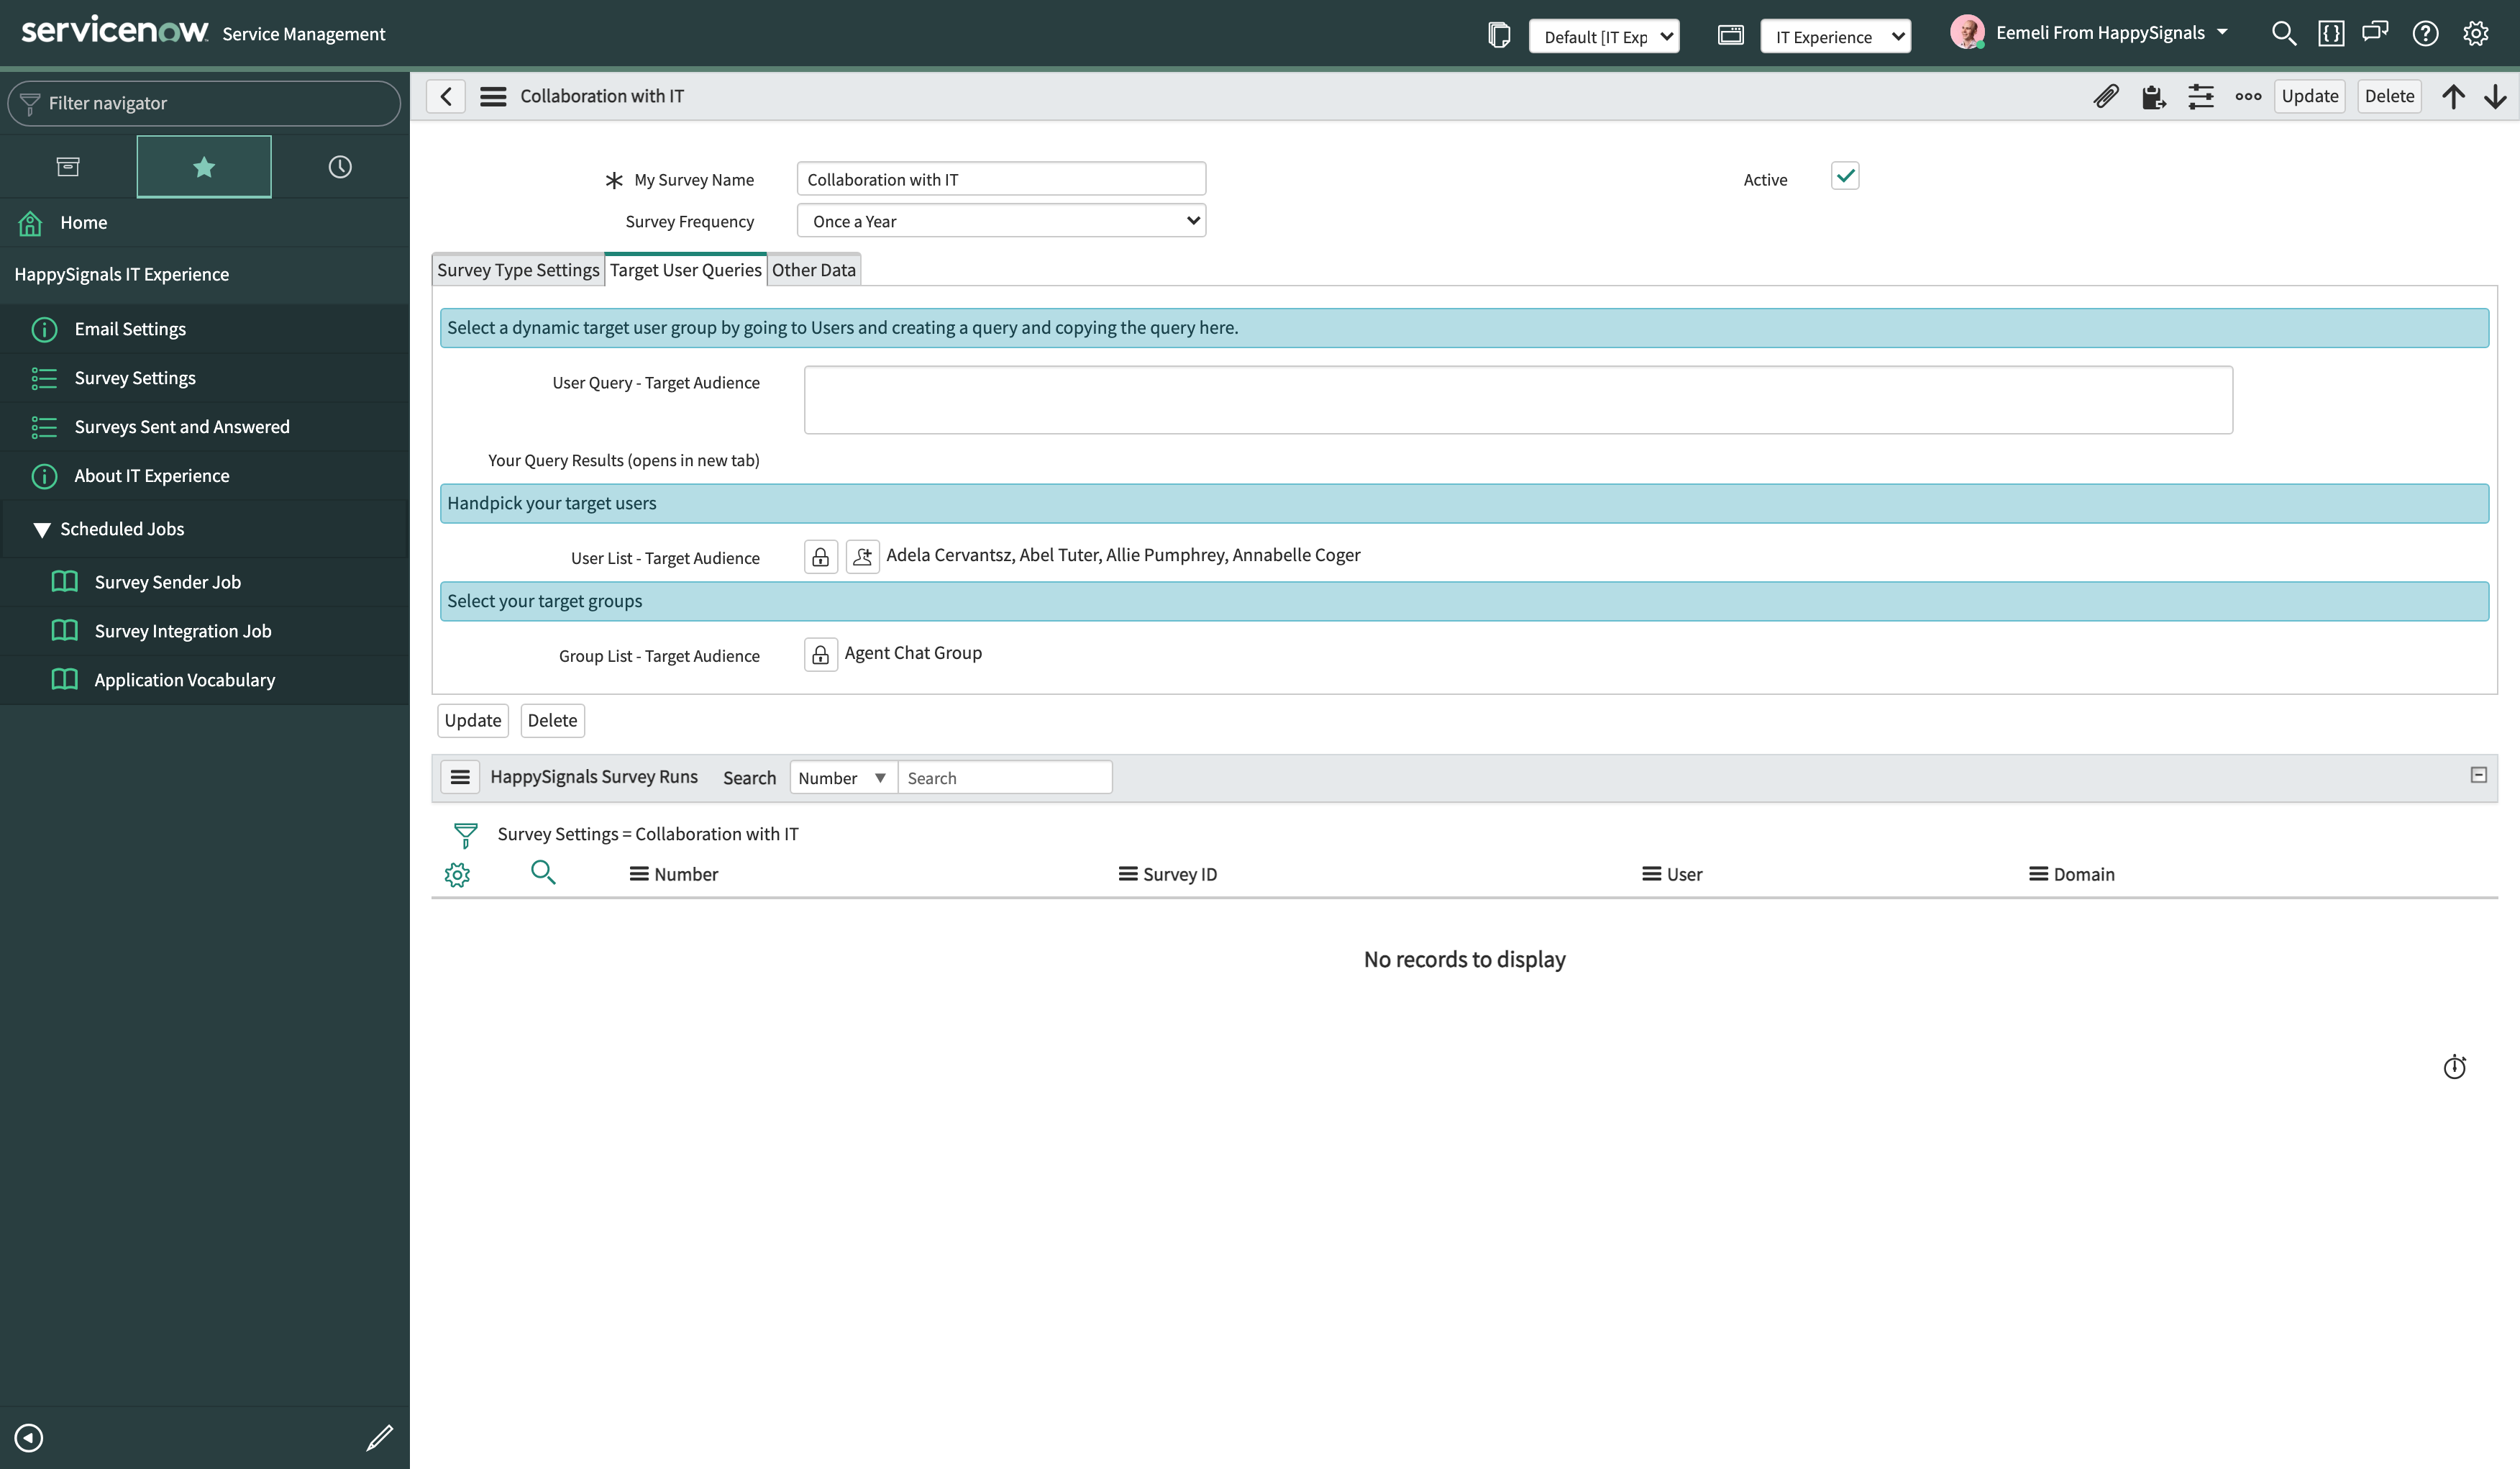
To set up a new survey, use the ServiceNow application navigator to open the "Survey Settings" module in the HappySignals IT Experience application.
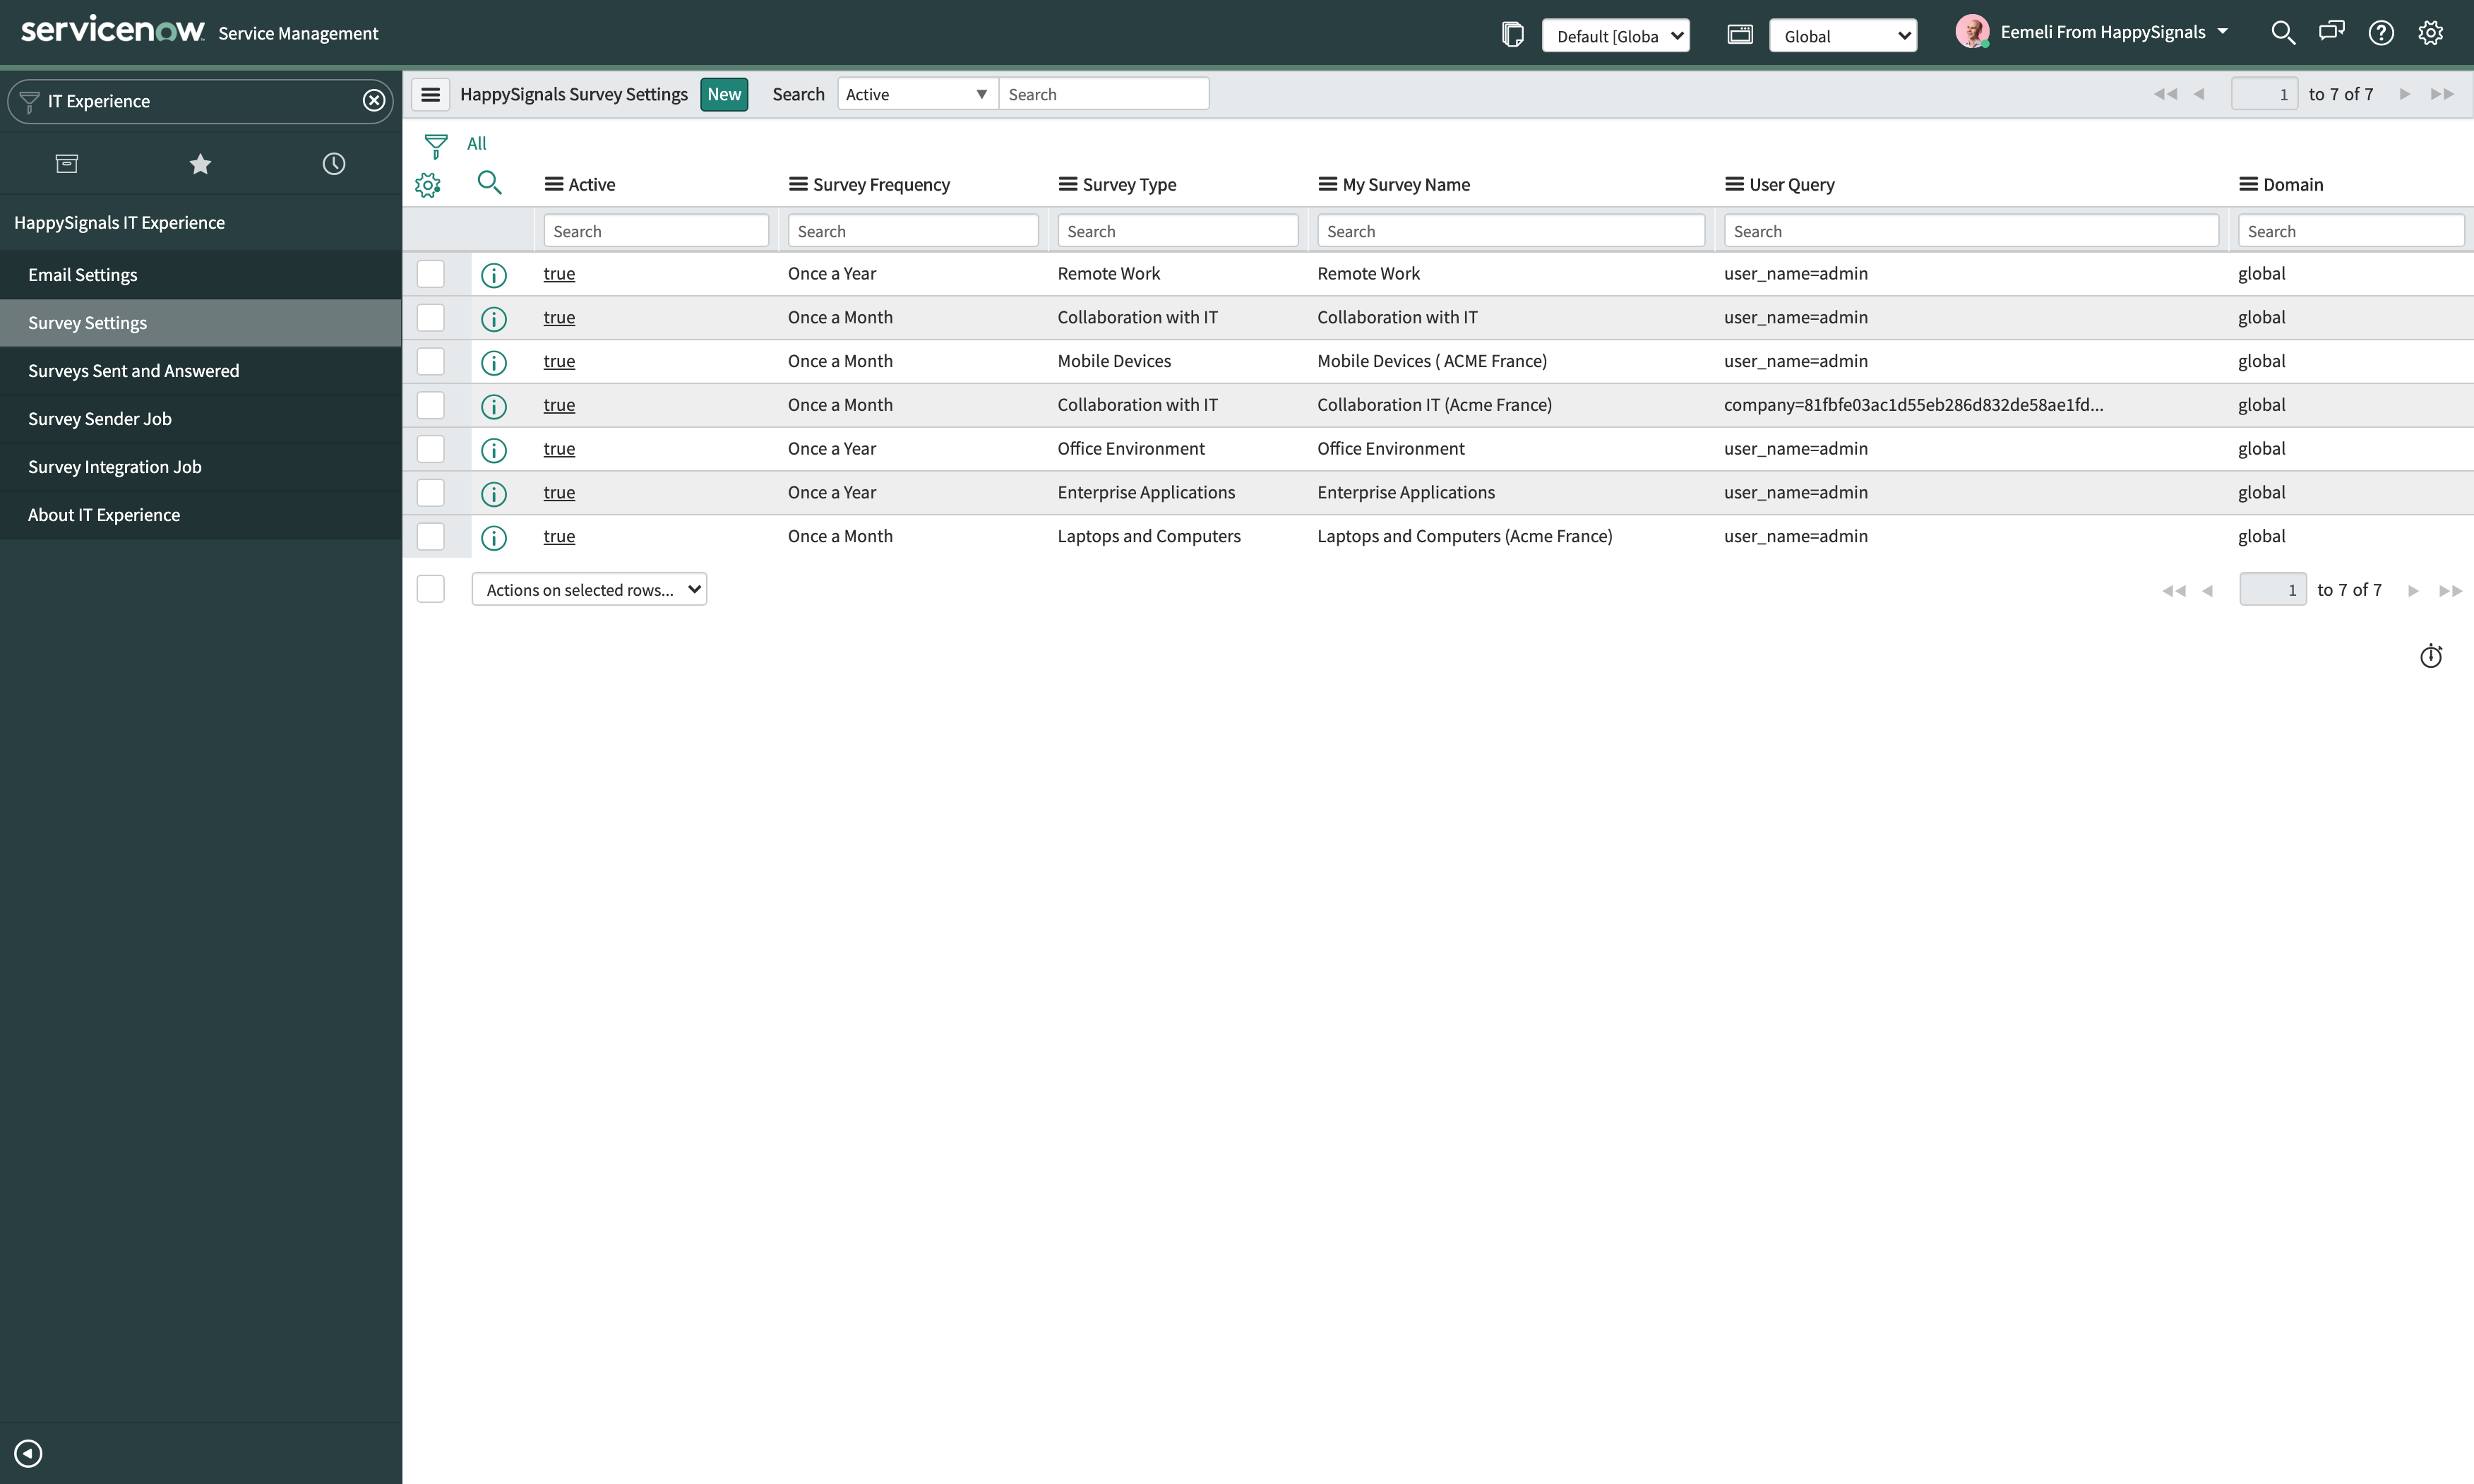
This opens a list of surveys that have been created in your ServiceNow. The list contains both currently active surveys and also surveys that are inactive.
To set up a new survey, click on the "New" button on the top of the list. This will open a new survey record. In the survey record
- select the desired survey area on the "Survey Type" field
- provide a descriptive name for your survey on the "My Survey Name"
- select the survey frequency on "Survey Frequency"
The survey frequency defines how often the users targeted by this survey will receive it. The target audience will continue receiving this survey with the selected frequency until the survey is deactivated.
To save your changes right-click on the grey banner area and select the "Save" option on the dropdown menu.
Define your target audience and create target user queries
Now that you have done the basic setup for your survey, it's time to build the target user queries that define the target audience for your survey. This is done in the "Target User Queries" section of the survey setting record.
The IT Experience application provides you with three different methods to define your survey target audience. You can use different methods independently or apply multiple methods in combination when creating your audience. When using multiple methods in combination, there is no need to worry about users being included in multiple different queries as users will only receive each survey once during the survey frequency period.
User query - Target Audience
The "User query" field allows you to use an encoded query to define a target group for the survey. The query targets the "Users" table [sys_user], so in order to generate the query, first, you need to navigate to the "Users" table.
We suggest that you open the user list in a new tab or a window next to your survey record.
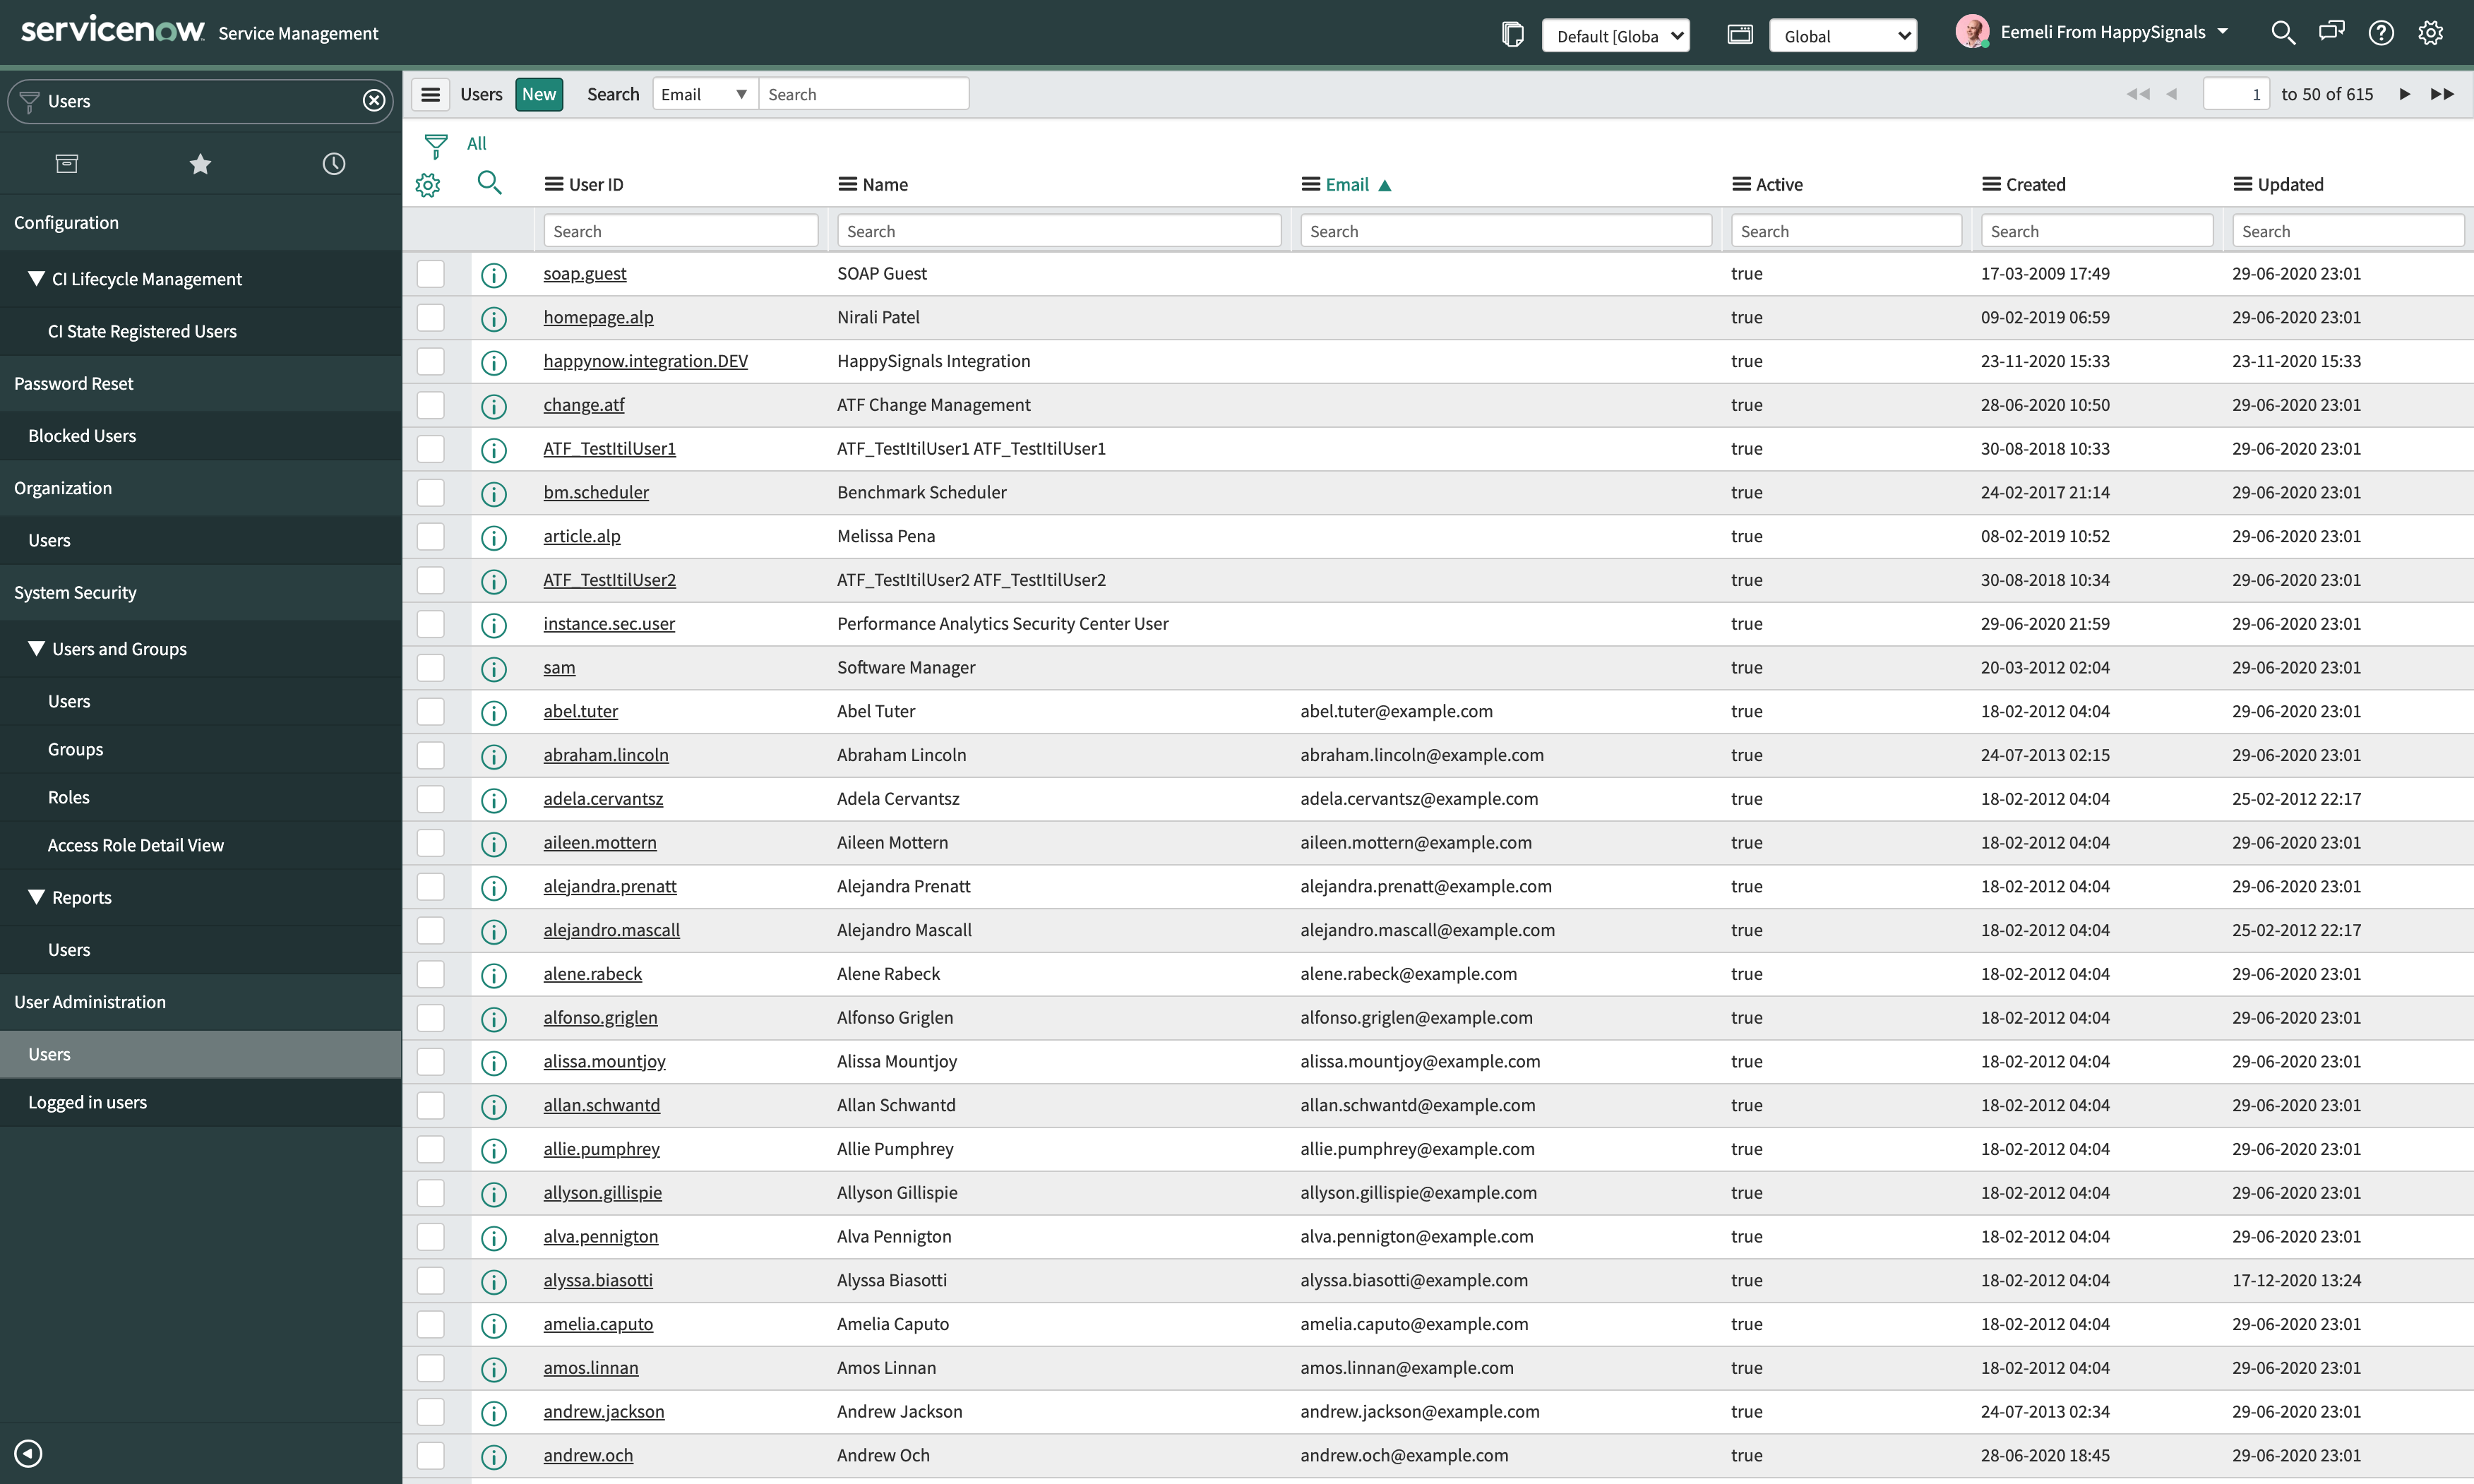
In the "Users" table apply filters to the user list until you have your desired target group in the list. Then right-click on the last filter breadcrumb on the right and select the "Copy query" on the menu that opens.
Now that you have the user query copied in the clipboard you can head back to the survey setting record and paste the query to the "User Query" field.
User List - Target Audience
The "User List" field allows you to select individual users to your survey target group. To add individual users, first, click on the small lock icon ![]() which makes the contents of the field editable.
which makes the contents of the field editable.

To include a specific user in the field you can start typing on the search field and suggestions matching what you have typed will start to show up. Once you click on one of the suggestions the user will be added to the field. Alternatively, you can click on the magnifying glass icon to bring up a list of users and select a user on the list to be added to the field.

If you want to add multiple users at one go, you can click on the group icon ![]() to open up a modal where you can select and add multiple users at once. Once you have you have added all the users you want in the modal click the "Save" button to add them to the field.
to open up a modal where you can select and add multiple users at once. Once you have you have added all the users you want in the modal click the "Save" button to add them to the field.
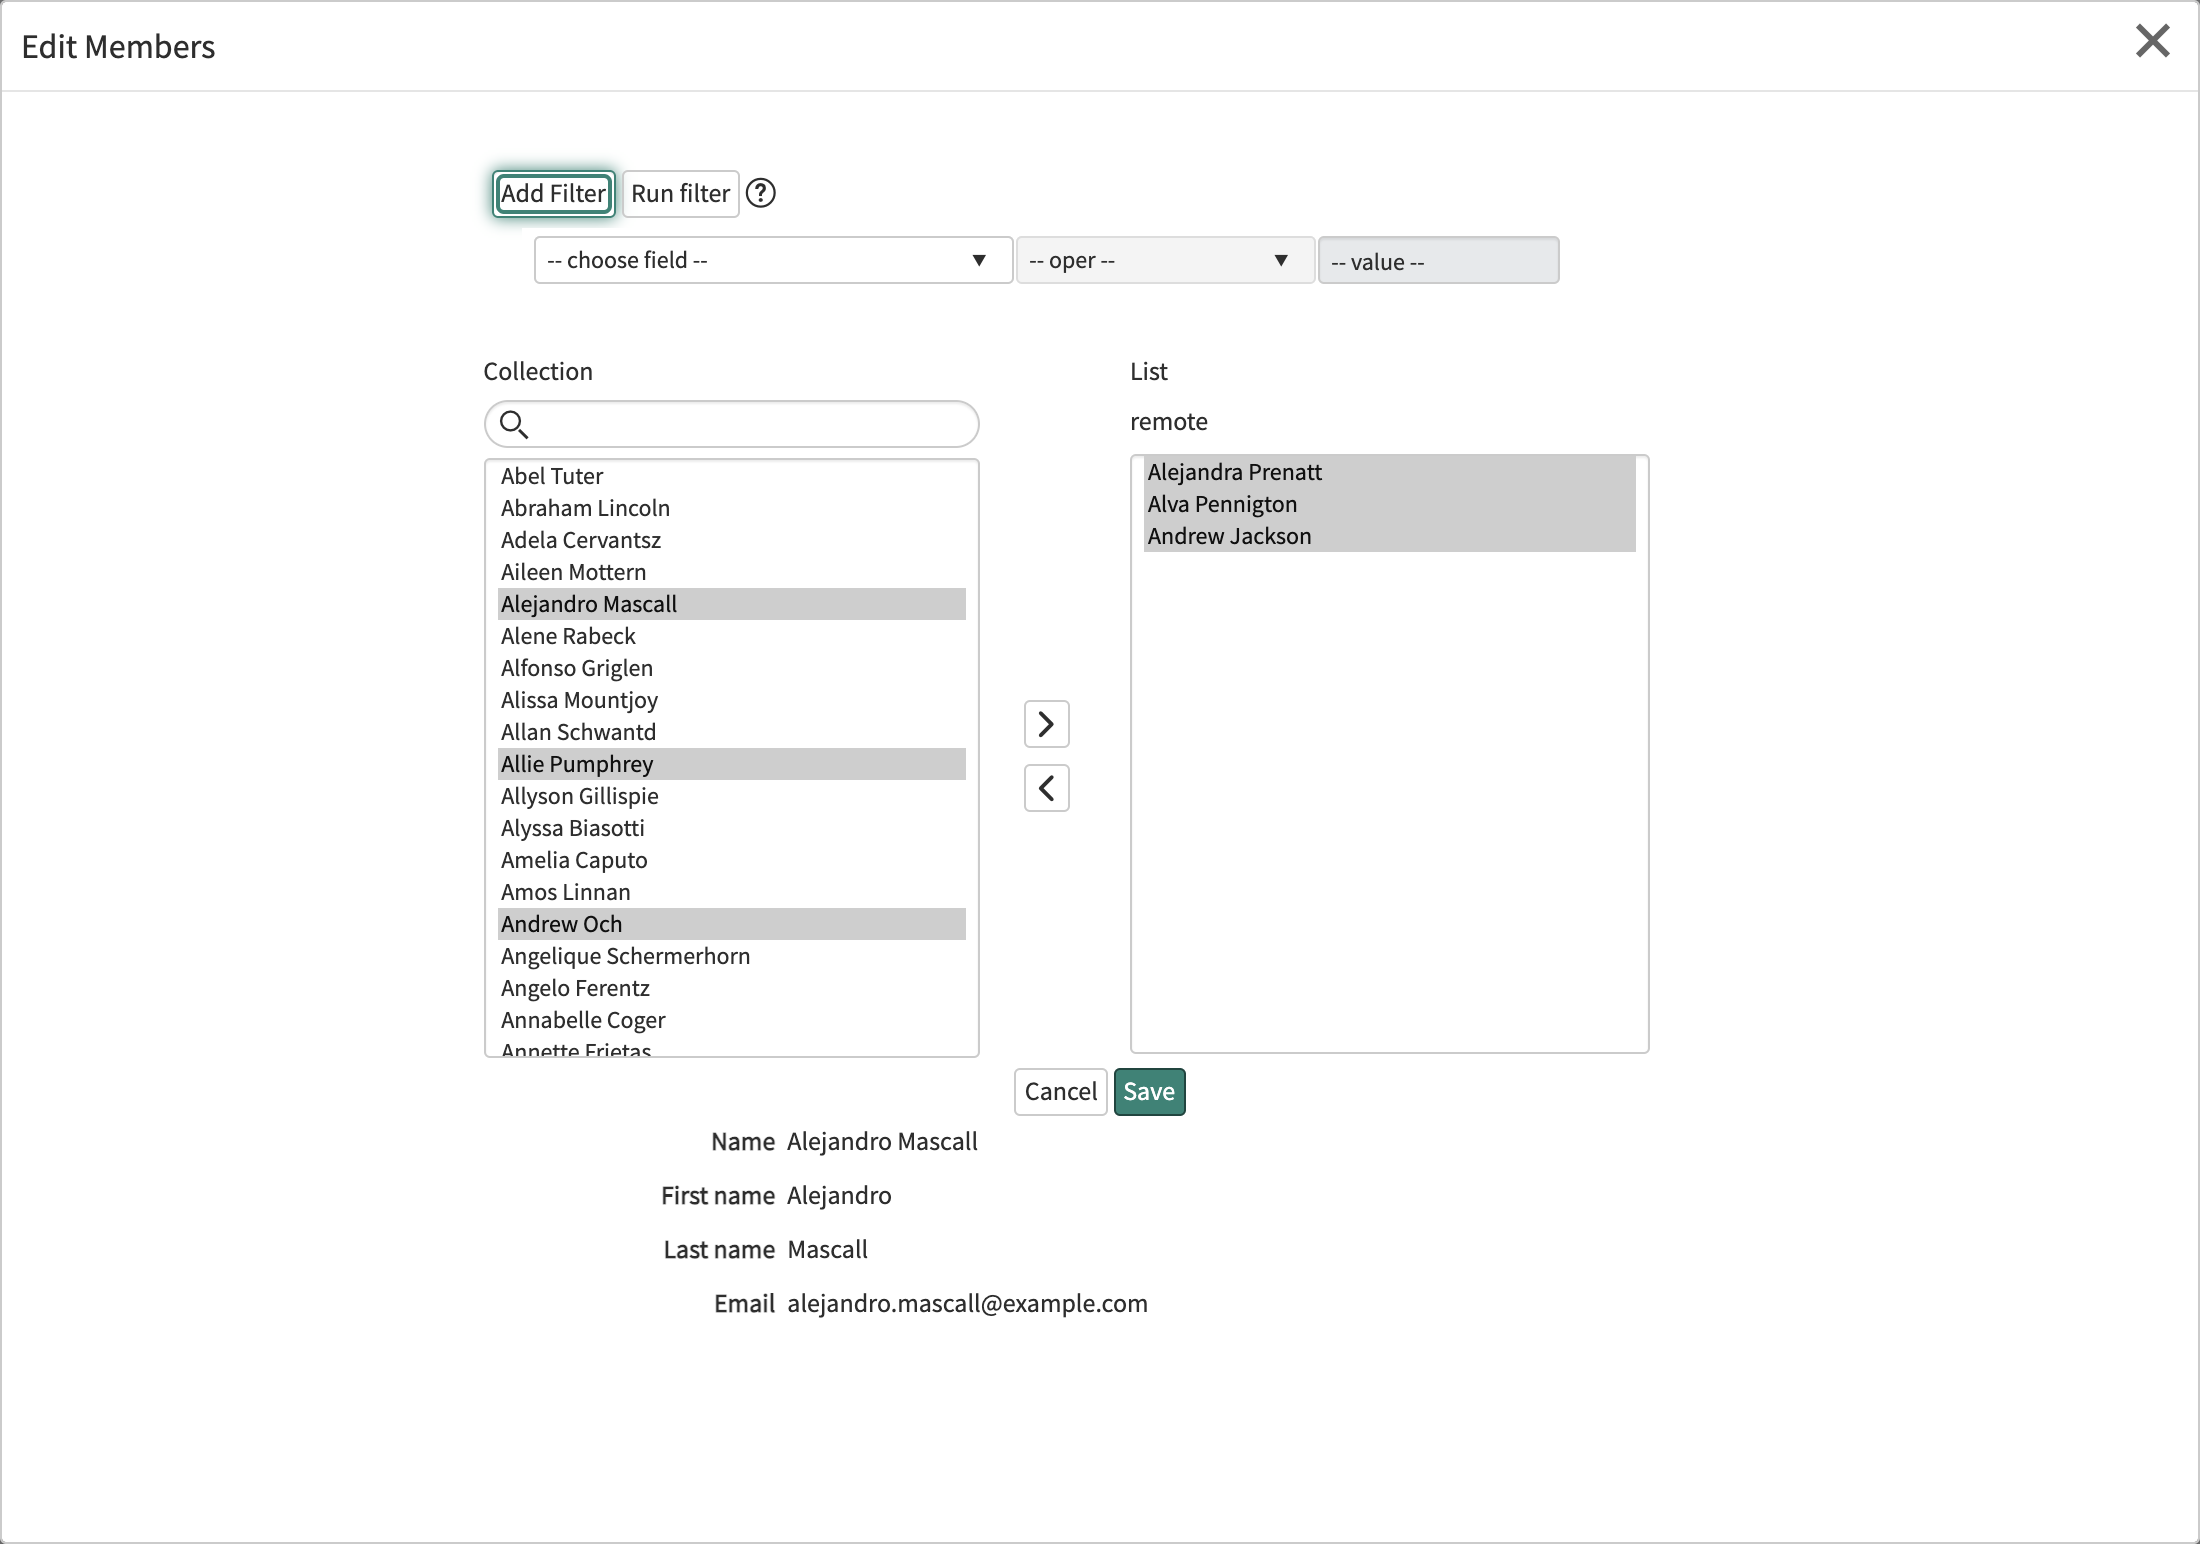
Once you are finished editing the field contents, you need to save the changes to the field by click on the small lock icon ![]() .
.
Group List - Target Audience
The "Group List" allows you to use the groups you have set up in your ServiceNow to be used for survey targeting. When you select a group to the target audience, all the users who belong to that group will be part of the target audience.
To select one or more groups for the target audience, first, click on the small lock icon ![]() which makes the contents of the field editable.
which makes the contents of the field editable.

Once the field is editable, then you can either select individual groups or add multiple groups at one go in a similar fashion as in the "User list" field.
Once you are finished editing the field contents, you need to save the changes to the field by click on the small lock icon ![]() .
.
Activate and save your survey
At this point, you can also set your survey as active by making the "Active" checkbox as checked.
To save your changes right-click on the grey banner area and select the "Save" option on the dropdown menu or by clicking the "Update" button on the right side of the grey banner area.
Once activated the system starts sending out the surveys to the target group. Note that the survey sending is spread out evenly across the selected frequency, so the whole target group will not receive the survey at one go. A portion of the surveys is sent out each day so that by the end of the survey frequency all users in the target will have received it.