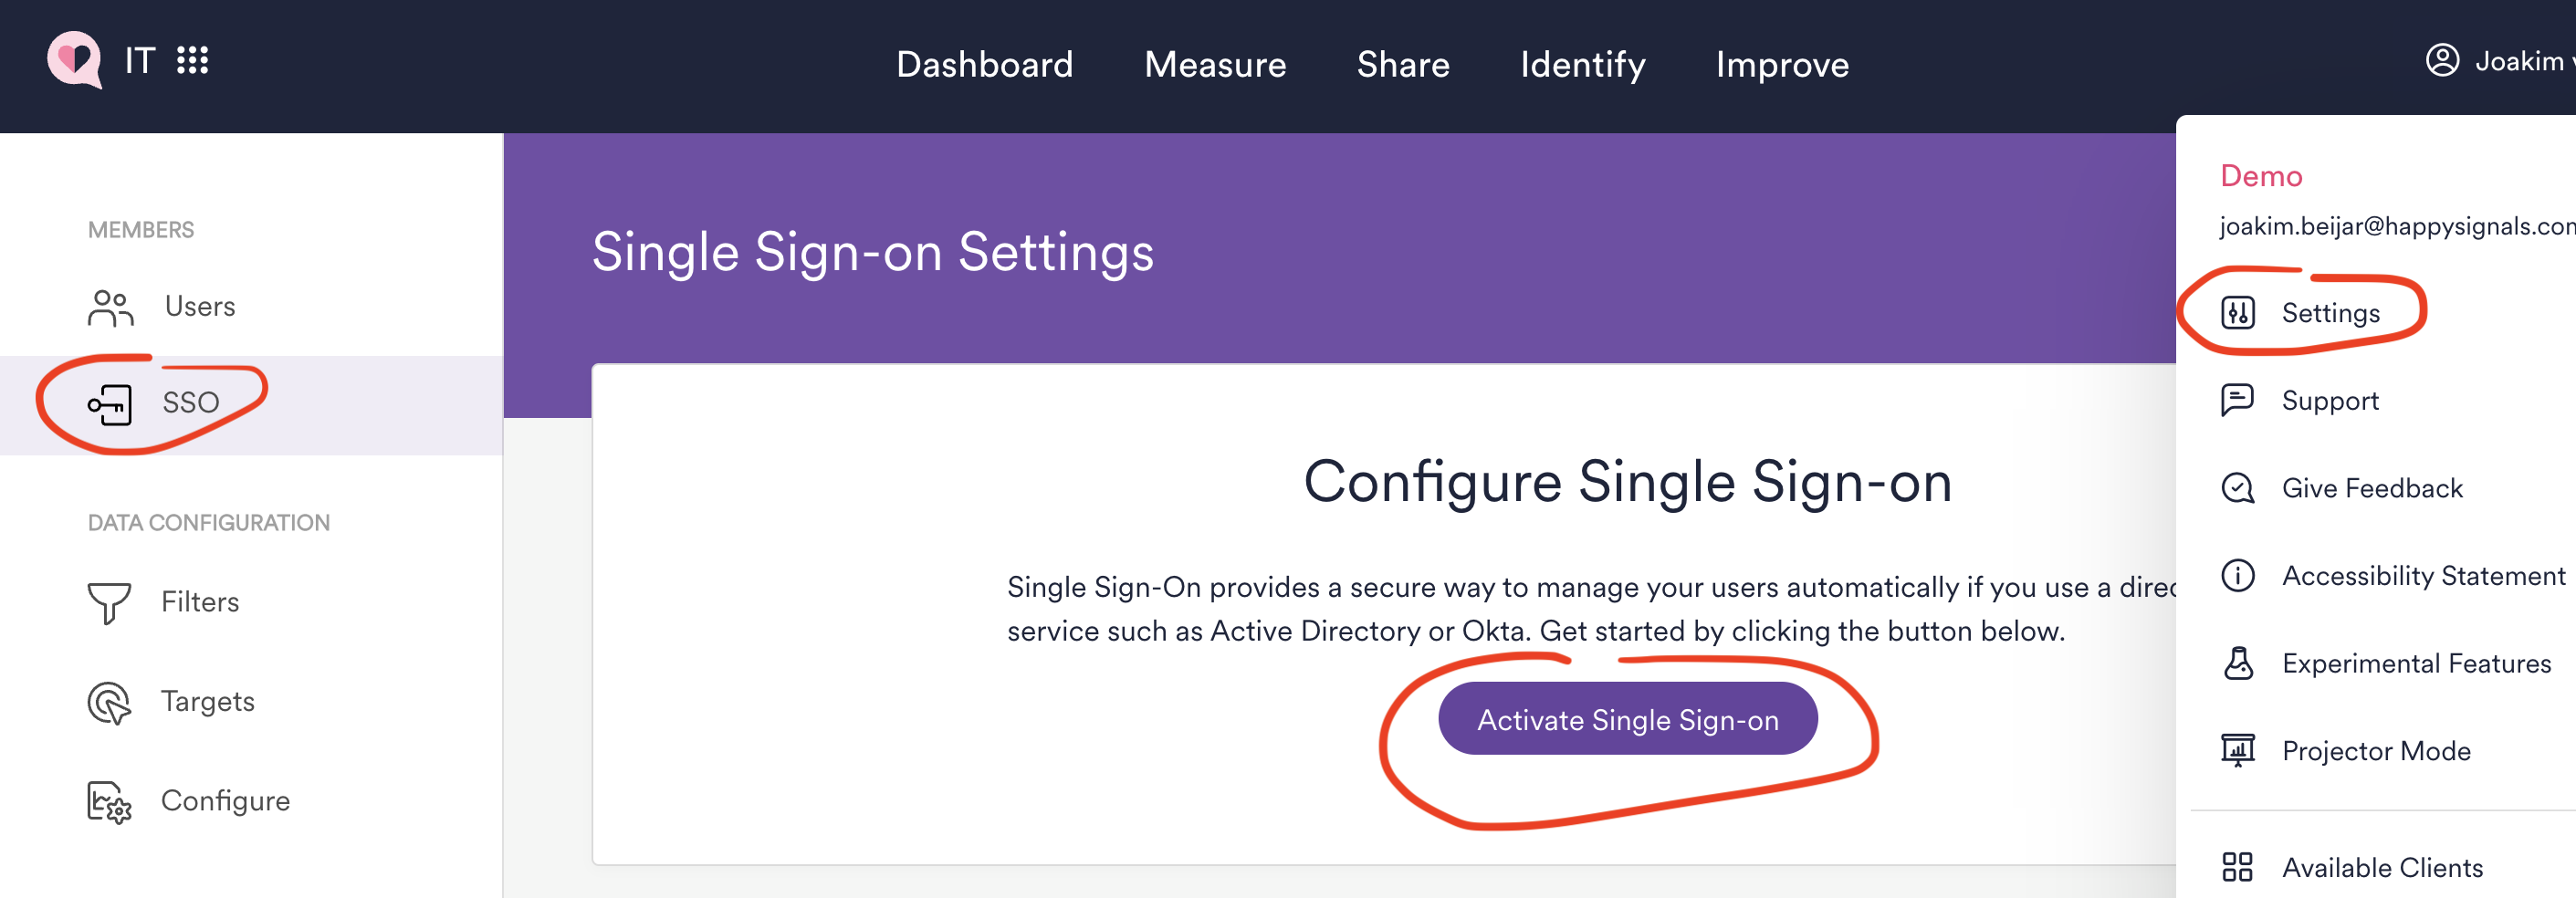
In your HappySignals instance go to Settings > SSO and click "Activate Single Sign-on".
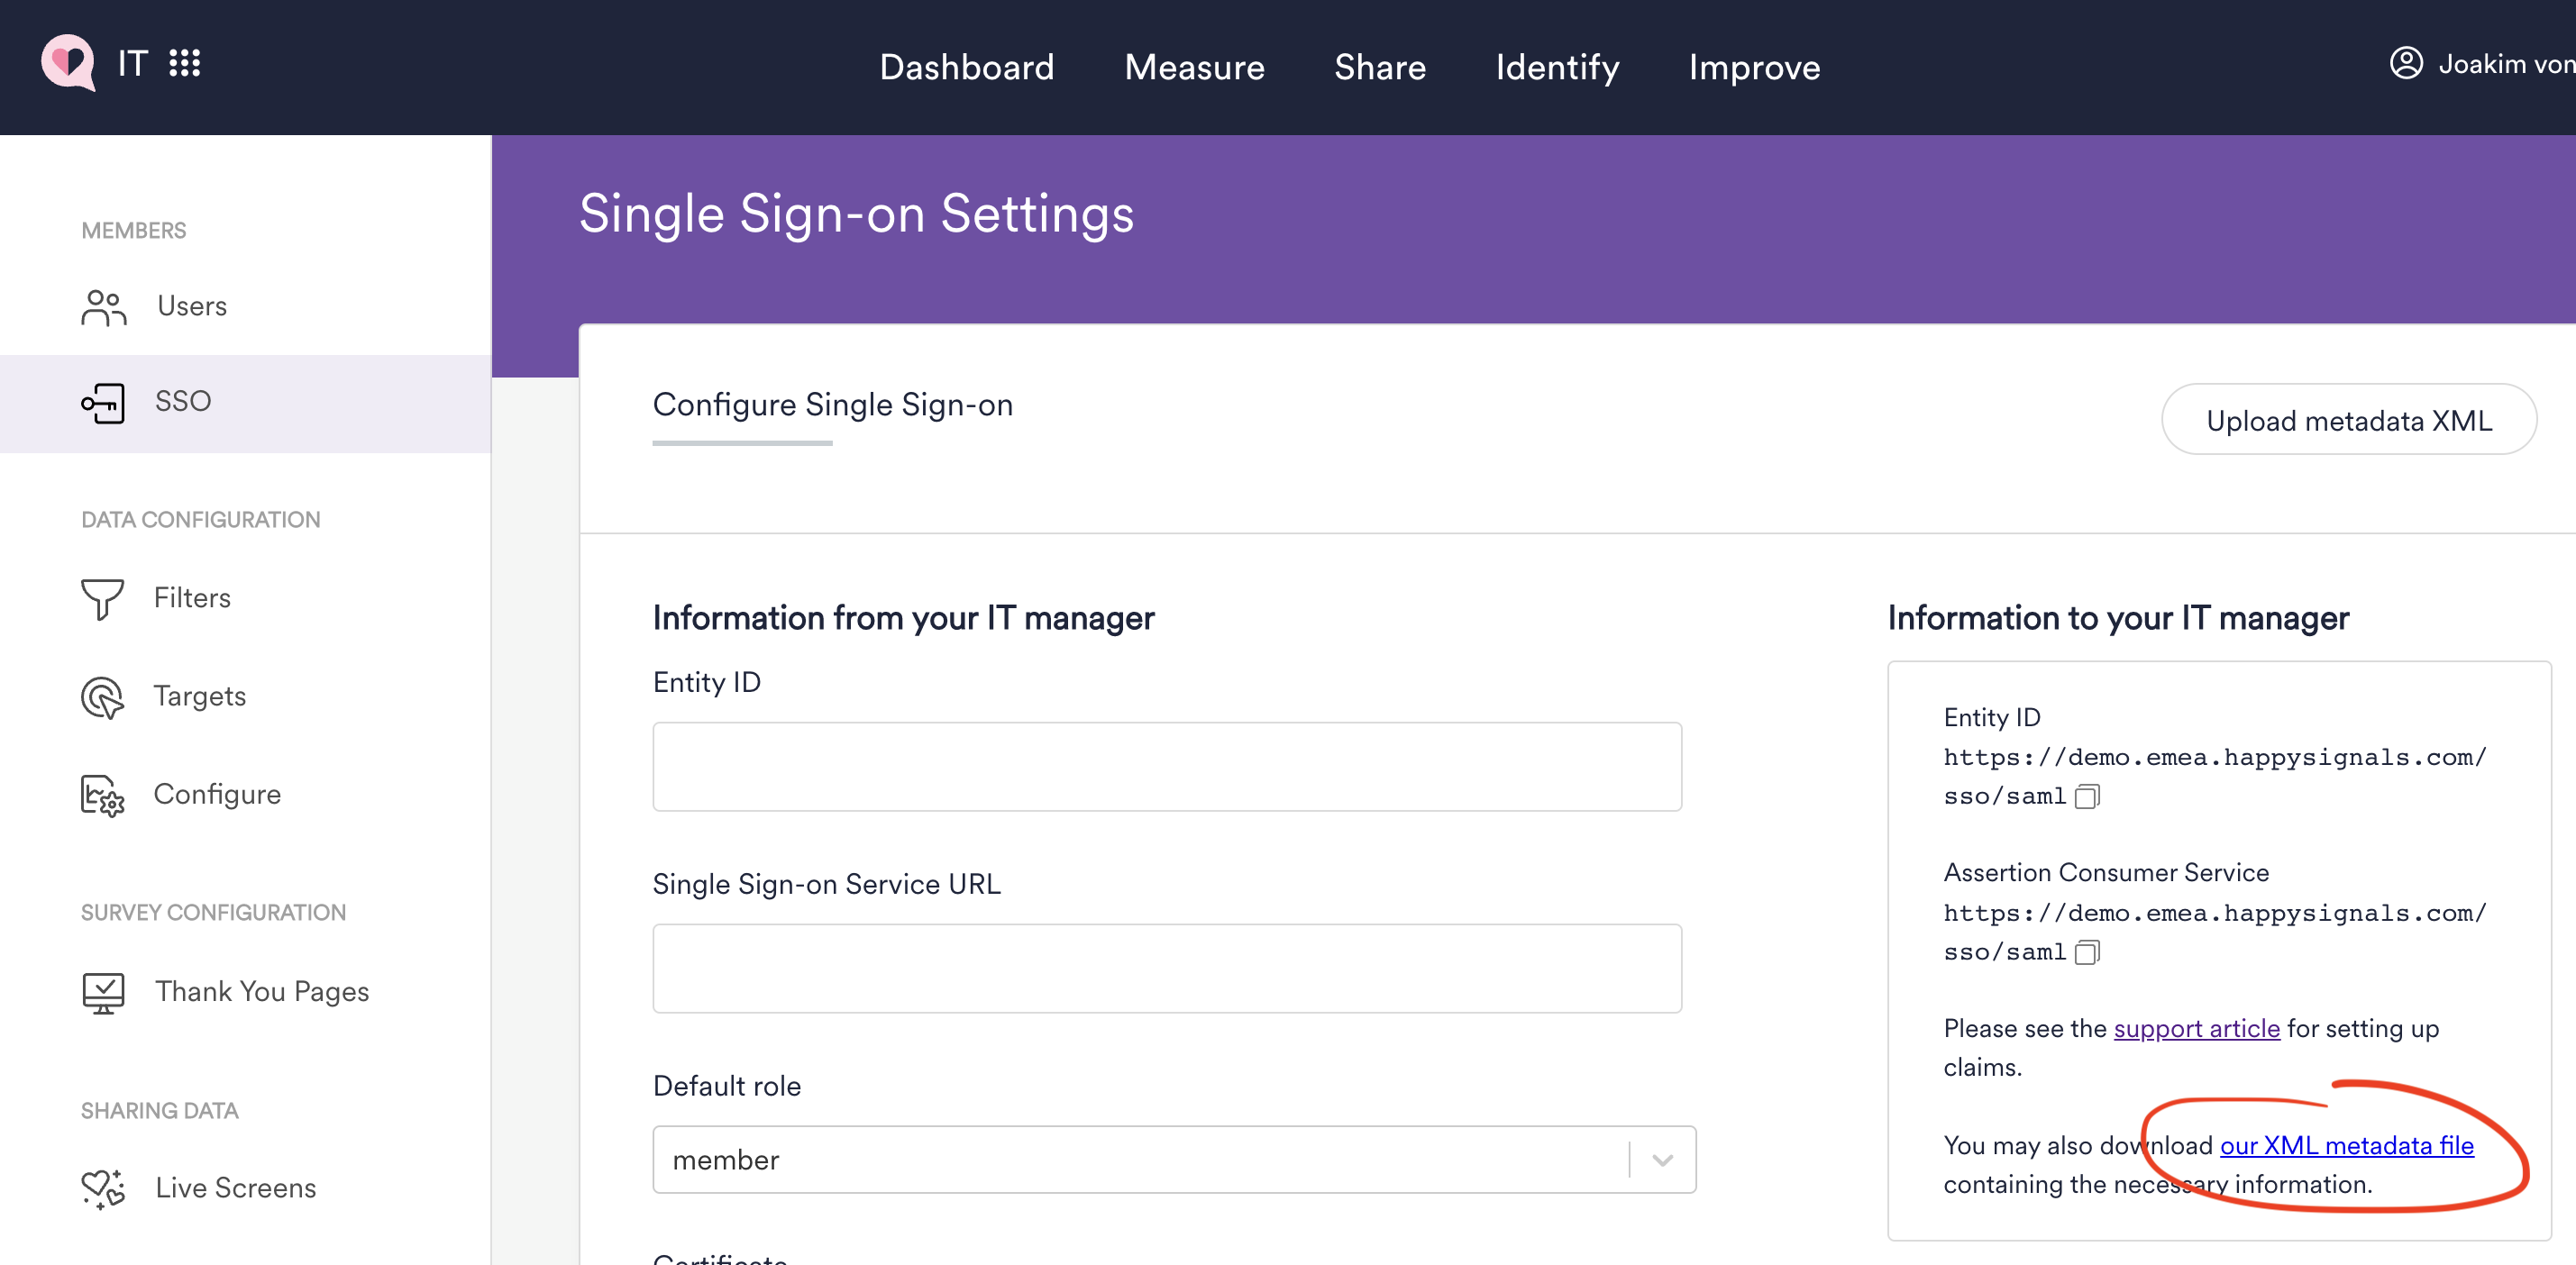
In the right hand side panel click the link to download an XML metadata file containing the configuration parameters needed to configure Azure AD.
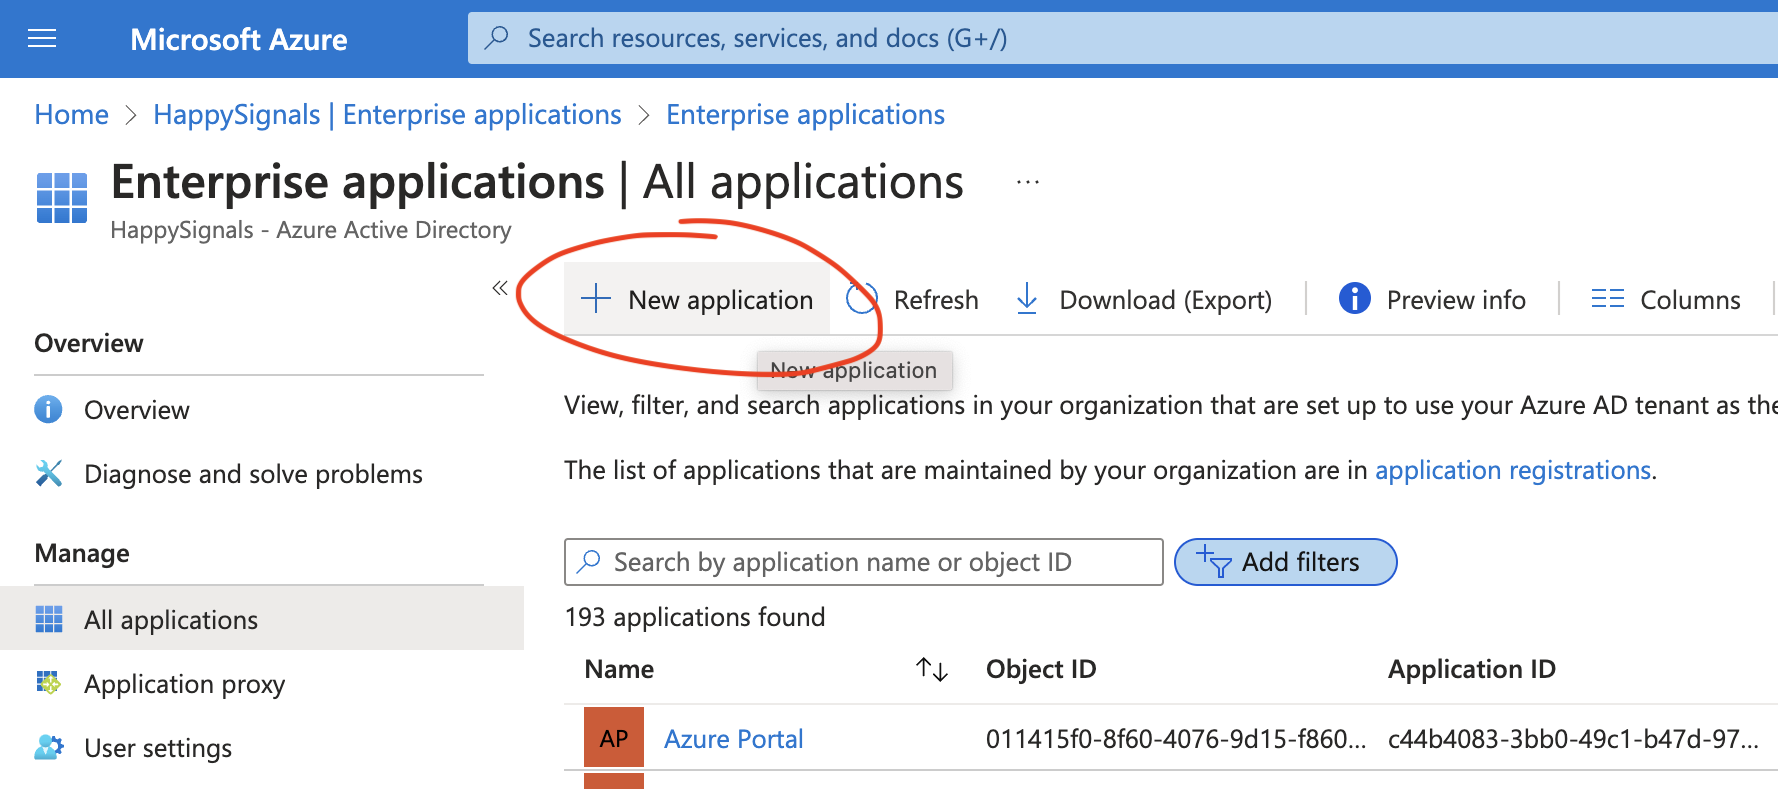
In the Azure portal search for "Enterprise Applications" in the search box, select "Enterprise Applications" to open the following "All applications" view. Click "New application" to add a new Application for HappySignals.
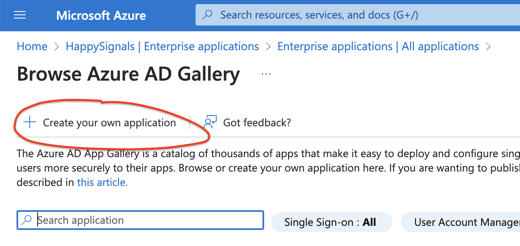
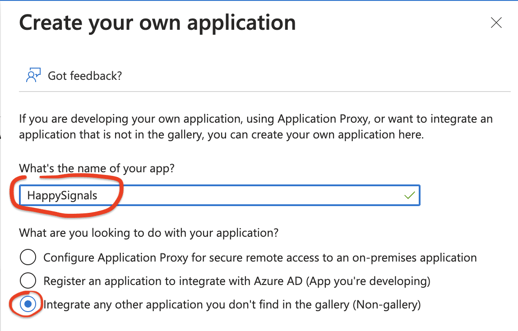
Click the "Create your own application" button in the toolbar to open a side panel for creating a new application.
In the panel, enter a name for the application eg. "HappySignals" and select the "Integrate any other application you don't find in the gallery (Non-gallery)" option. Finally click "Create" to create the application in Azure AD.
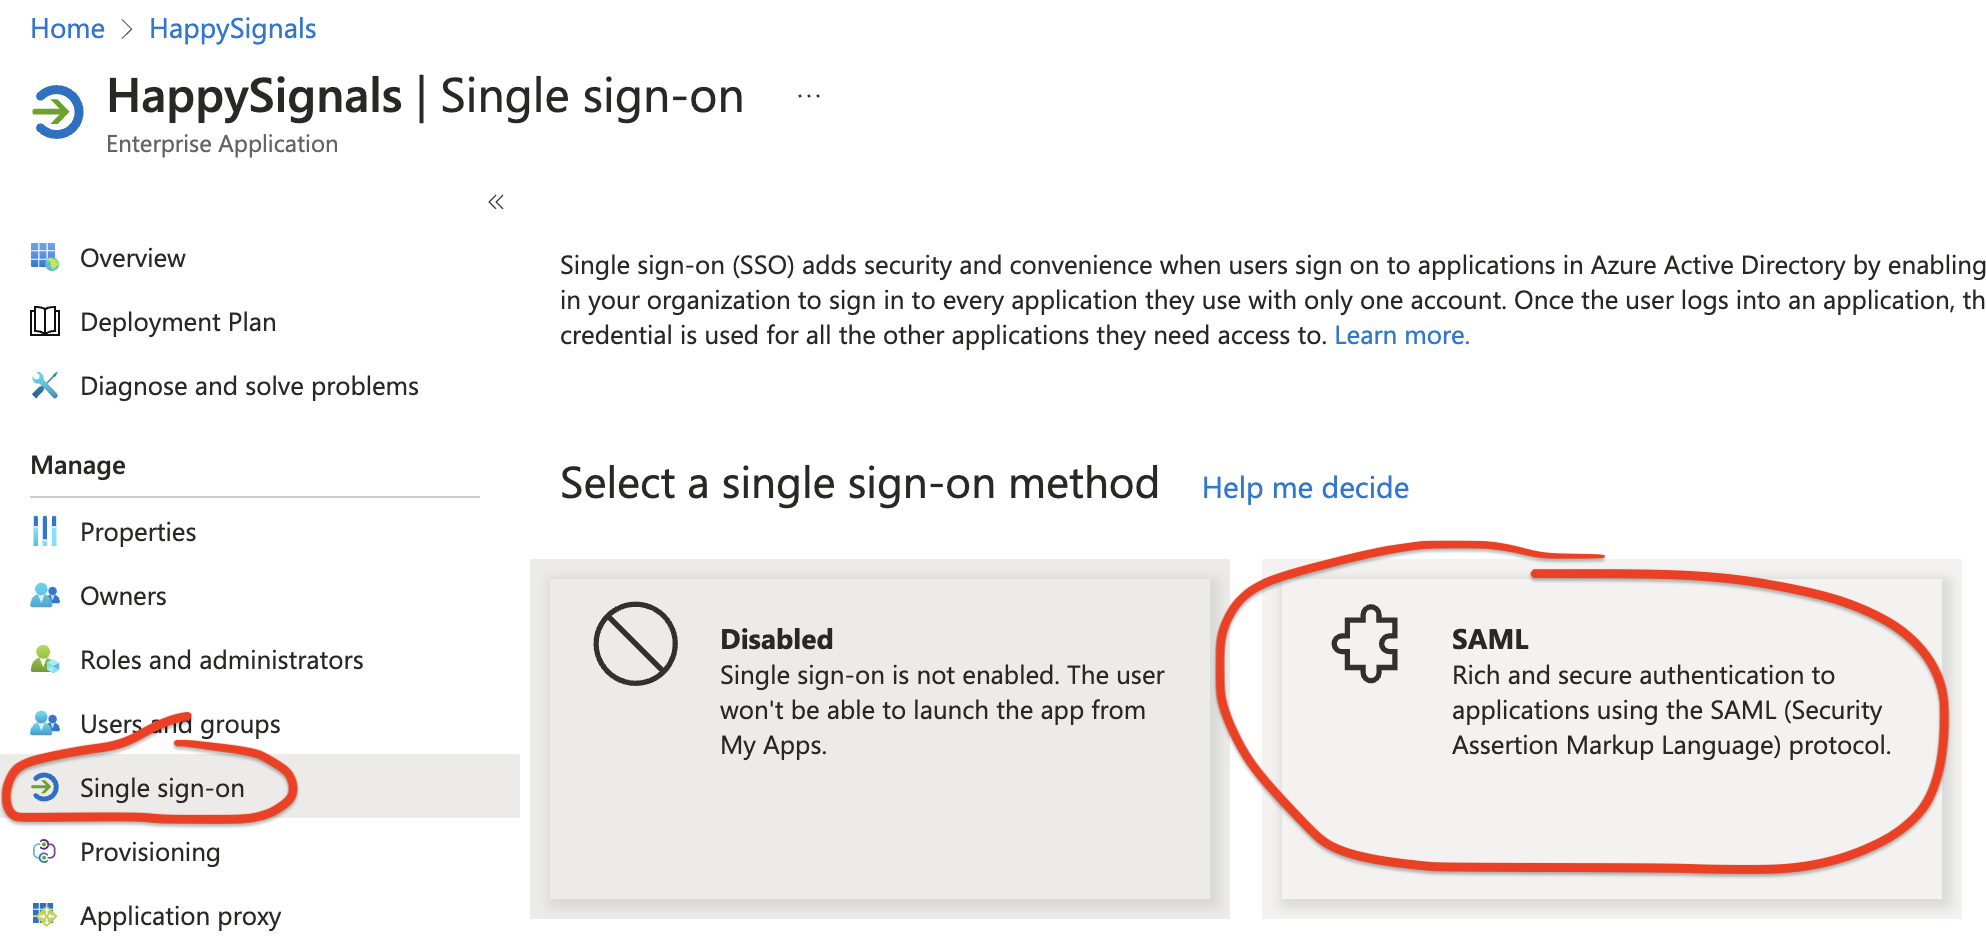
Once the application has been created, open the "Single sign-on" panel and choose SAML as the single sign-on method.
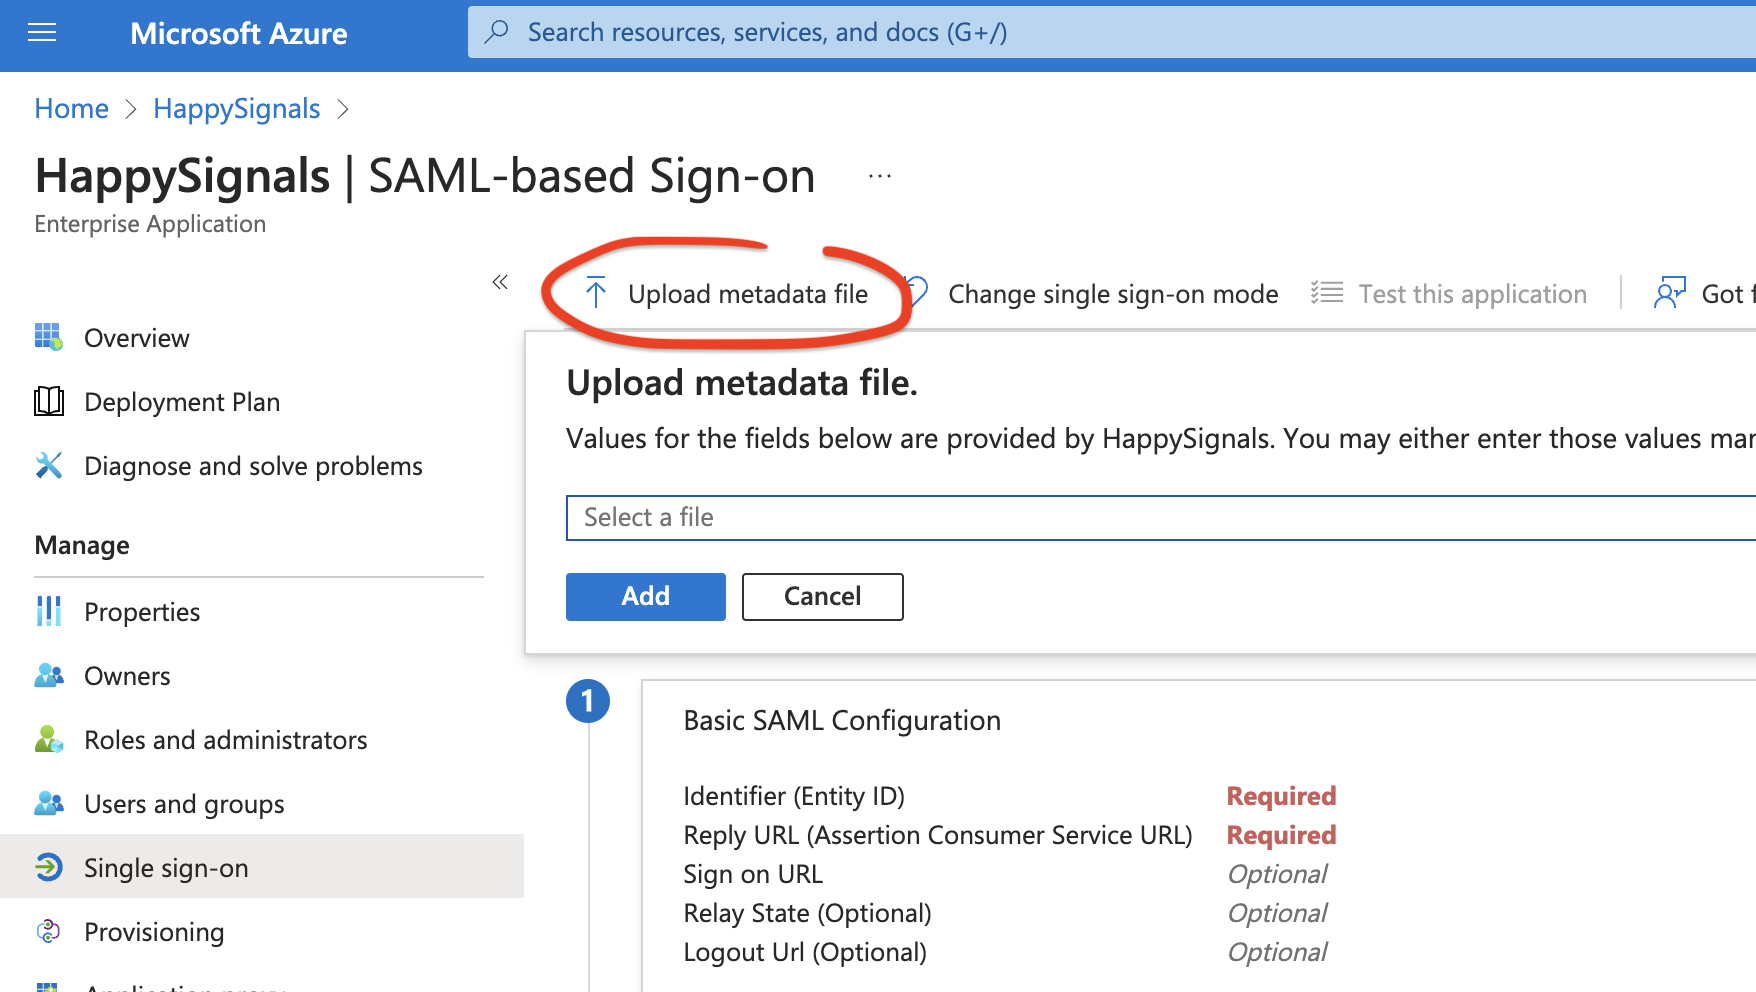
Click "Upload metadata file" and select the XML configuration file you previously downloaded from HappySignals and click "Add". Click "Save" to accept the pre-filled fields.
Scroll down to section 3 labeled "SAML Certificates" and click "Download" next to "Federation Metadata XML".
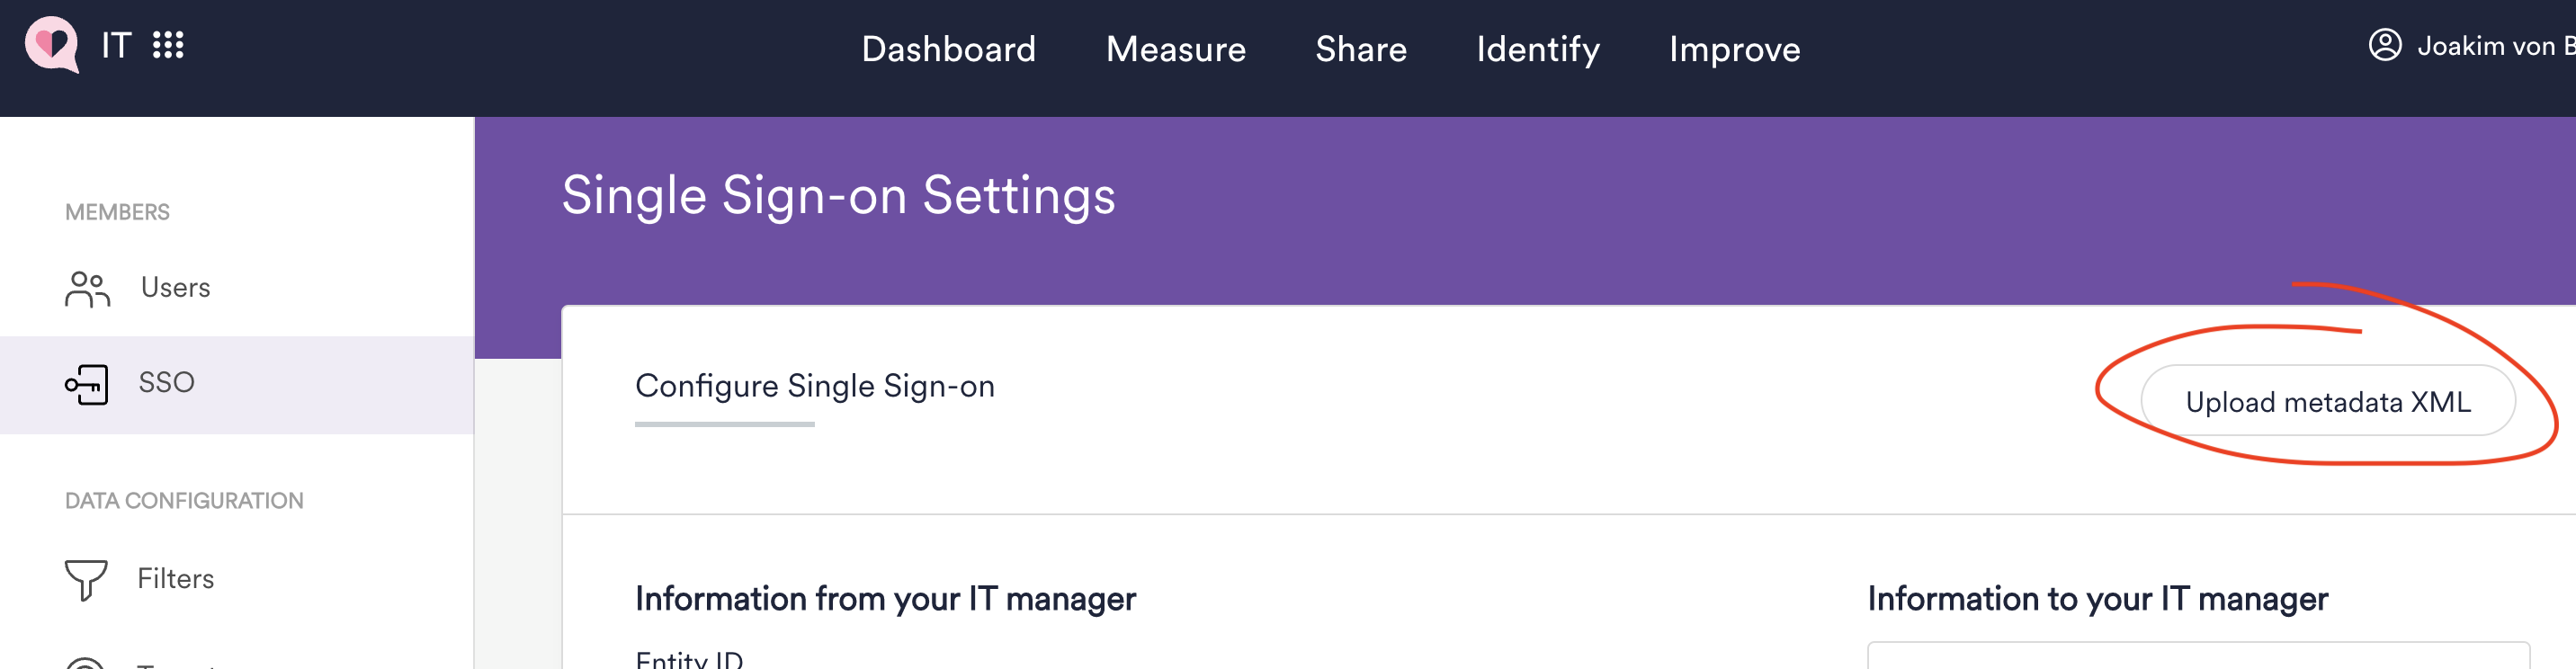
With this file, navigate back to SSO page in HappySignals settings and click the "Upload metadata XML" button in the top right corner. Upload the federation metadata XML file downloaded from the Azure AD portal. The required fields on the right will be filled out automatically based on the contents of the file. Click "Submit" to complete the configuration process.
Once you have assigned user or groups to the application in Azure AD you should be able to login to HappySignals using your Azure AD credentials via SAML based SSO.